VCF on VCD: 3b – Second VCF environment – Management Domain+WLD+Housekeeping
When I have a new purpose in my mind, I want to move forward. So after preparing the infrastructure, I moved ahead with deploying the Management Domain, the Workload Domain and some housekeeping tasks (like backups and certificates). Most of this I have already documented in earlier blogs, but this blog will mention some differences and also show the ultimate goal (in a nice picture).
The target environment is:
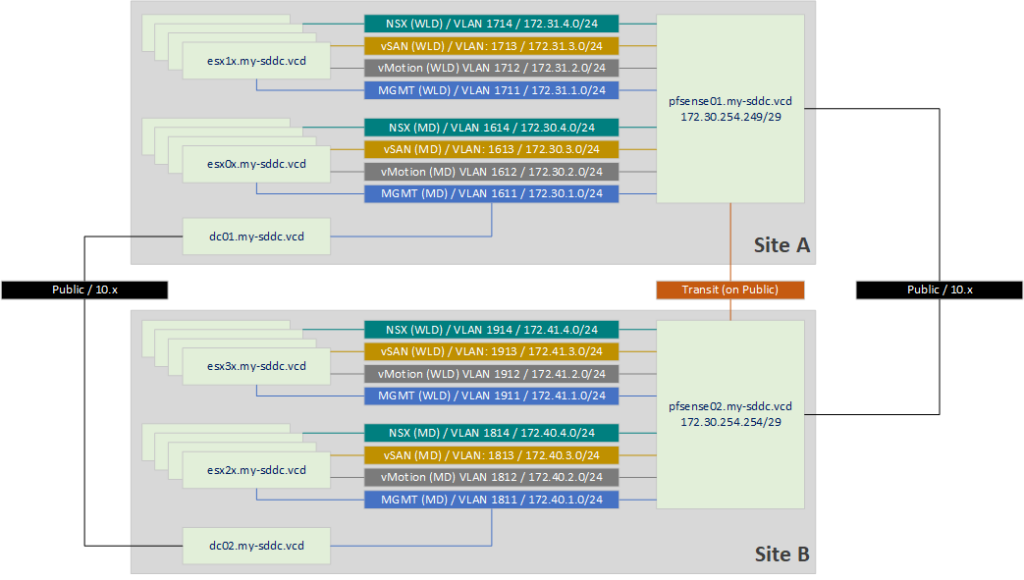
I changed the IP addresses and the VLAN’s of the components on Site-B and recreated the VLAN’s and interfaces on the pfSense on Site-A.
After this, I more or less followed the article I wrote earlier: https://my-sddc.net/creating-a-vcf-lab-on-top-of-vcd-part-1/, but with a few differences. I’ll focus on the differences and for the rest refer you to the previous article.
- Deploy the Cloud Builder appliance
- Update DNS with the new hosts and appliances
- Deploy the new hosts
- Fill the deployment parameter sheet
Deploy the Cloud Builder appliance
Deployed the appliance in the same way as previously. One thing to note, configuring the IP address on the device was not automatically done, so I used https://vmware.github.io/photon/assets/files/html/3.0/photon_admin/setting-a-static-ip-address.html to set the address.
Second thing is, change the DNS server in /etc/resolv.conf, to make sure name resolution is working.
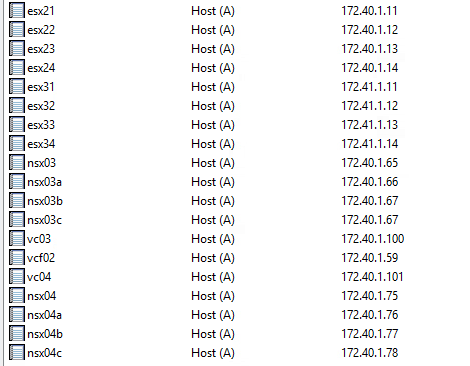
Update DNS with the new hosts and appliances
I put in the new addresses to the new hosts and appliances in DNS (and also prepared for the WLD that will be created later):
Deploy the new hosts
Deployed the new hosts in the same way I did previously, but I did change the configuration of the storage.
- Reset Configuration
- Change Password
- Change Network settings (VLAN, IP address, DNS settings)
- Change the VLAN for the “VM Network” portgroup
- Change TSM-SSH Service to automatically start
- Configure the host with the correct certificate
- Reboot host
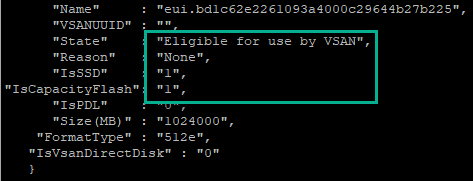
This time I only created the NVME drives (one of 100 GB and one of 1000 GB), and then, from within ESXi change the configuration of the NVME drives to set the correct values. On the Capacity disk set “IsCapacityFlash” settings to 1:
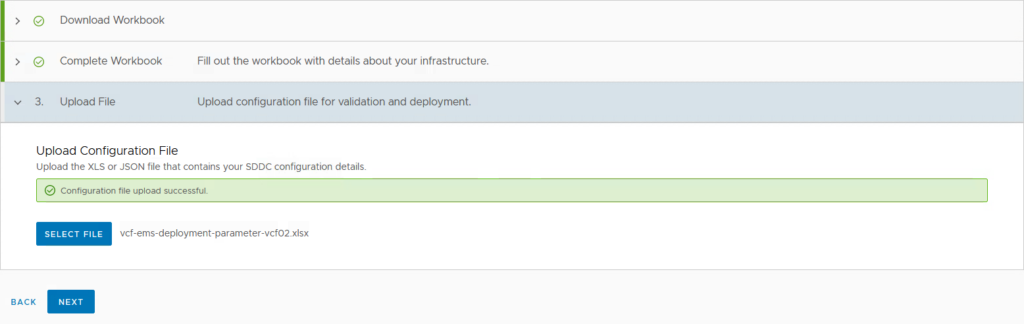
Fill the deployment parameter sheet
I used the same deployment parameter sheet and adjusted it, to reflect the new names, IP Addresses and VLAN ID’s.
Deploy SDDC
With this parameter sheet, we are going to deploy the SDDC.
During this process, I had to help it along a little bit, like I had to when deploying the first SDDC. So that means:
- Manually adjusting parts of the vDS configuration
- Manually removing the standard switch on one of the hosts (the task was hanging)
- Pausing the Cloud Builder appliance, during NSX bring-up (after the NSX Managers have been deployed and until they are functional).
And after only about 4 hours (which, for a nested environment, I find pretty quick), I had deployed the Management Domain:

Next up, the WLD, same stuff as for the Management Domain, mostly the same activities as I performed in previous articles:
https://my-sddc.net/creating-a-vcf-lab-on-top-of-vcd-part-2-workload-domain/
https://my-sddc.net/creating-a-vcf-lab-on-top-of-vcd-part-2a-certificates/ and
https://my-sddc.net/creating-a-vcf-lab-on-top-of-vcd-part-2b-back-ups/
Host Preperation
- Create 4 new hosts (based on an existing host that was not yet used)
- Add disks to the hosts (I have added the disks to the source host, so only had to do this once)
- Reset configuration –> Only a restore/reset of the network configuration is not enough (the uuid needs to be recreated, otherwise vSAN will not converge)
- Change Password
- Change Network settings (VLAN, IP address, DNS settings)
- Change the VLAN for the “VM Network” portgroup
- Configure NTP
- Change TSM-SSH Service to automatically start
- Configure the host with the correct certificate
- Change tagging on capacity disk
- Reboot host
Create Network Pool
Create a Network Pool, to use for commissioning hosts (described in https://my-sddc.net/creating-a-vcf-lab-on-top-of-vcd-part-2-workload-domain/)
Host Commissioning
Commission hosts (described in https://my-sddc.net/creating-a-vcf-lab-on-top-of-vcd-part-2-workload-domain/)
Create Workload Domain
(described in https://my-sddc.net/creating-a-vcf-lab-on-top-of-vcd-part-2-workload-domain/)
and after all this, it finishes succesfully (with some help during both the VDS configuration and the NSX Manager convergence).

Then the last steps in the process: Housekeeping.
- Certificates
- Backup
As also described in:
https://my-sddc.net/creating-a-vcf-lab-on-top-of-vcd-part-2a-certificates/ and
https://my-sddc.net/creating-a-vcf-lab-on-top-of-vcd-part-2b-back-ups/
During this process I had an idea (a little too late to incorporate here), to also create a third VCF environment, but give it the ability to stretch, all on VCD… So that will likely be part 4 of the series.