VCF on VCD: 2 – Workload Domain
I created the Management Domain environment, on top of VCD (described in the previous blog) and now I will add a Workload Domain to the environment and after that, add an additional host to the cluster.
When creating the Management Domain I already prepared a little bit for the Workload Domain. I added one extra host (empty) to the environment and that will be my basis for the new WLD. The first WLD I will create will consist of four hosts and will be placed in the environment like so:
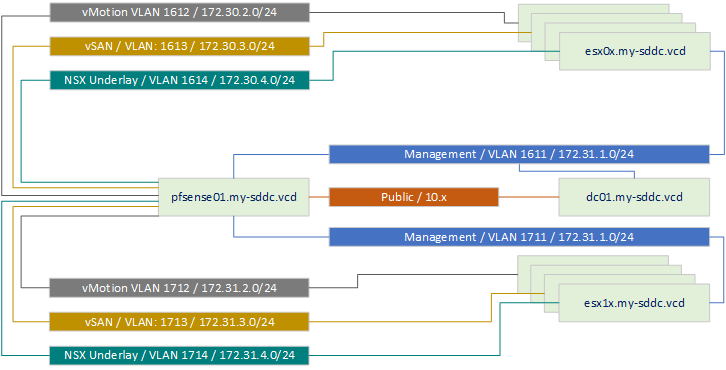
So a new set of VLAN’s for the new hosts, routed by the pfSense router to the rest of the network, including the management VLAN where the DNS and NTP server is active.
For this to work we need to create the right interfaces on the pfSense (which I will not cover in this blog, if you want to know how, there are plenty blogs available that describe how to create VLAN-interfaces on pfSense). Suffice it so say that the interfaces are created and the routing is functional (and no firewall rules are blocking traffic).
Now we can create our four hosts. I use the available host and create four additional copies of it. I will retry with the storage configuration I ultimately want to use:
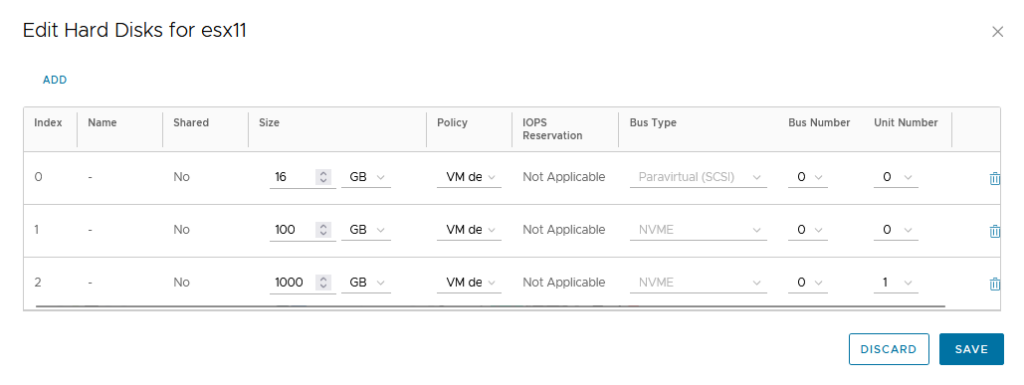
So one 100 GB NVME for cache and a 1000 GB NVME for capacity. Networking is the same as the other hosts:

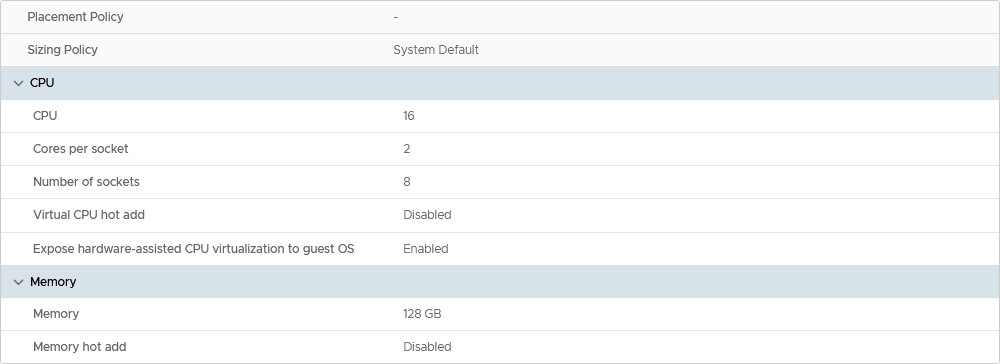
and compute is also the same as the other hosts:
After deployment and powering on, the first action is to Reset the System Configuration:

And after a reboot, we do the following activities on the hosts:
- Reconfigure password
- Reconfigure the management network (don’t connect two vmnics to the Standard Switch).
- Add the host records into DNS (forward and reverse)
- Change the NTP configuration.
Then we need to change the certificate of the host, like we did on the hosts in the Management Domain. So we run the command:
/sbin/generate-certificates
and reboot the host. After that, the certificate has changed to reflect the (new) name of the host. If you don’t do that, you will get an error when trying to commission the host:

“Unable to get the Host Fingerprint, verify ESXi host connectivity or credentials or SSH access.”
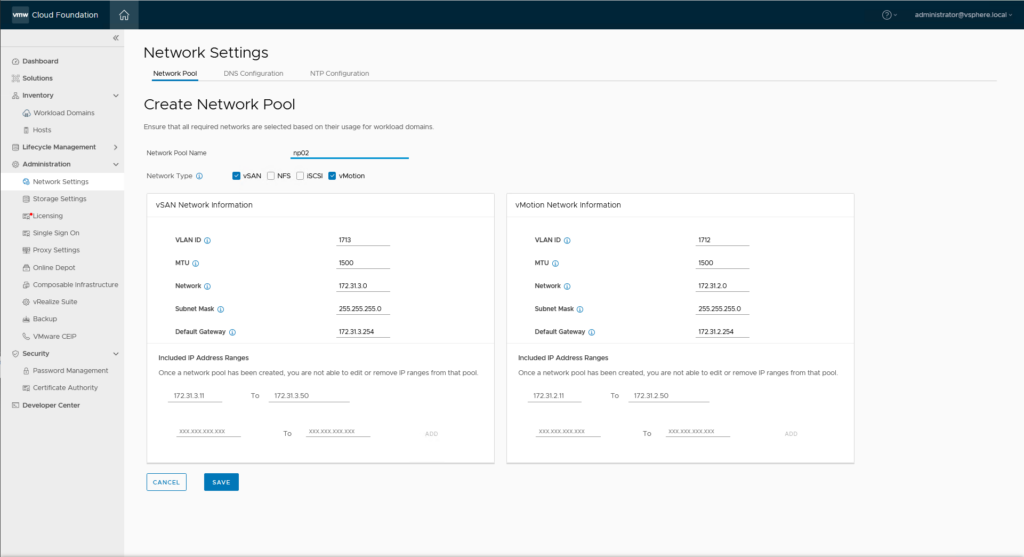
After all the hosts have been configured, the configuration within the SDDC Manager can commence. First, we have to create a Network Pool:
In this lab I will be using vSAN as primary storage and have thus created a network pool containing both vMotion and vSAN networks:
Other activities to perform:
- Add the name of the vCenter Server to DNS (forward and reverse)
- Add the names of the NSX appliances (and VIP) to DNS (forward and reverse)
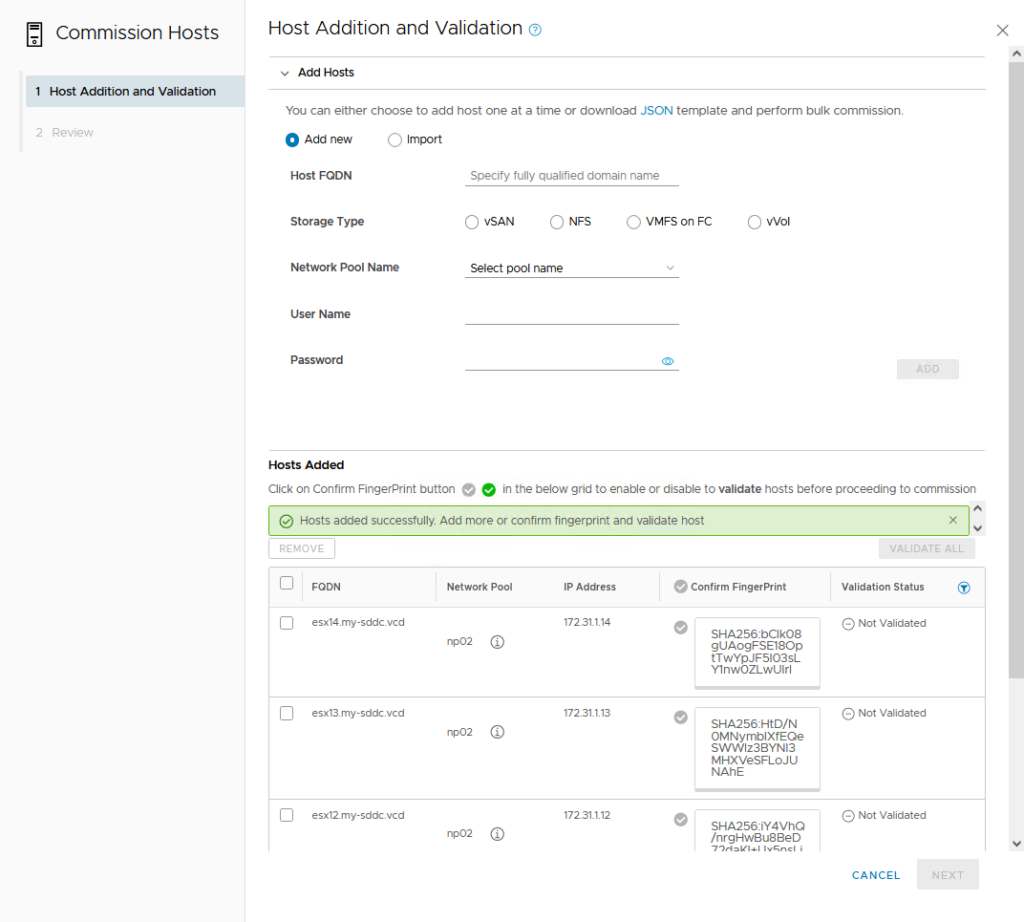
Then it is time to commission the four hosts that are available. First check to see if we have met all the requirements:

and click “Proceed”.
Note that in the list it says: “Host has a standard switch with two NIC ports with a minimum 10 Gbps speed.” However, when you connect a second NIC to the standard switch, the Validation of the host will fail.
Then we commission all the hosts in one go:
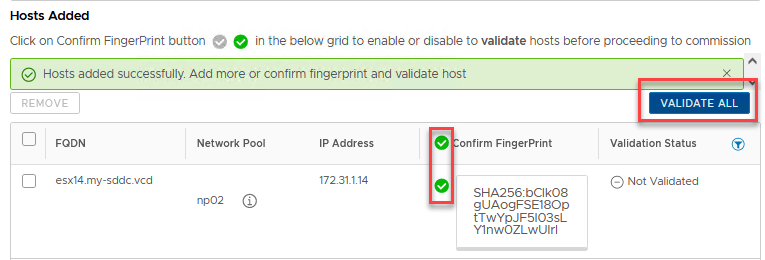
Confirm the FingerPrint and Validate all hosts:
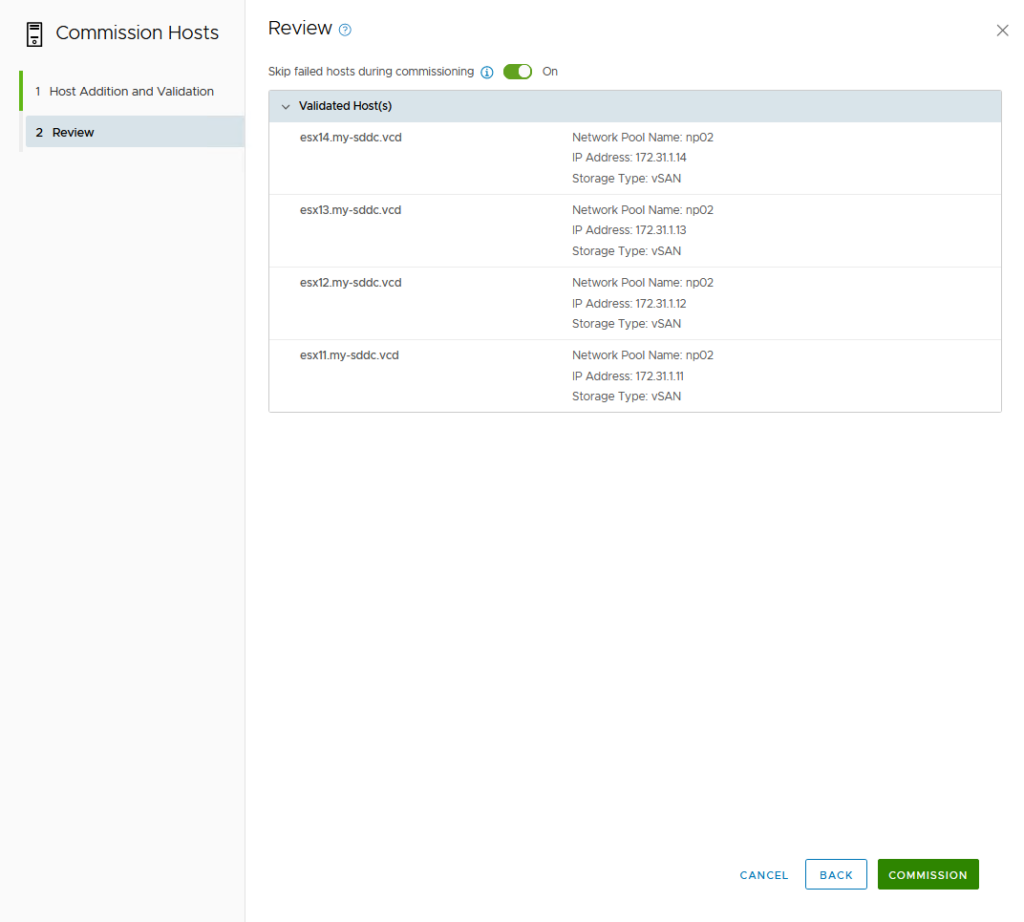
After validation has completed succesfully, we can click Next and at the next page click Commission:
When the commissioning has been completed, we will find the hosts in the “Unassigned Hosts” list:
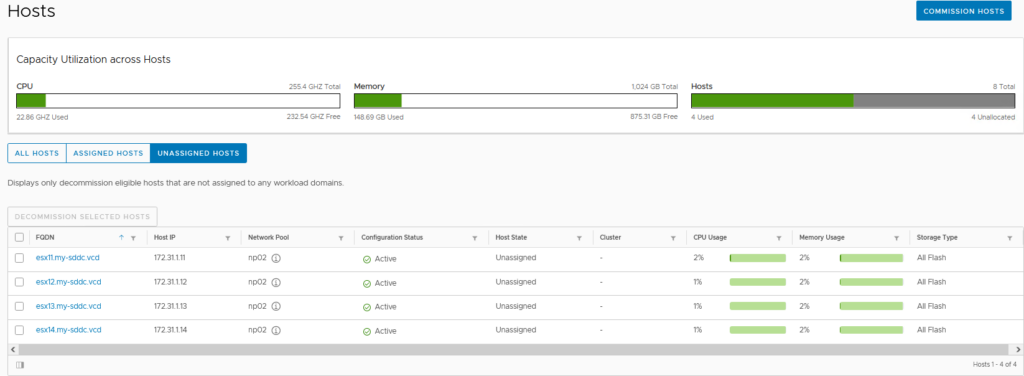
And then we can start creating our Workload Domain.
Then moving through the screens (I won’t put screenshots of all the screens here, it’s kind of overkill, without additional value). Just the information I used in the deployment and the screens where I find it adds value to put in here:
- Select vSAN
- Name: WLD01
- Organization: MySDDC
- Cluster Name: WLD01-CL01
- vCenter FQDN: vc02.my-sddc.vcd (172.30.1.101)
- NSX Appliance 1: nsx02a.my-sddc.vcd (172.30.1.76)
- NSX Appliance 2: nsx02b.my-sddc.vcd (172.30.1.77)
- NSX Appliance 3: nsx02c.my-sddc.vcd (172.30.1.78)
- NSX VIP: nsx02.my-sddc.vcd (172.30.1.75)
- Overlay Networking:
- VLAN ID: 1714
- IP Allocation: Static IP Pool
- Create New Static IP Pool
- Pool Name: wld01-tep01
- vSAN Parameters:
- Failures to Tolerate: 1
- vSAN Deduplication and Compression: Disabled
- Host Selection:
- esx11.my-sddc.vcd
- esx12.my-sddc.vcd
- esx13.my-sddc.vcd
- (the esx14 will be added later, as part of another blog).
- Licenses selected
- Object Names: Auto Filled
And after all is filled out, we get the final screen:
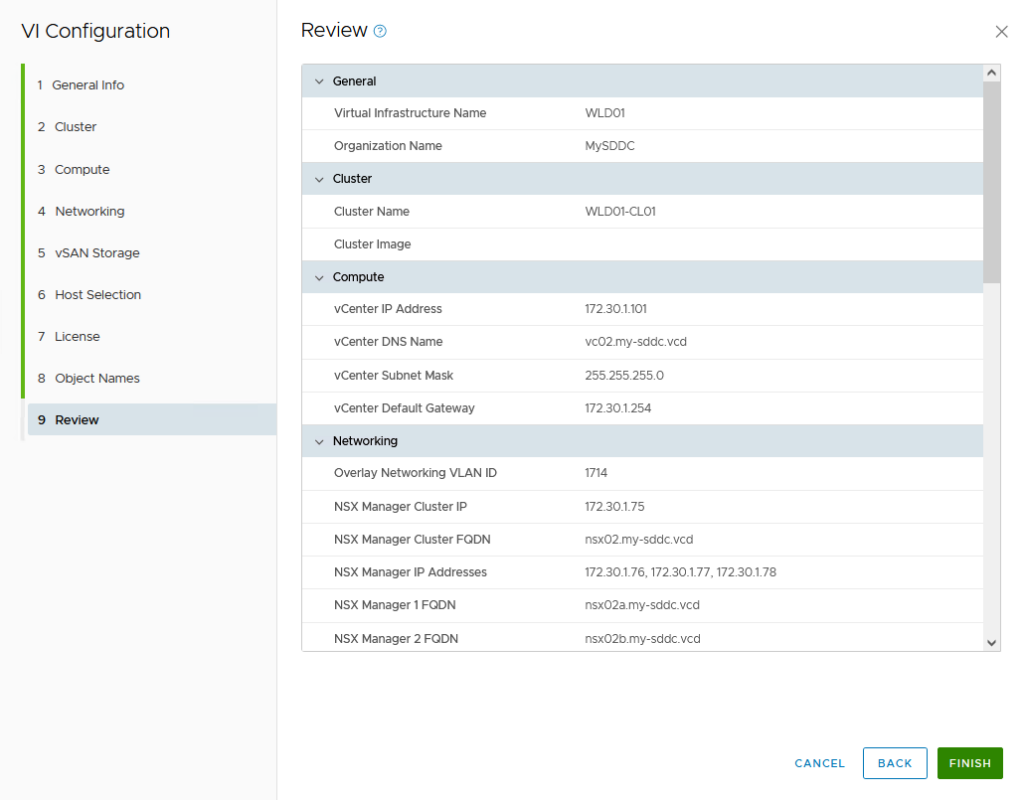
And we can click “Finish” to start the actual deployment. Just a heads up, this doesn’t go through fully automatically. I ran into quite a few issues that needs addressing:
- No Capacity disk for vSAN
- Distributed Switch Host configuration
- Create Disk Group failure
- Deploying NSX Managers
No Capacity disk for vSAN
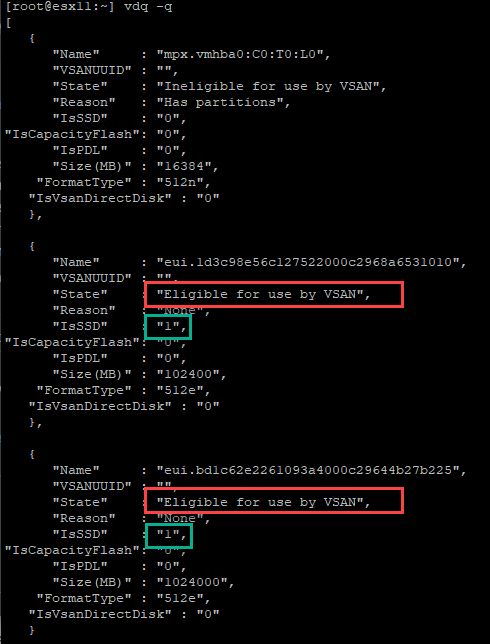
First error I ran into was (a little bit expected) the Capacity disk for vSAN. So the configuration of two NVME’s (size 100 GB and 1000GB) is not something that SDDC Manager can work with.

This time I dug a little deeper into the underlying problem “no eligible capacity disk found”, instead of adding “other” disks and later on correcting the datastore, I searched for some references to this issue and found: https://communities.vmware.com/t5/VMware-Cloud-Foundation/VCF-4-0-HostPreparationException-No-eligible-cache-disks-found/td-p/1856406. This showed me that it is not just the “IsSSD” variable, but that the “Is CapacityFlash” variable should be 1 for the largest NVME device:
This is easily set through:
esxcli vsan storage tag add -d eui.bd1c62e2261093a4000c29644b27b225 -t capacityFlash
and after that:

everything is happy to proceed (and of course, do it on all the hosts).
Distributed Switch Host configuration
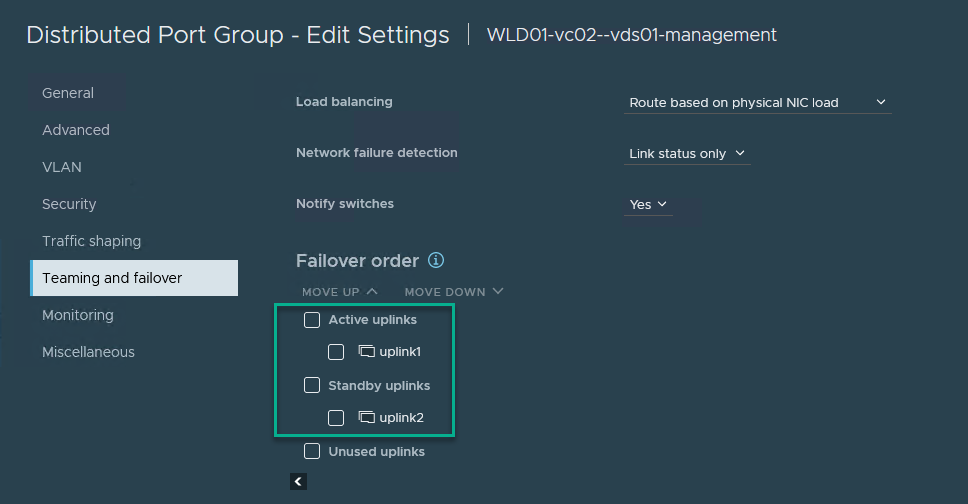
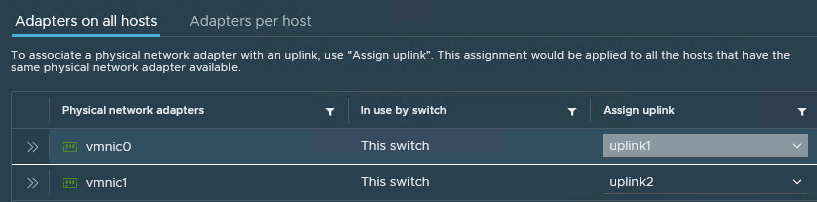
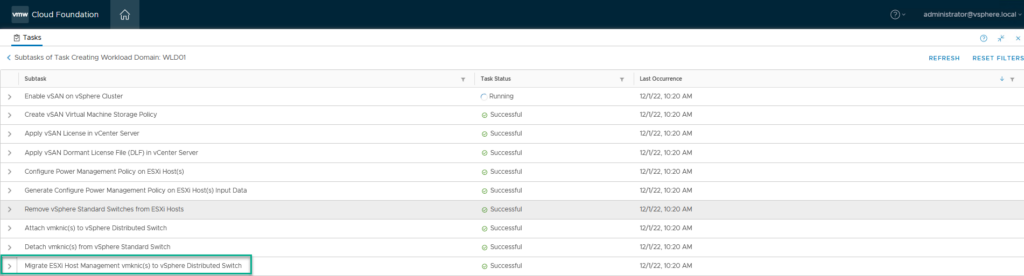
Next thing that went wrong (as it did with the management domain) was the nic-assigment. It is necessary to:
- Change the port group assignment of the Management Distributed Portgroup to use uplink1 as the active uplink and uplink2 as the standby uplink:
- (manually) add the vmnic0 to the uplink1 port of the Distributed Switch
- And (at the same time) migrate the vmk0 to the correct Distributed Portgroup:
But, in order to do this, while the task keeps failing, I suspended the SDDC Manager and waited for the last task to fail before doing this. After that was done, I resumed the SDDC Manager and it went to the next stages:
Create Disk Group failure
Next problem I ran into:

is described in KB article https://kb.vmware.com/s/article/52586. It is necessary to create the “/store.capacityflash.json” file, like so:

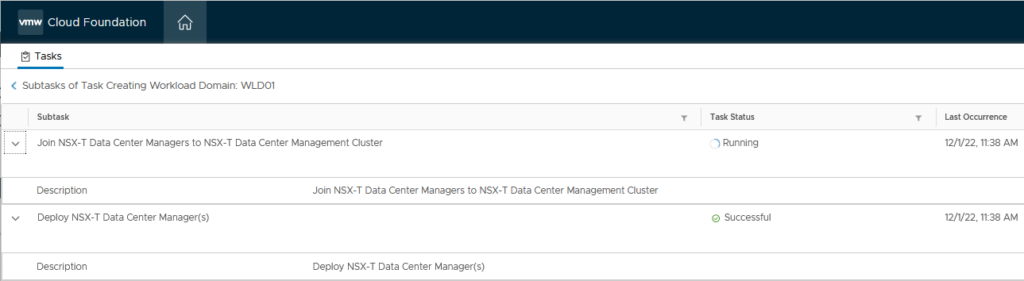
Deploying NSX Managers
After that, it moves on, again, until I hit the expected failure of deploying the NSX Managers. This can be easily addressed by suspending the SDDC Manager for a couple of minutes (I gave it 10) and once the NSX Managers are available to log into (through the web-gui), we resume the SDDC Manager and let it continue on it’s quest.
And after another half an hour, the workload is deployed:

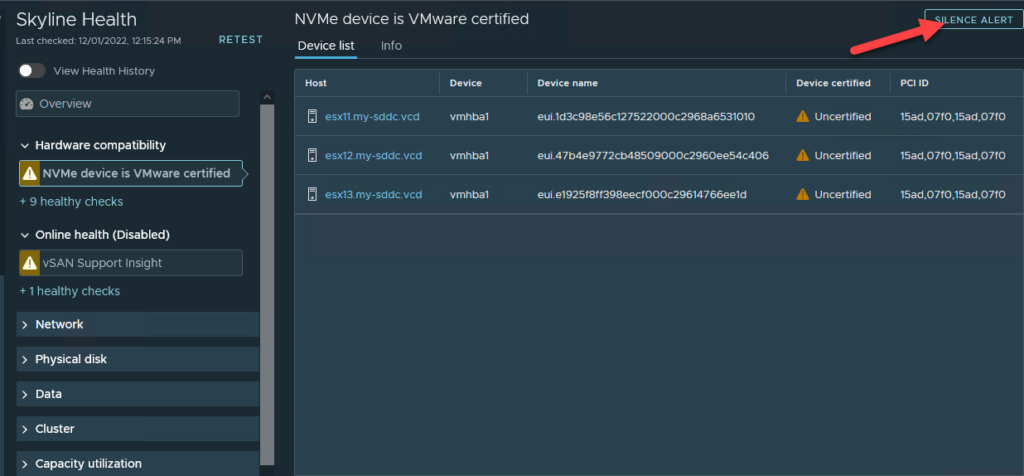
After some cleaning up at the vSAN Skyline Health (disable some failed checks, due to the nested nature of the environment) and we can start using this WLD.
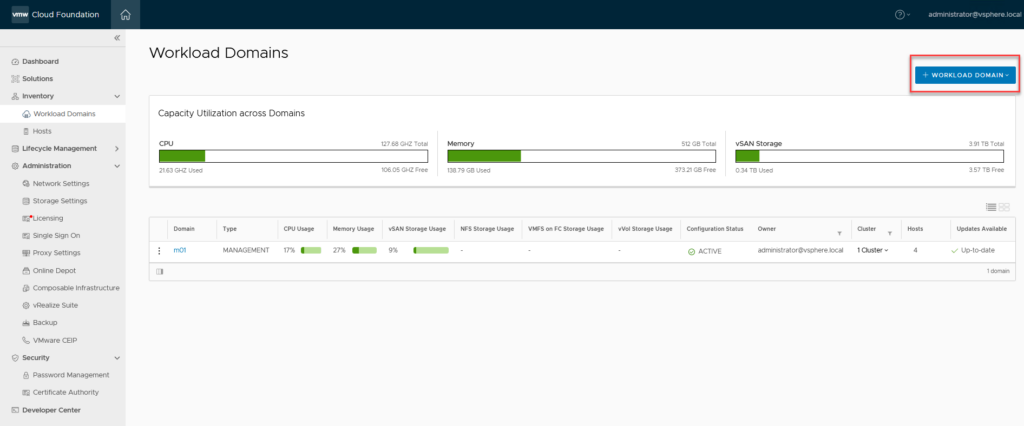
And we can see the status of the WLD in SDDC Manager:

And we can commence with the final step for this blog, adding the fourth host to the cluster in the Workload Domain:
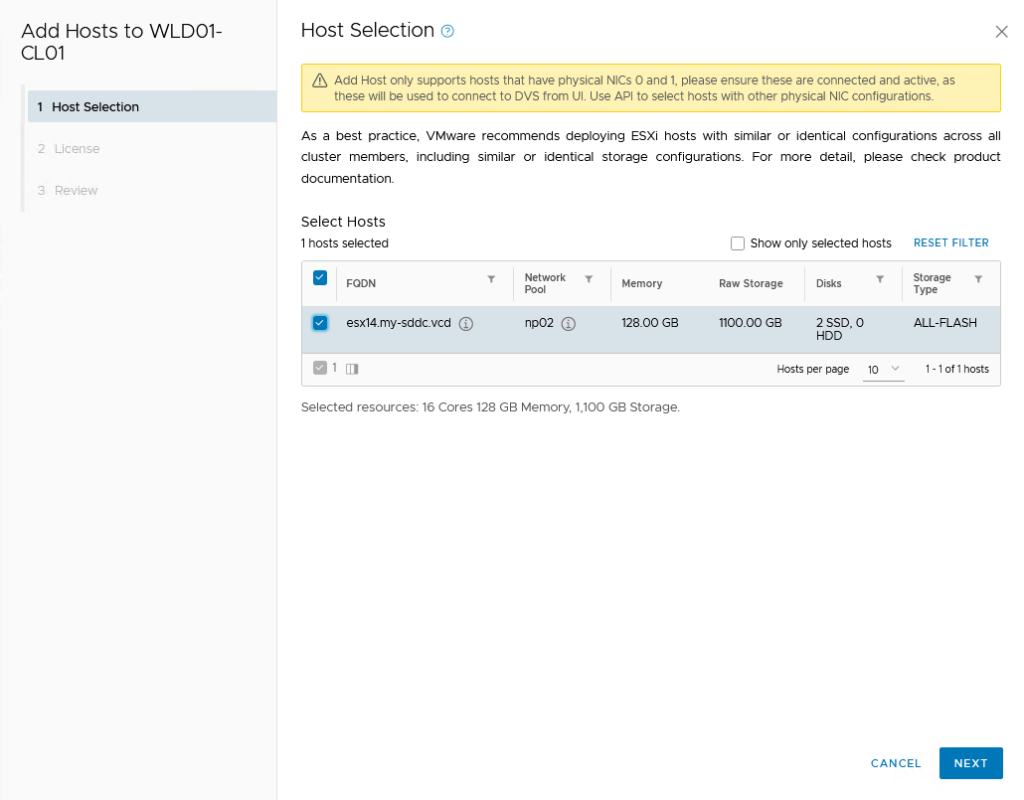
I already had the host configured as the other hosts, so this should be real easy. Select the WLD, then drill down into the cluster and select “Add Host”:

Then select the only host available (already commissioned):
On the next page, select the correct license and on the review page, click “Finish”:
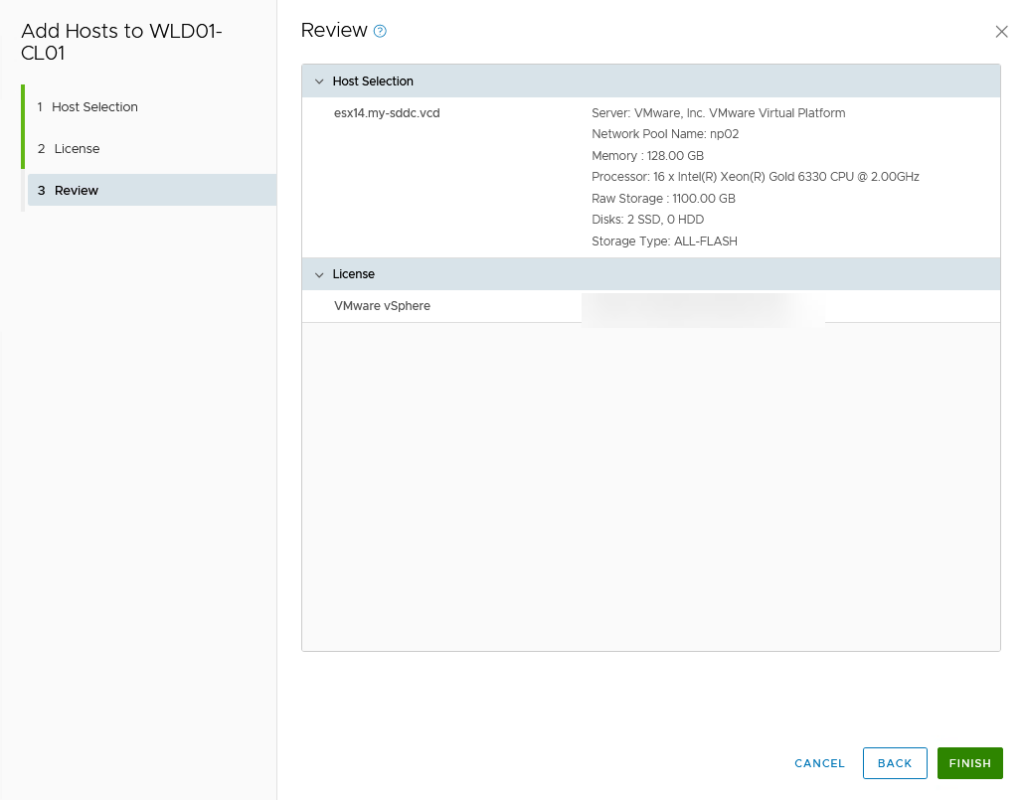
And the host is being added to the cluster:

As expected, the same issue with the Distributed Switch, so we have to address that in the same way we did with both the Management Domain and the initial deployment of the Workload Domain. suspend the SDDC Manager, change the network settings (see Distributed Switch Host configuration). After that, it’s smooth sailing.

That is it for this blog. Next time I will be digging into the configuration of NSX-T and create some applications on top of the WLD.
6 thoughts on “VCF on VCD: 2 – Workload Domain”