Managing VMware Cloud Foundation – First Look
Now that we have a Management Domain (MD) with all components running in them, let’s take a look at the environment.
We know that the Cloud Builder VM (CB-VM) was responsible for bringing up the Management Domain, but after this job, it is basically finished. We thank it for its service and can dismiss the VM (unless we want to build more SDDC’s).
The new sheriff in town is called the SDDC Manager, and when we log in to its web interface, we can see the status of our SDDC:
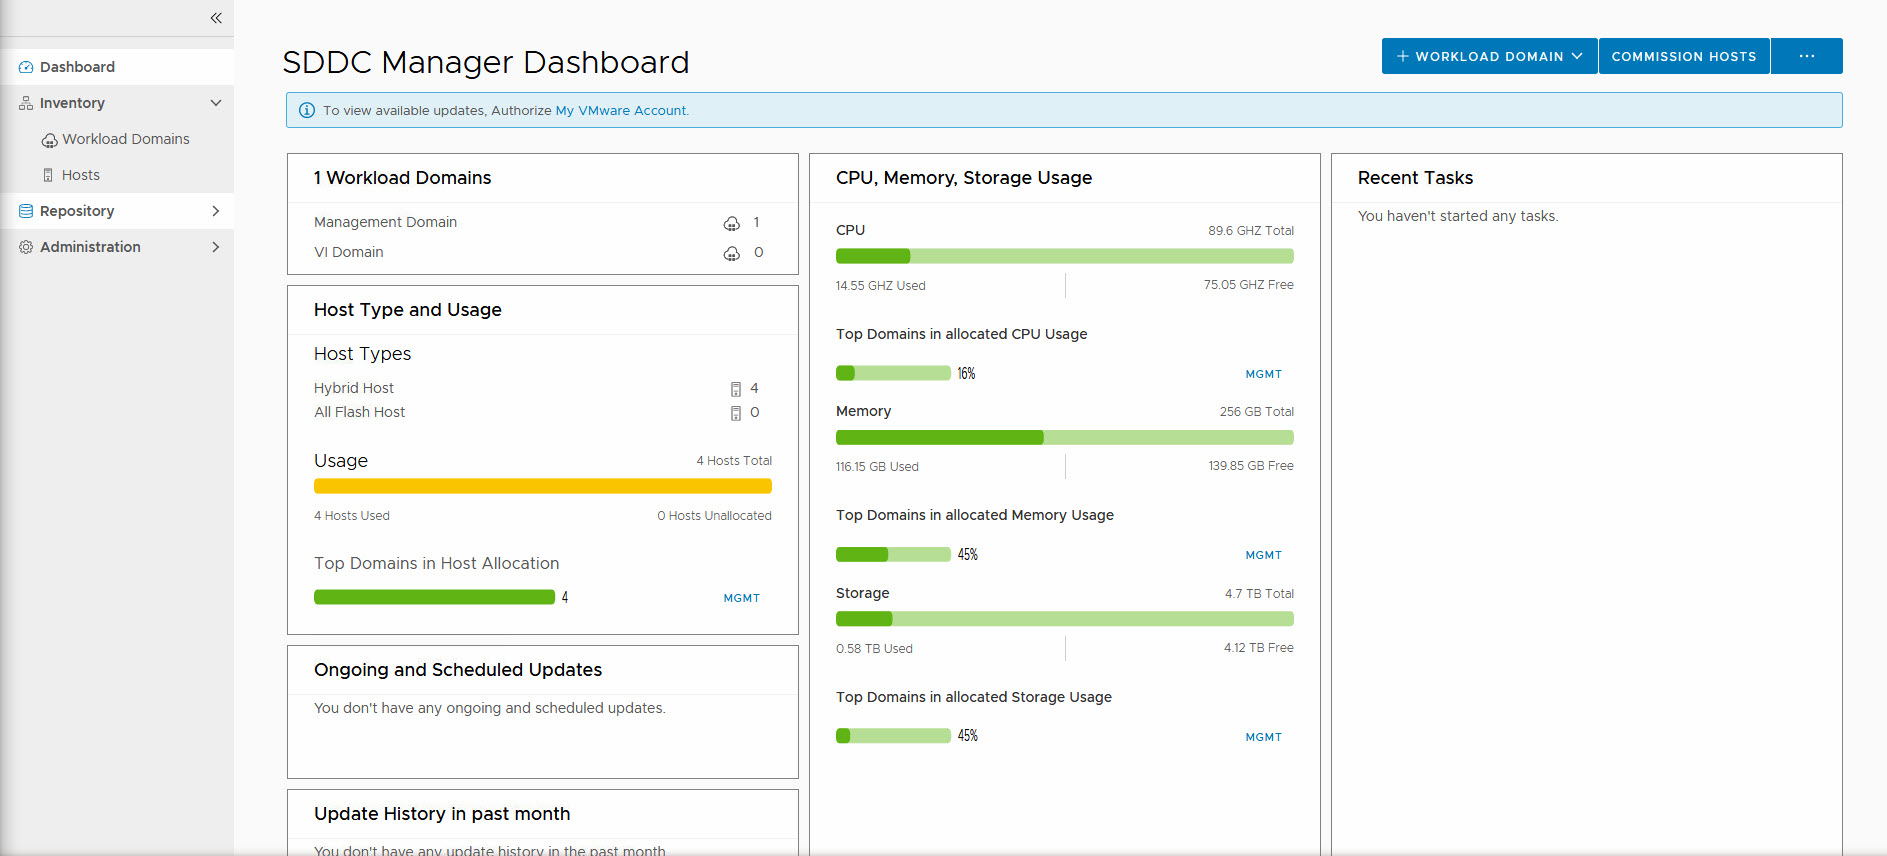
So here we can do the following tasks:
- Commission Hosts: Make them ready to be used in the SDDC
- Create a Workload Domain (WLD)
- Download Bundles for update/upgrade of VCF
- Update/upgrade our SDDC to the next version of VCF
- Manage User Accounts
- Manage Passwords
- Manage Certificates
- Manage Licenses
- Manage Network Pools
- Deploy vRealize Suite components
Let’s look at a few of those (others we will come to when deploying a WLD or doing an upgrade).
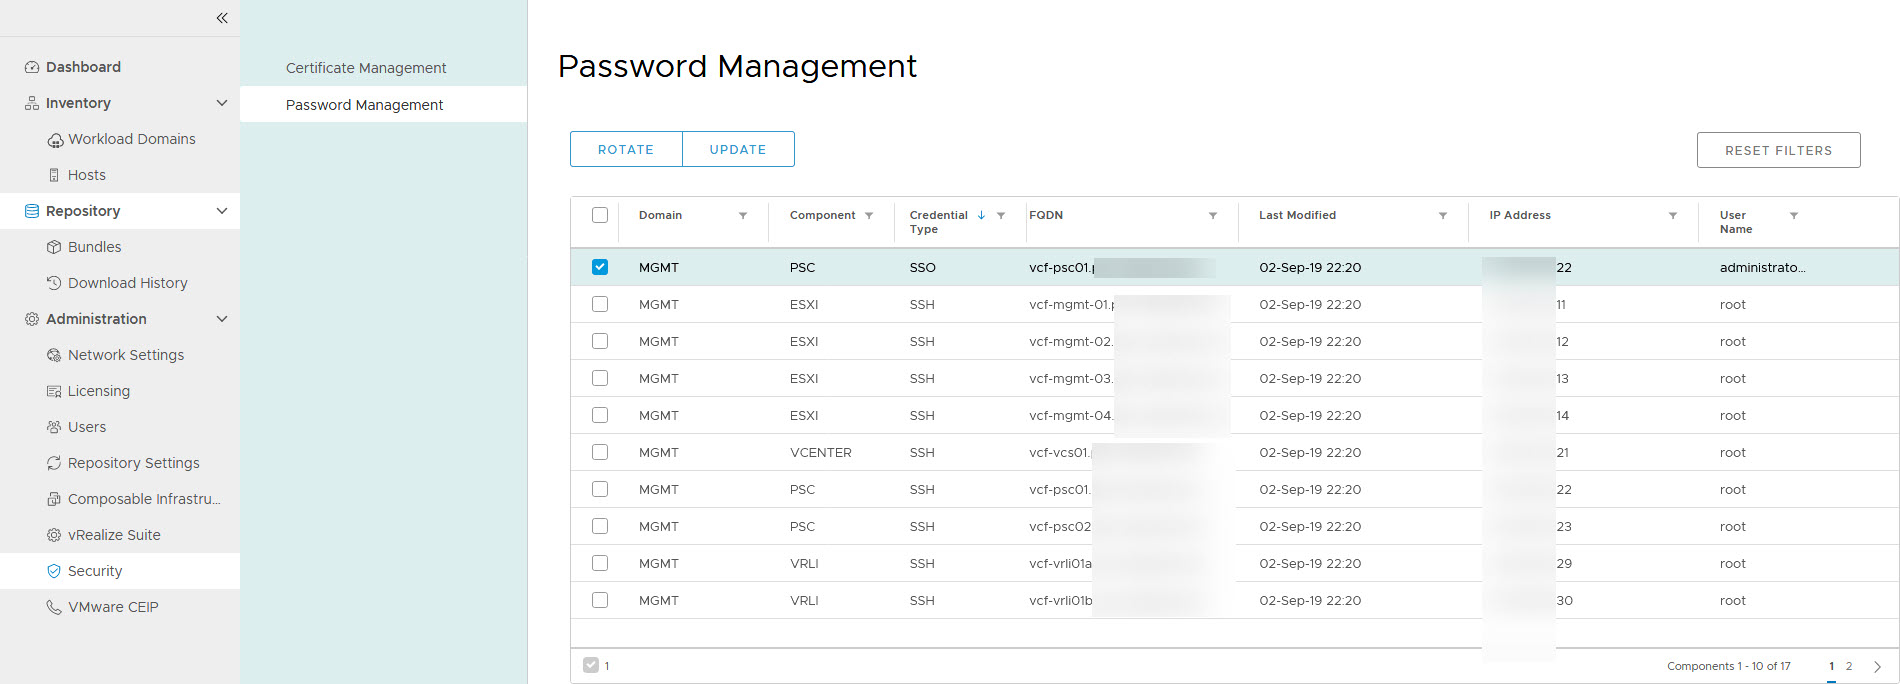
Manage Passwords
Passwords within VCF can be managed within the SDDC Manager interface. The benefit of this is two-fold. First, we have a central location where all passwords are stored, second, when changing a password, it will update it on all locations where that password is used.
The best example of this is the account administrator@vsphere.local. This account is used to administer the environment, but it is also used for the connection of NSX to vCenter:
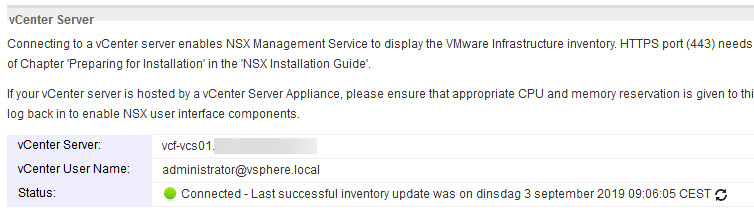
If we changed the password of this account through the regular way, this password would not be updated and the connection between vCenter Server and the NSX Manager would fail. The same goes for the connection with vRealize Log Insight.
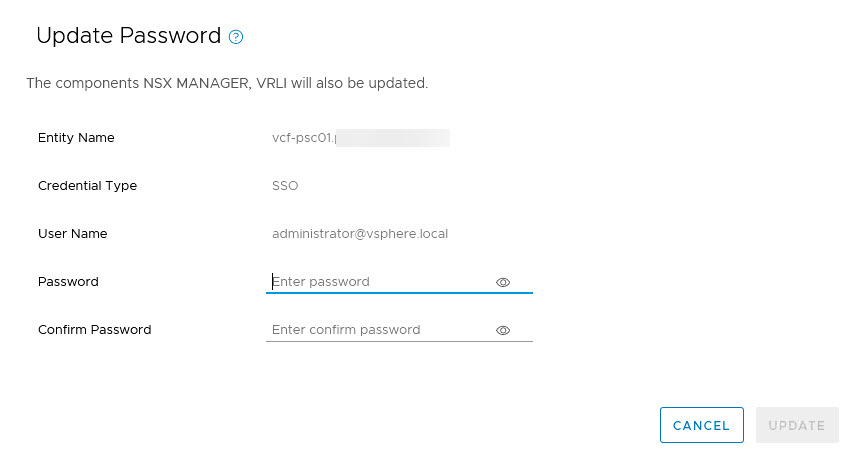
By changing the password within SDDC Manager this is avoided:
When I click “Update” I get the option to change it to something I type in myself:
But it is also possible to rotate the passwords (multiple at a time), which will generate random passwords. When you need to know the passwords, you can do this by logging into the cli of the SDDC Manager and running:
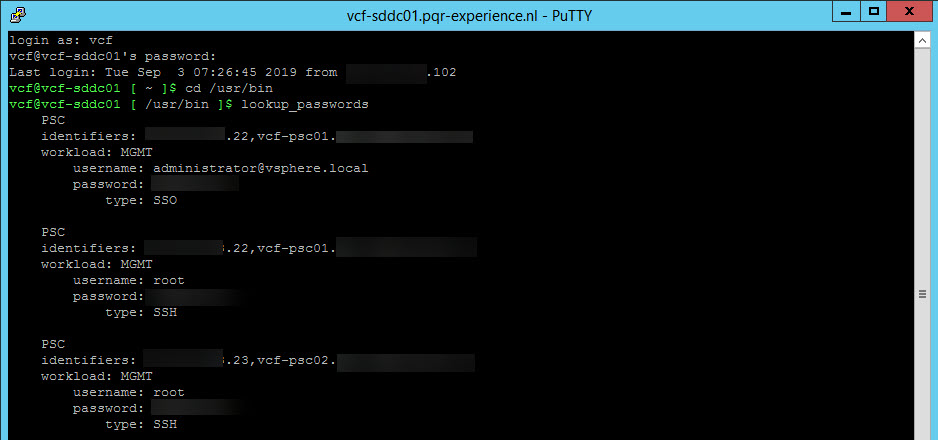
I change the passwords for the ESXi hosts, and can find them here as well:
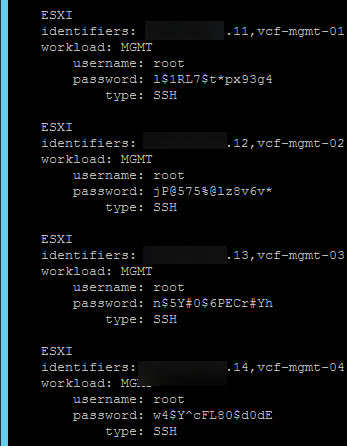
(change them back again, to make it easier to log into, but you get the gist of it ;)).
Manage User Accounts
In case it is necessary to have additional people logging in to the SDDC Manager, we can also manage User Accounts. The User Accounts and Groups are taken from the SSO domain in which the SDDC is created.
I have attached the newly created VCF environment to my Active Directory domain, which can be done in the “normal way”, of connecting your PSC’s to AD and then adding the AD as an Identity Source. This way the users created in the SSO domain become available to the SDDC Manager.
And then it is relatively easy to give access to AD-users within SDDC:
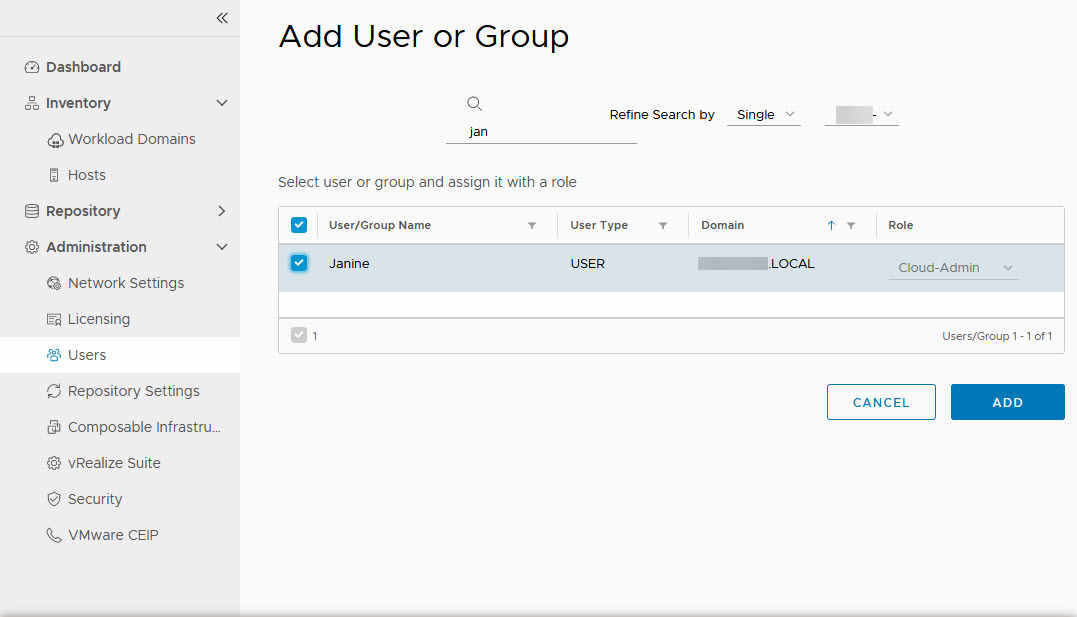
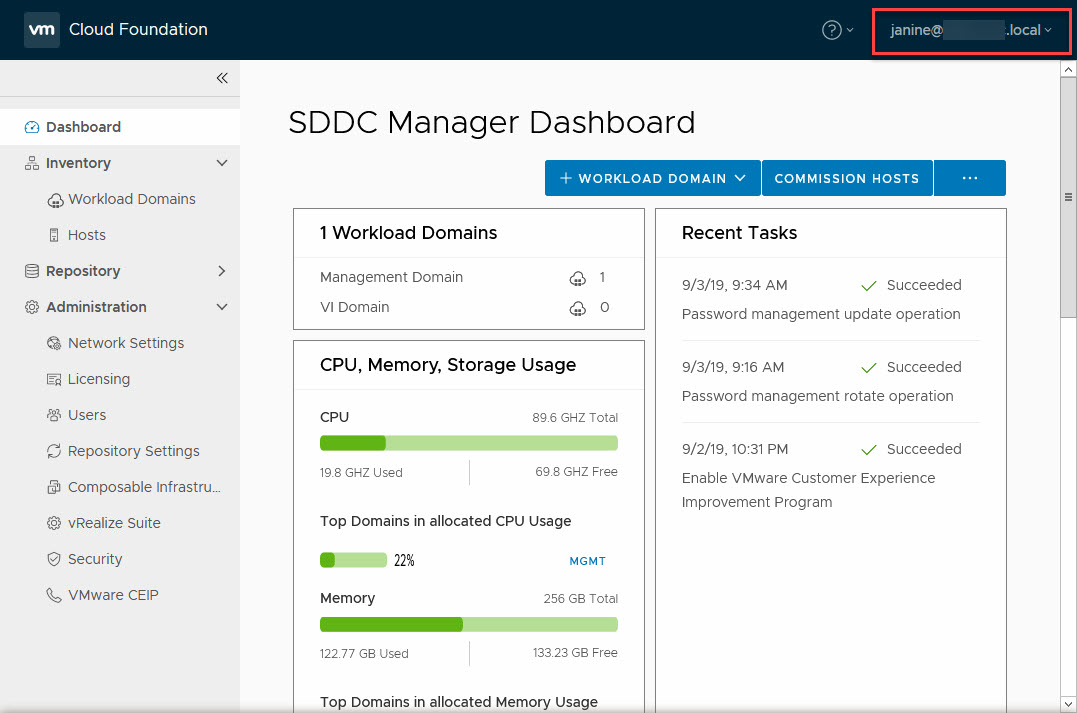
There is only one role available currently, which is “Cloud Admin”. This gives permissions to read, write and delete workload domains. One the user has been given access, we can log in:
Manage Certificates
Of course, good certificate management is very important when managing your SDDC. So we want certificates that are signed by a CA which is also trusted in the environment. This way, we get the nice green “safe” browsing experience.
For VCF certificate management is pretty straight forward. We need to set up a connection to a (Microsoft) CA and from that point, we can request and create certificates for all parts of the SDDC.
Setting up a connection to an existing CA is pretty straight forward. We need a user account, able to request and create the necessary certificates and the appropriate certificate template. So I created the user, called svc_ca_sddc and granted this user permission to request certificates. Another key element here is that the web-server needs to accept basic authentication. After this is all created and configured, we have to configure the SDDC Manager to use this user:
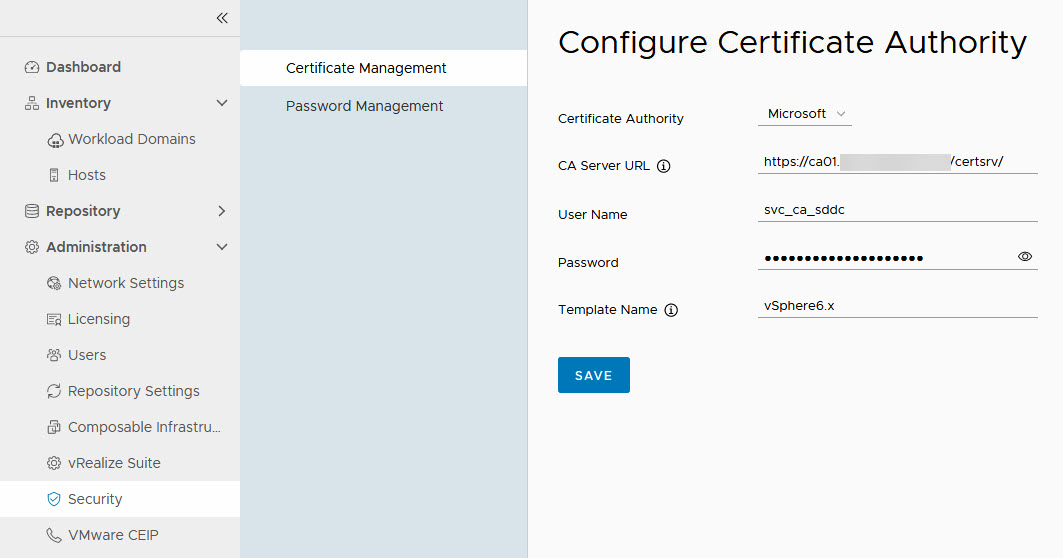
Important to note here is that you need to use the “short name” of the template, so without spaces. Otherwise, you will get error messages when requesting a certificate (for reference: “Denied by Policy Module 0x80094800”).
When we click Save, we get a question to accept the CA details: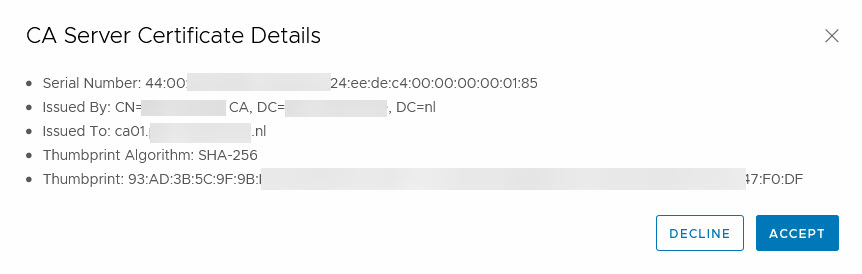 and we can start creating certificates.
This we do per Workload Domain (and the Management Domain is a Workload Domain). I’ll demonstrate this with one item, for here, but basically, almost all components can be certified this way. NSX-T is an exception to this.
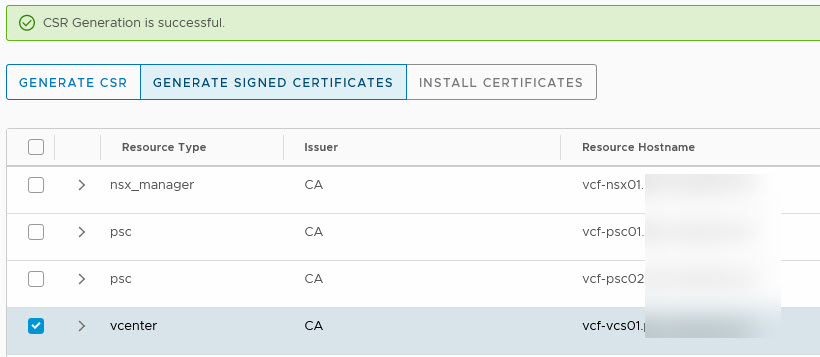
We go to the Security tab of the Management Domain inventory and there we can see all components that we can request certificates for:
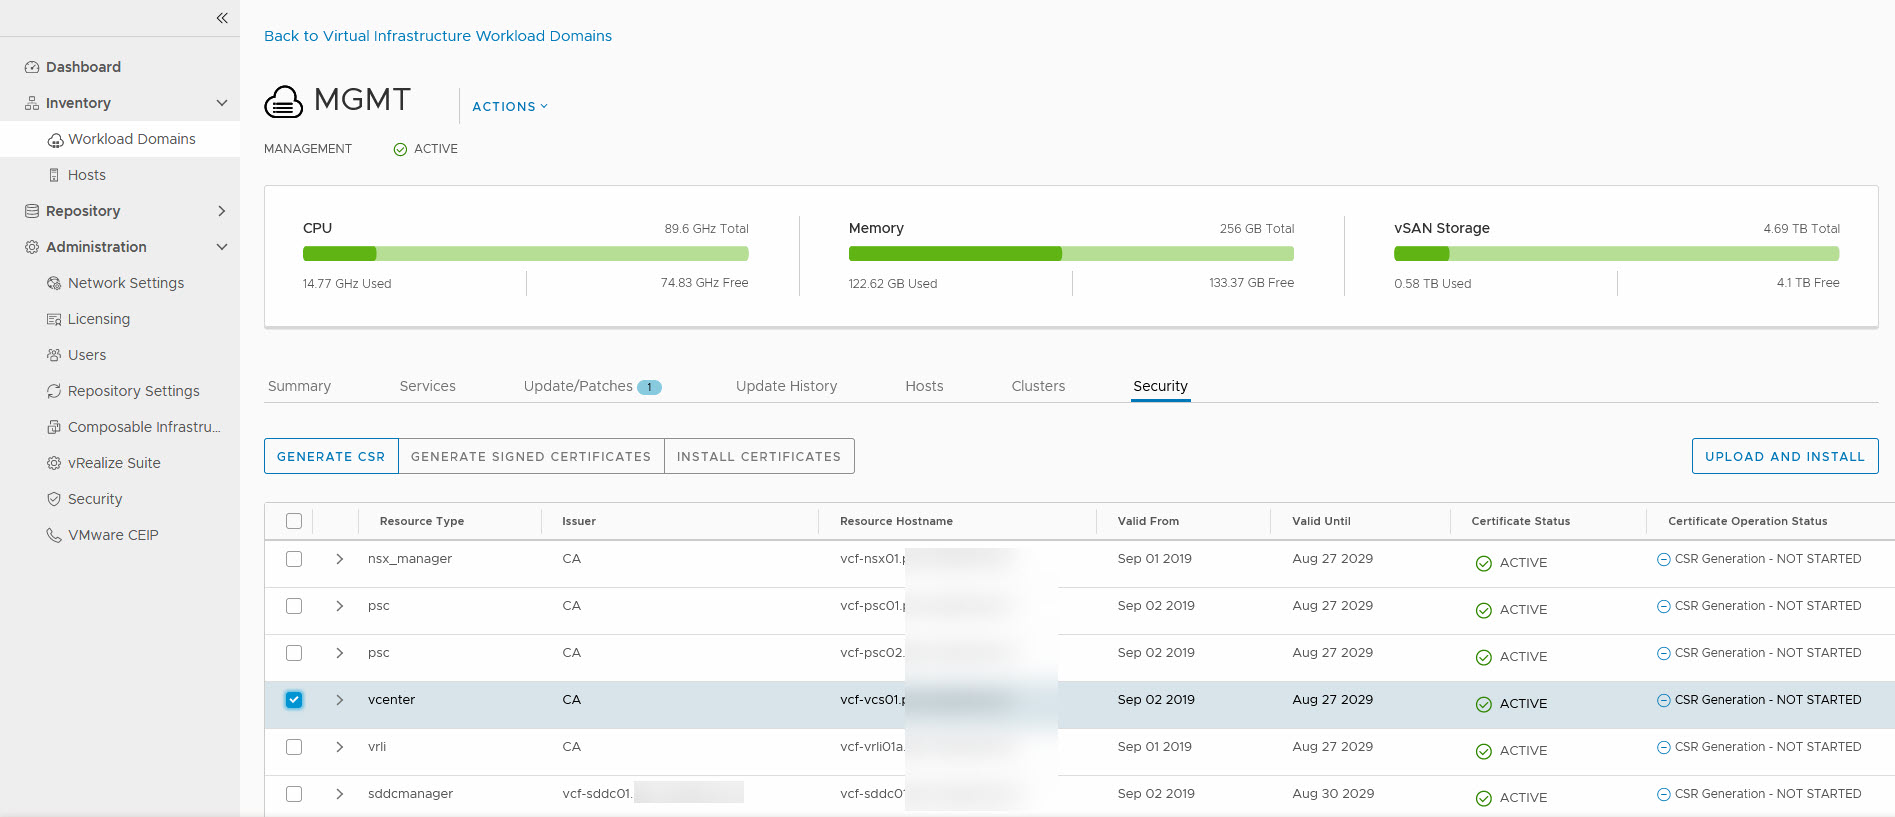
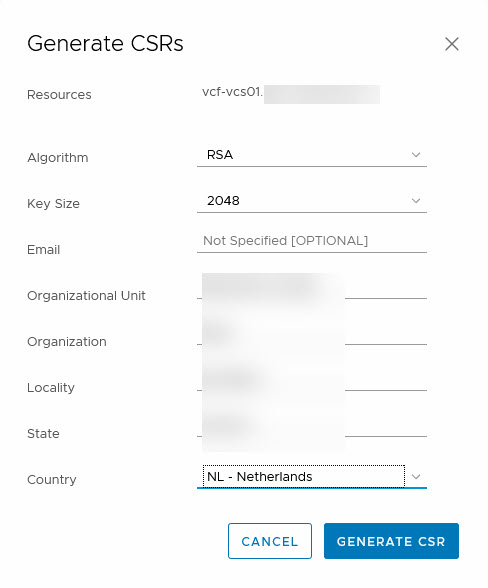
We are going to start with the vCenter Server. We select the server and click on “Generate CSR”. We have to fill out the form and submit it:
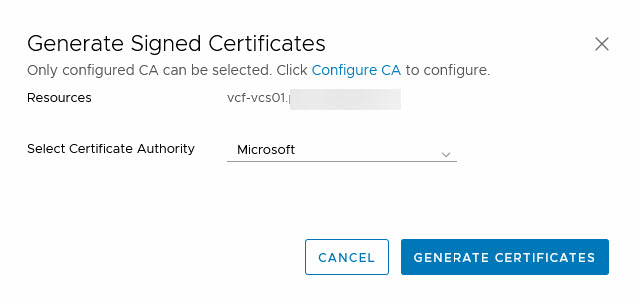
After the CSR has been processed, we can generate the certificate, based on the information we submitted earlier:
Click on Generate Signed Certificates:
And when the certificate has been successfully generated, we can click on “Install Certificates”, which will install the certificate (duh). Of course, this wíll lead to a restart of services, so it will mean your environment will be unavailable for management, for a few minutes.
When it is done, it will give you the following message:

So we also restarted the SDDC Manager.
After all that, we went from: ![]() to
to ![]()
I like that nice and green lock :).
I of course updated the other components in the Management Domain as well.
So that’s it for now, from a management perspective. Next time, I’ll be looking at deploying my very first Workload Domain and after that, I’ll be doing an upgrade of VCF.
3 thoughts on “Managing VMware Cloud Foundation – First Look”
Great Article !