Deploying VMware Cloud Foundation – Management Domain
After the theory (Building a VMware Cloud with VCF (a short history)), it is time to dive into the technical stuff. Let’s deploy us some VCF!
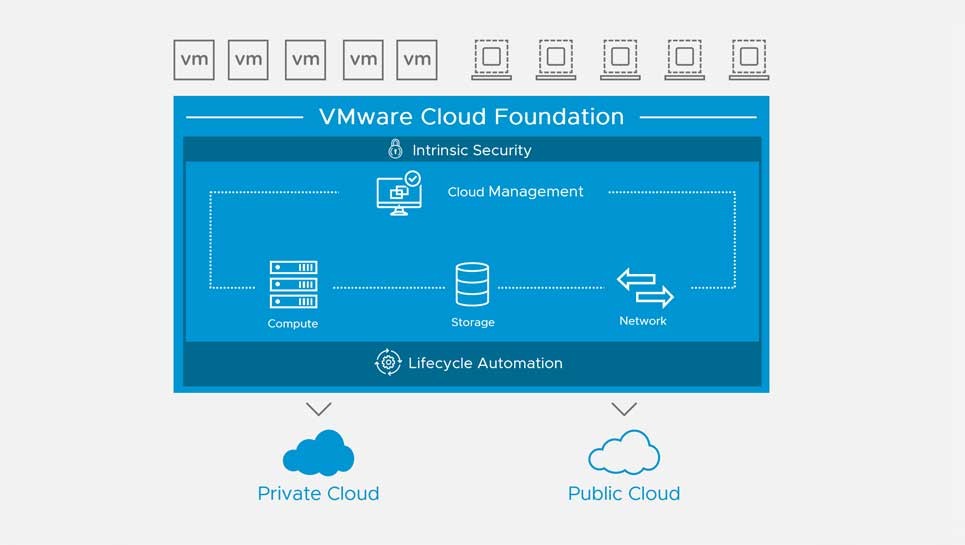
VMware Cloud Foundation is deployed in multiple steps. Since you are deploying an environment that has dependencies on itself, there is one tool that you can use, to help you along. This tool is called the Cloud Builder VM (which is a pretty cool name ;)). It can be downloaded from the My VMware site (when you possess the correct entitlements).
This Cloud Builder VM can be run on an existing environment, or on a VMware Workstation instance. In our situation, it is running in an existing environment. After the deployment of the Management Domain, the Cloud Builder VM (CB-VM) has no more function in the environment and can be safely deleted.
BTW although version 3.8 is available for download, I chose to deploy version 3.7.1. The main reasoning behind this is that I also want to be able to perform an upgrade (or maybe two), without having to wait for the next version.
Planning
It is important, with every deployment, but especially when deploying VCF to plan ahead. To make sure you know all the requirements you have to meet, before moving along.
Most of the requirements that need to be met, before you are able to deploy your VCF environment, are described in the Cloud Builder Deployment Parameter Guide. This can also be downloaded from the My VMware site, but it is also available from the web-page that the CB-VM will present after it’s deployment. But to be ahead of the game, I’d advise you to download it prior to deploying the CB-VM and make yourself aware of the requirements.
A few of the requirements are related to the CB-VM, most of the requirements are necessary further along the way, but it is good to know them upfront, so you won’t run into issues when deploying VCF.
The following requirements are needed before you can deploy the CB-VM:
- VLAN and Port Group in which to deploy the VM
- IP-Address, subnet mask and default gateway for the VM
- NTP and DNS information for the VM and the forward and reverse lookup records registered.
- Valid passwords! These are not fully checked during deployment, but the functionality will fail if they do not meet the requirements (yes, I found that out the hard way ;))
The following requirements are needed before you can deploy VCF with the CB-VM:
- A minimum of four ESXi hosts (officially they need to be vSAN Ready Nodes)
- With the correct build number for your version of VCF.
- With vSAN capable devices for caching and capacity
- Configured with static IP Addresses
- With TSM-SSH enabled and set as “start and stop with host”
- With NTP enabled and configured and set as “start and stop with host”
- IP-Addresses and DNS entries (reverse and forward) for:
- Platform Services Controllers (2)
- vCenter Server (1)
- NSX Manager (the Management domain will be using NSX for vSphere)
- vRealize Log Insight (4)
- SDDC Manager (1)
Preparing underlying storage
Since I have already deployed multiple vSAN based nested environments, it is not necessary to do this step for VCF, but if this was the first deployment, it would be necessary to enable SCSI reservations. Method and reasoning behind it can be found here:
https://www.virtuallyghetto.com/2013/11/how-to-run-nested-esxi-on-top-of-vsan.html
Preparing Network
In my environment, I have a couple of available VLANs, that can be used. Four networks are necessary and preferably, they are separated from each other. I have created four networks, using four different VLAN’s. Since I am nesting the environment, I have created three distributed port groups on the underlay:
- DPortGroup-VCF-Trunk-2141, 2143, 2147, 2149
- DPortGroup-VCF-Management-2143
- DPortGroup-VCF-VTEP-2149
VLAN 2141 will be used for vMotion
VLAN 2143 will be used for all management addresses, including the Management addresses for the ESXi hosts.
VLAN 2147 will be used for vSAN
VLAN 2149 will be used for the VTEP-addresses for the hosts, but in my setup, I need to create the port group in order to have DHCP available in that network.
Deploying Cloud Builder VM
After the requirements have all been met and everything is in order, we can start by deploying the Cloud Builder VM. I won’t go into detail or bore you with the pictures of a simple OVA deployment, where you click next, next, finish and in between fill out the fields that I described above. After the deployment has completed, we can power-on the CB-VM.
The CB-VM is deployed in VLAN 2143 in DPortGroup-VCF-Management-2143.
Deploying Nested ESXi hosts
For the Management Domain, I am using four ESXi hosts, which will be deployed on the underlay. For this, I have used William Lams nested ESXi images, which are absolutely amazing when you want to deploy nested environments. You can find them here:
https://www.virtuallyghetto.com/nested-virtualization/nested-esxi-virtual-appliance
I have downloaded the appropriate OVA to deploy. In this case, it is important to know which version of ESXi is required for the version of VCF you are deploying. I am deploying VCF 3.7.1, so I need to create ESXi hosts, that are running ESXi 6.7U1, build 13004448. Since this build is not directly available for download (neither from the repository nor as an installable from My VMware), we need to create it ourselves. For this, I took the basic 6.7U1 OVA from the aforementioned site and added the necessary patch to reach build 13004448.
But first the deployment. Again the deployment of the OVA is relatively straight forward. Fill in the fields and connect the two NIC’s to the correct dPG (the one with the trunking, so we can use VLAN tagging within the nested ESXi host).
Both adapters in the host are connected to DPortGroup-VCF-Trunk-2141, 2143, 2147, 2149.
The following changes were made to the default deployment of the OVA:
- 1 CPU:8 cores
- 64 GB memory
- Expanded the first disk to 4 GB in order to be able to manual patch ESXi
- Expanded the second disk to 40 GB as a vSAN cache disk
- Expanded the third disk to 40 GB as a vSAN cache disk
- Created two additional disks of 600 GB as vSAN capacity disks
- Change start-up setting for the NTP service to “start and stop with host”
And we also need to mark the two cache disks, as SSD devices, although they are not really ;).
To do this, we can use the command-line. First, we have to find out what the disk name is, we can do that in the GUI or through the command:
esxcli storage core device list
This will list all devices. When we want to define that it is an SSD, we can use the following commands (replace the naa….. device name, with the name for your system):
esxcli storage nmp satp rule add -s VMW_SATP_LOCAL -d naa.6000c29ecddb0aaf15ac8e21b1c75547 -o enable_ssd
esxcli storage core claiming reclaim -d naa.6000c29ecddb0aaf15ac8e21b1c75547
eventually leading to the two 40 GB devices being marked as SSD:

Updating ESXi
After the initial deployment, we need to update ESXi to the correct build. This needs to be exactly what is required as to the BOM. In the case of VCF 3.7.1, this means 13004448. Exact details can be found here: https://kb.vmware.com/s/article/52520.
So in our case, we need to update to express patch 07 in ESXi 6.7 U1. The patch can be downloaded from the VMware site: https://my.vmware.com/group/vmware/patch#search
After you have downloaded the patch, upload it to the ESXi host (I created a new partition in the additional space on the disk where ESXi is installed (because of the increase on the first disk, there is a small amount of space available for this).
Put the host in maintenance mode and install the patch from the uploaded location:

After this, reboot the host, take it out of maintenance mode and your good to go.
Filling out the Configuration File
After all, requirements are met, we can go on and log in to the Cloud Builder site. When we open that site, it asks us about the requirements and we have met them all, we can select “Check All”:

And go to the next page. Here we accept the EULA and again click Next, which bring us to the Configuration File screen:

If not already downloaded and prefilled, this is the place where we can download it and configure all that is needed. In this case, I choose to download the file and edit the content. Make sure the content is correct and fully filled in because VCF is strict on its configuration.
The first page, I’ll omit, this is basically information that is already shared above, about which prerequisites need to be filled. The second-page “Management Workloads” gives us some insight into the virtual machines that are being deployed in our environment and the resources that are needed. Since we are in a nested environment, we are not really looking at these values. The disk usage is based on all bytes filled, but since we will be using thin provisioning, the 4 x 1000 GB should be enough, in our environment.
We do need to fill out the license keys on this screen. Once the license key is filled correctly, the field will change to yellow (before that, the fields are red):

On to the next tab. Here we need to fill out all the passwords we are going to use:

The tab after this contains network information. Because we have set Validate ESXi Thumbprints to No we can ignore those fields:

The final tab contains information about the management components. IP-Addresses and hostnames and so on. Important that all names and addresses are (forward and reversed) resolvable through DNS:

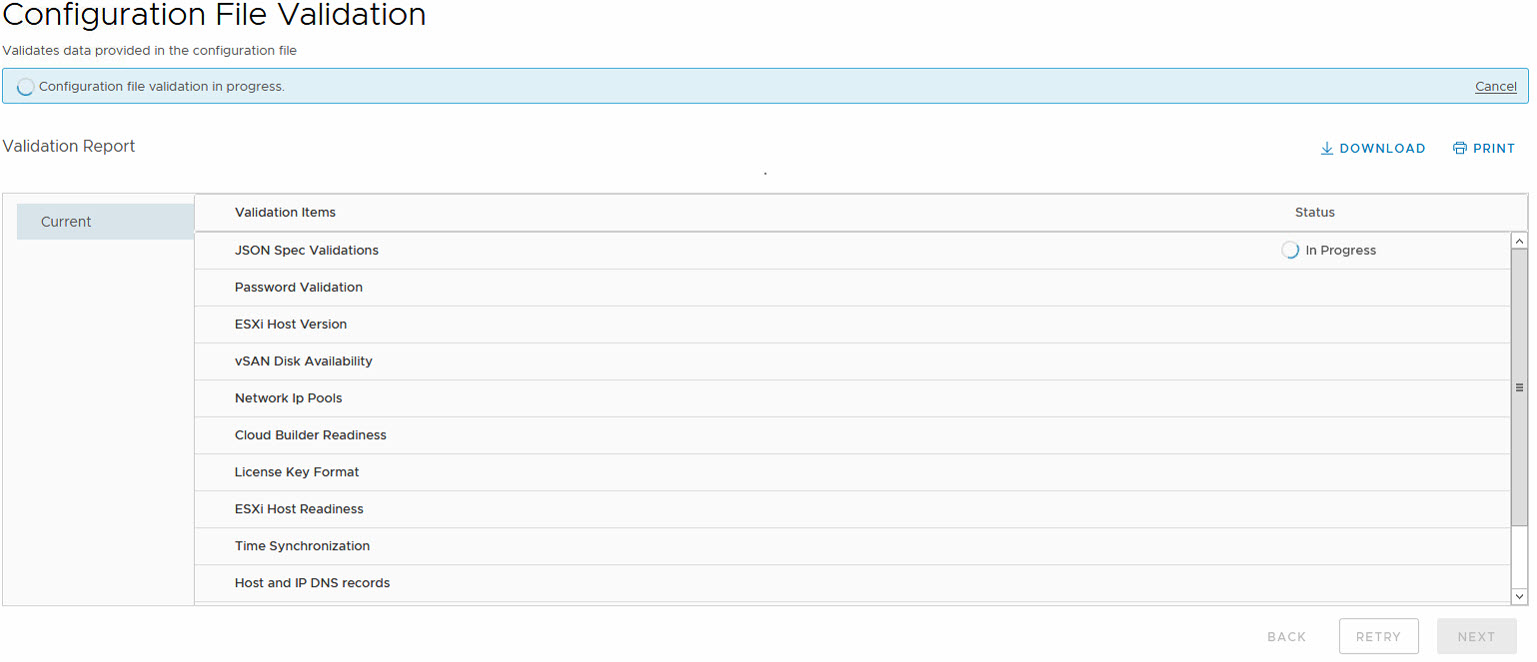
When all fields in the sheet have been properly filled and all requirements have been met, we can upload the sheet into the Cloud Builder website, on the page shown before. Once it is uploaded, it becomes available for validation:

This will bring up a window in which all parts of the xlsx are being checked for valid values:
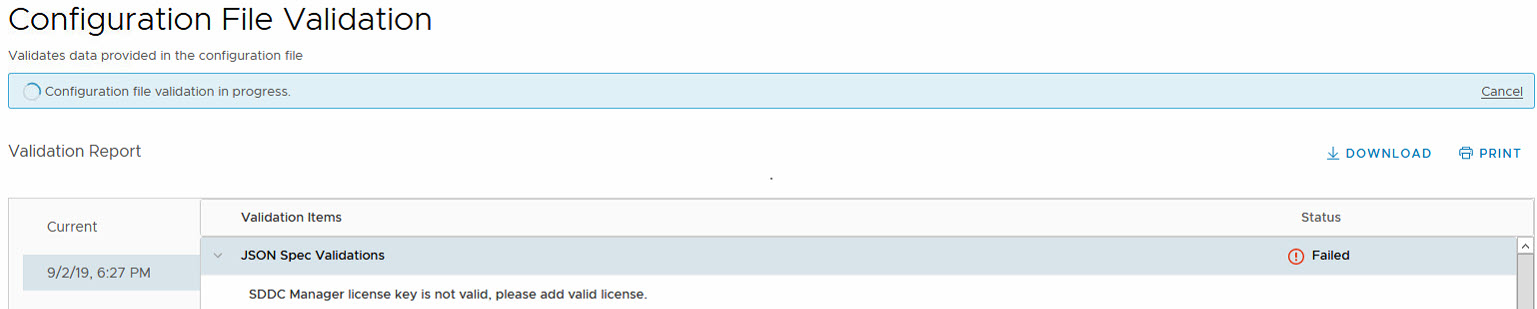
One thing to note, with version 3.7.1 (I remember running into this one, at a customer, so for me, it was easily recognized when I ran into it, with this deployment) is that the SDDC Manager license key must be left empty. Otherwise, validation will fail:
When the SDDC Manager license is kept empty (you need to fill it in later), validation will succeed:
The only warning here is related to the size of the boot disk of the nodes. Which is smaller than the required 16 GB:
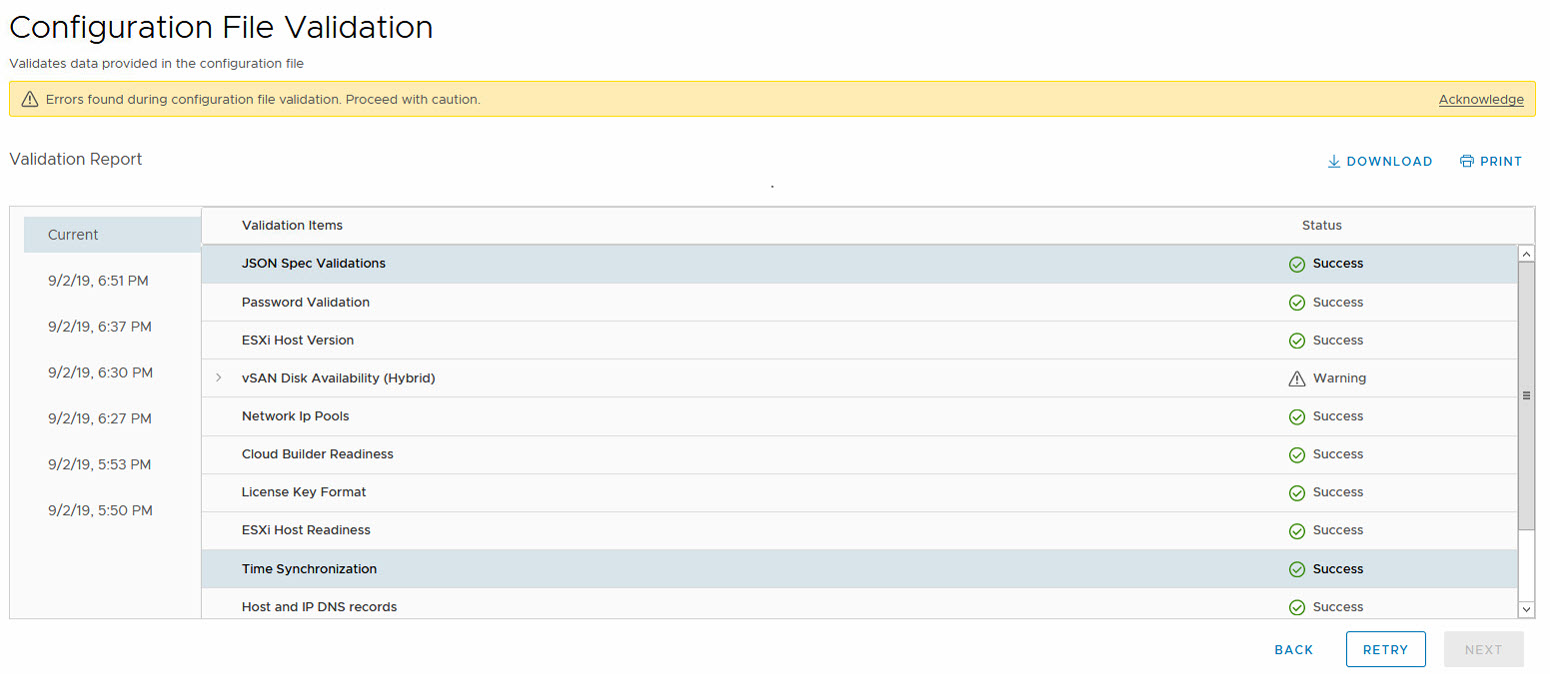
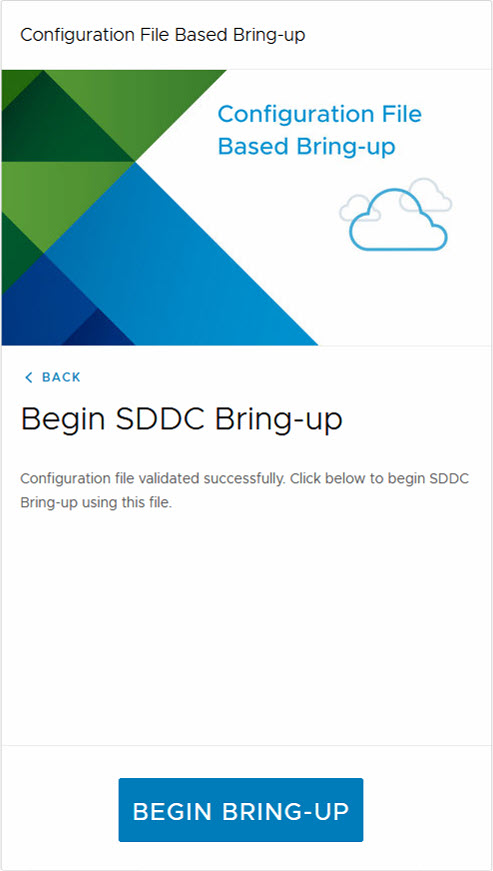
But after acknowledging the warning, we can proceed and start the Bring-Up:
This will start a process where the hosts are configured and all necessary components are deployed. And after approximately 4 hours of processing (remember, it is a nested environment, not super fast ;)), we get a result:
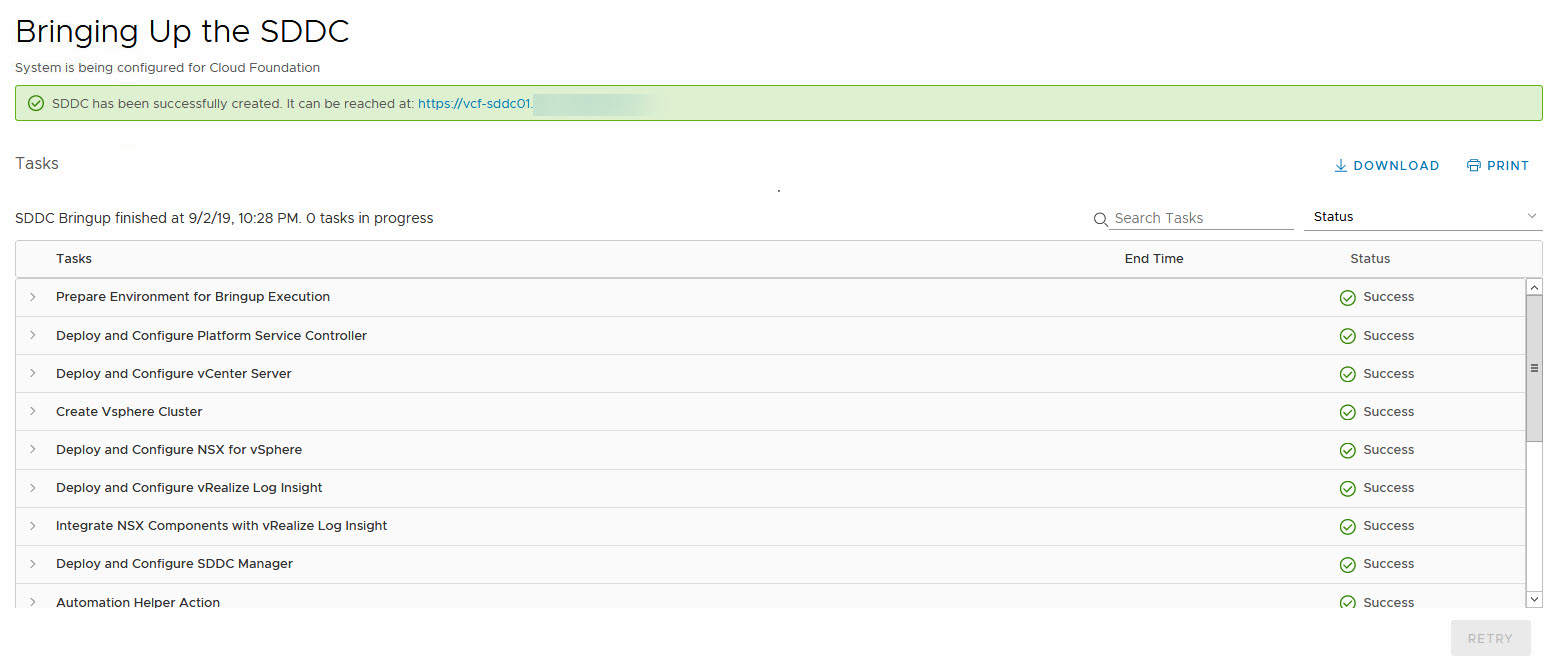
And with the deployment finished, our SDDC Manager is available:
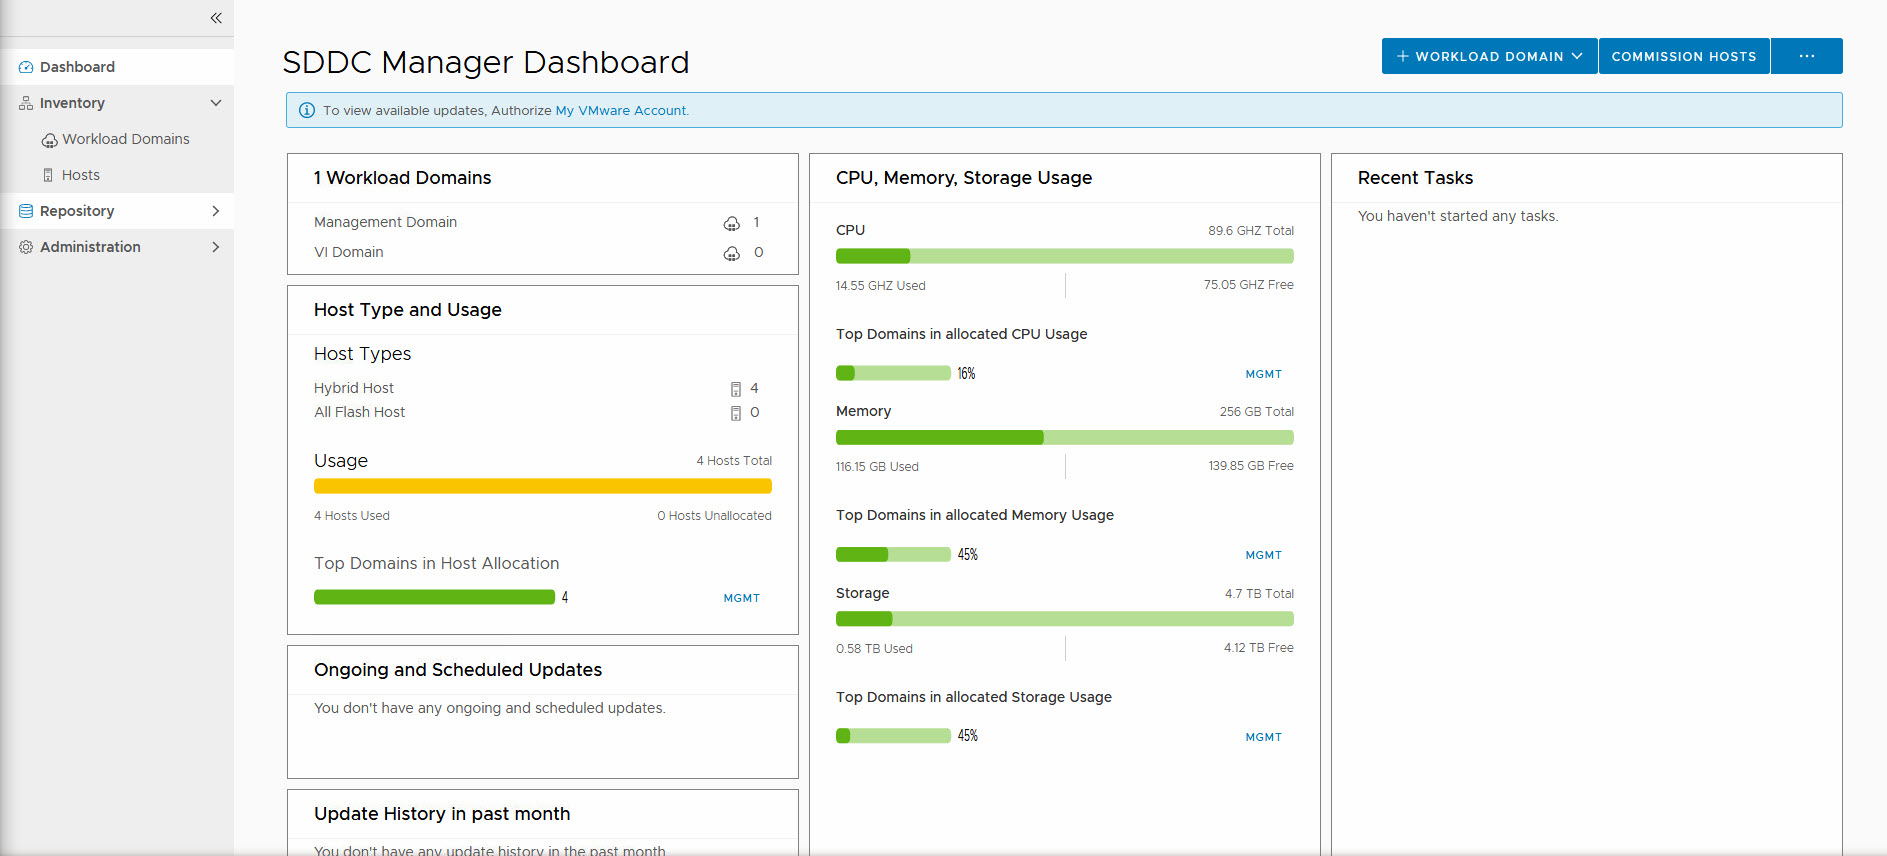
So next up: Configuration of the environment and deployment of a Workload Domain.
2 thoughts on “Deploying VMware Cloud Foundation – Management Domain”