NSX-T 3.0 – Initial Configuration
This blog is to describe the initial configuration of NSX-T 3.0. After deploying the appliances and combining them into one environment (https://my-sddc.net/nsx-t-global-manager-installation-and-initial-setup/) and deploying the vSphere/vSAN environment (https://my-sddc.net/building-the-lab-vsphere-and-vsan/) it is time to combine the two and create the virtual network environment.
As a reminder, our environment is going to look like this:
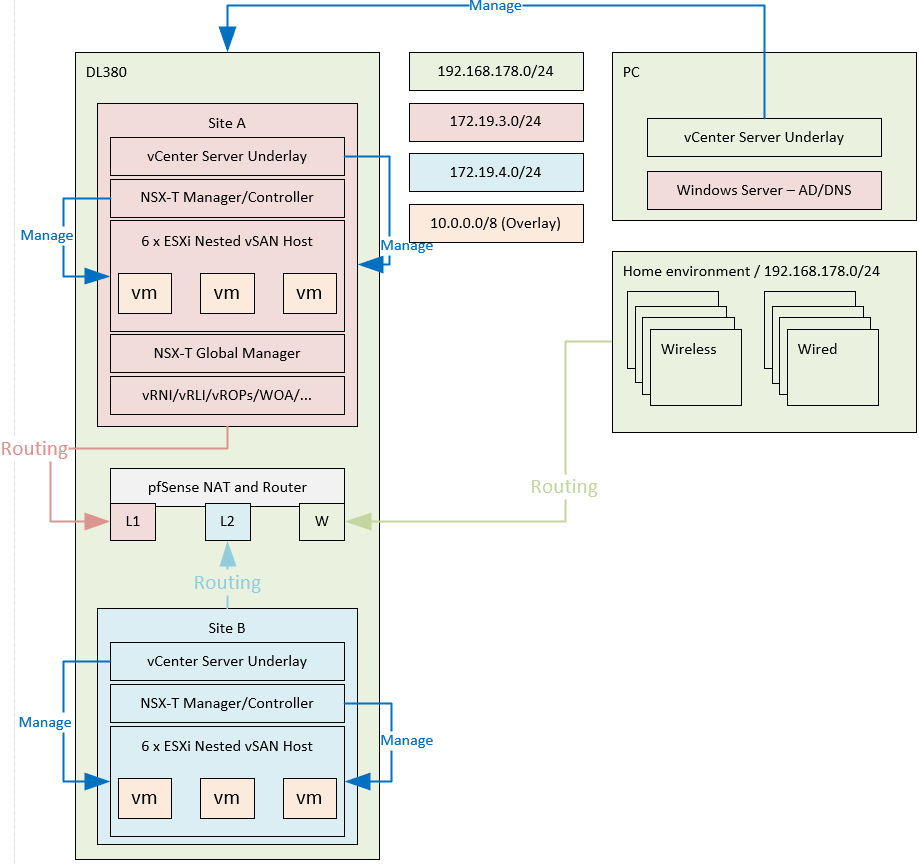
but that’s mainly the physical side of it. The virtual side is still something I have to figure out, but for now, it’s roughly going to look like this:
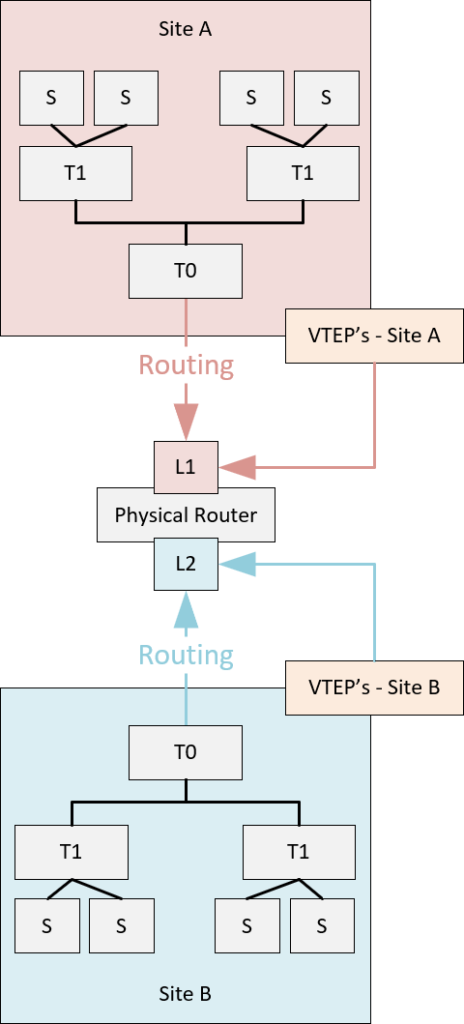
(and that is without the global configuration).
So, first things first, configure the hosts. Since we are running vSphere 7, we can use the VDS that comes with it (have to make sure the version VDS is correct). Stuff we have to do:
- Connect Compute Manager (vCenter Server) to NSX Manager
- Create IP Pool
- Create Uplink Profile
- Create Transport Node Profile
- Configure NSX on Transport Nodes
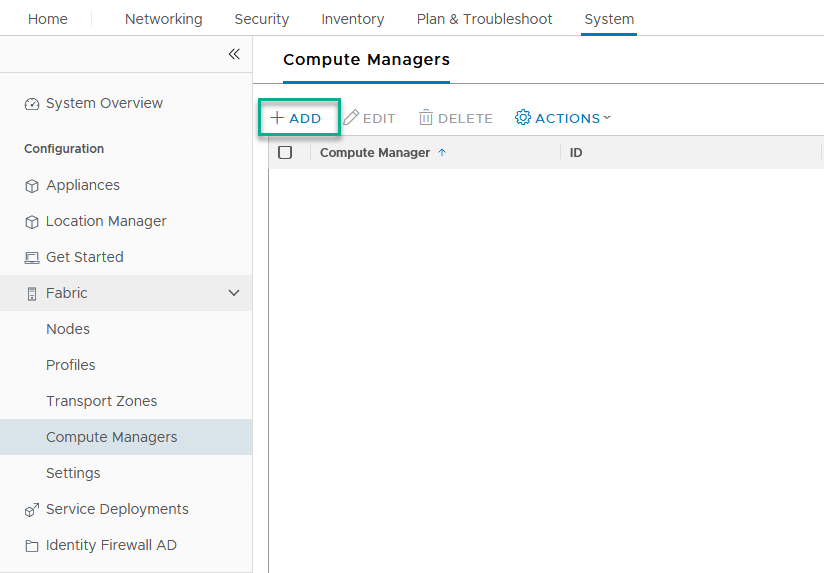
Connect Compute Manager (vCenter Server) to NSX Manager
This is a relatively simple task. We go to “System | Fabric | Compute Manager” and click “Add”:
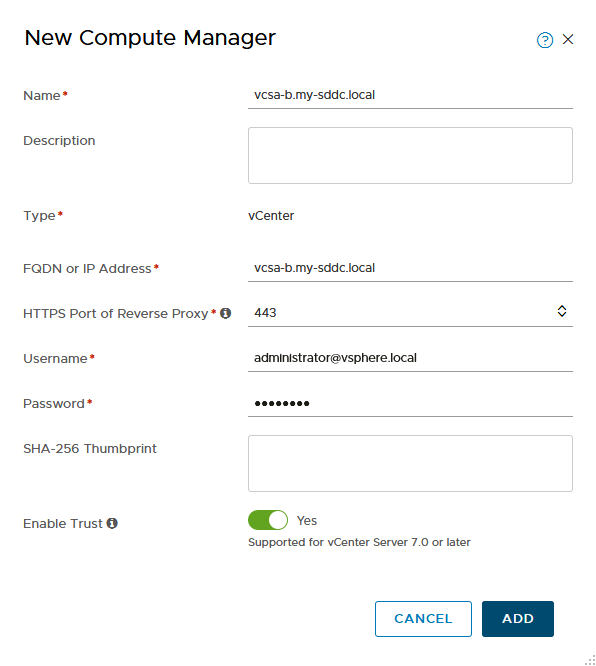
Fill out the information and click ADD (add the signature in the second screen):
Create IP Pool
In a production environment the prefered method to hand out IP Addresses to VTEP’s is DHCP. I could set that up, but the use of IP Pools is a little easier, so I am going down that road.
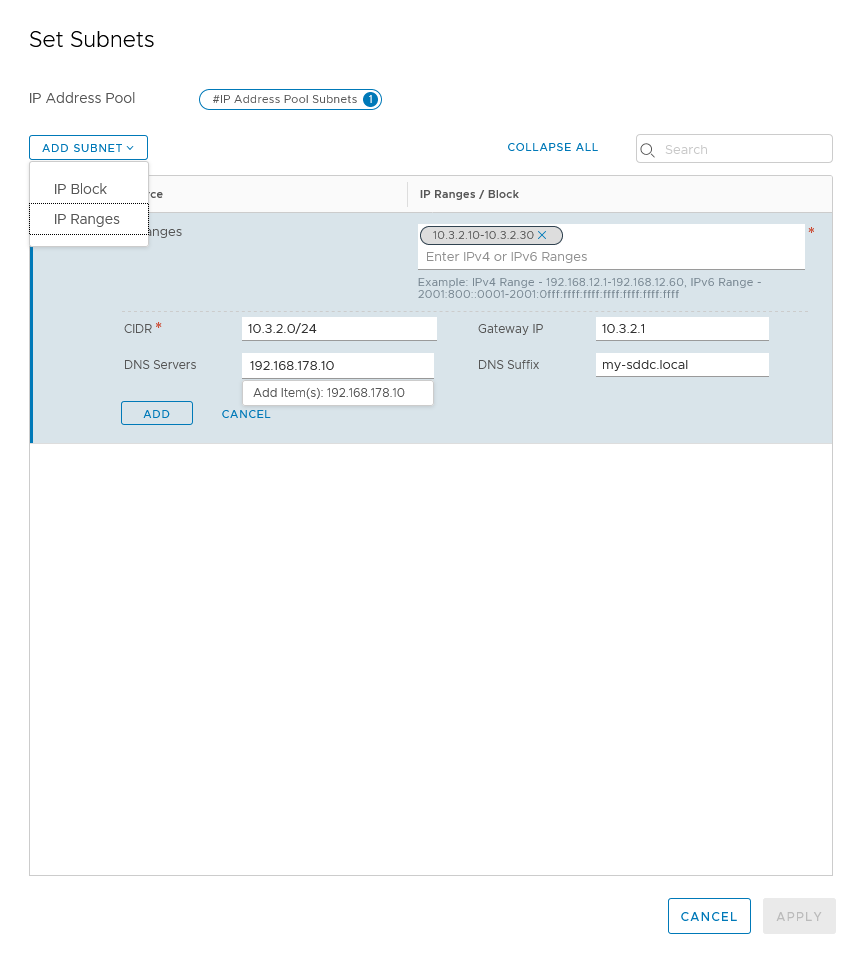
This has changed since earlier versions and NSX-V. Here you create an IP Pool and you can than choose to add an IP Block or an IP Range to it.
The configuration is done in “Networking | IP Address Pools”. Click “Add IP Address Pool”:
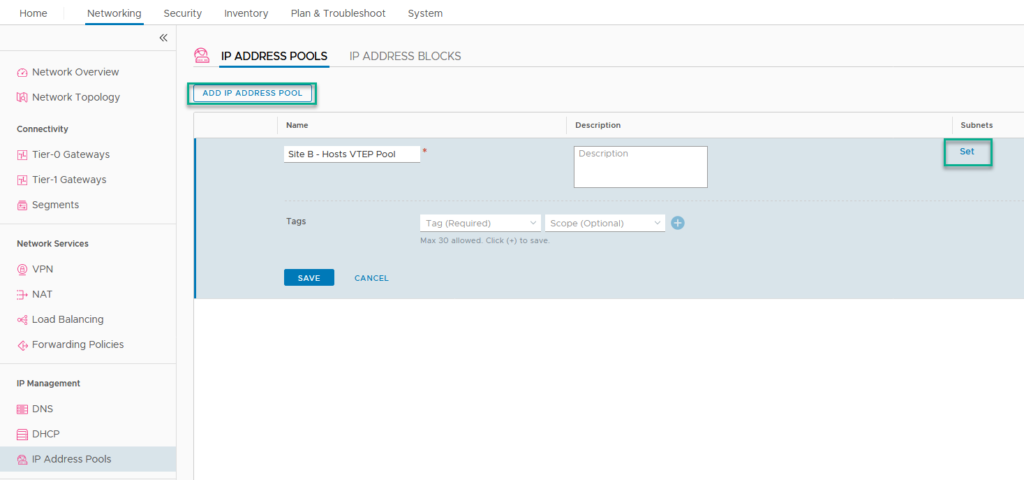
and click on “set” to create an IP Range or Block:
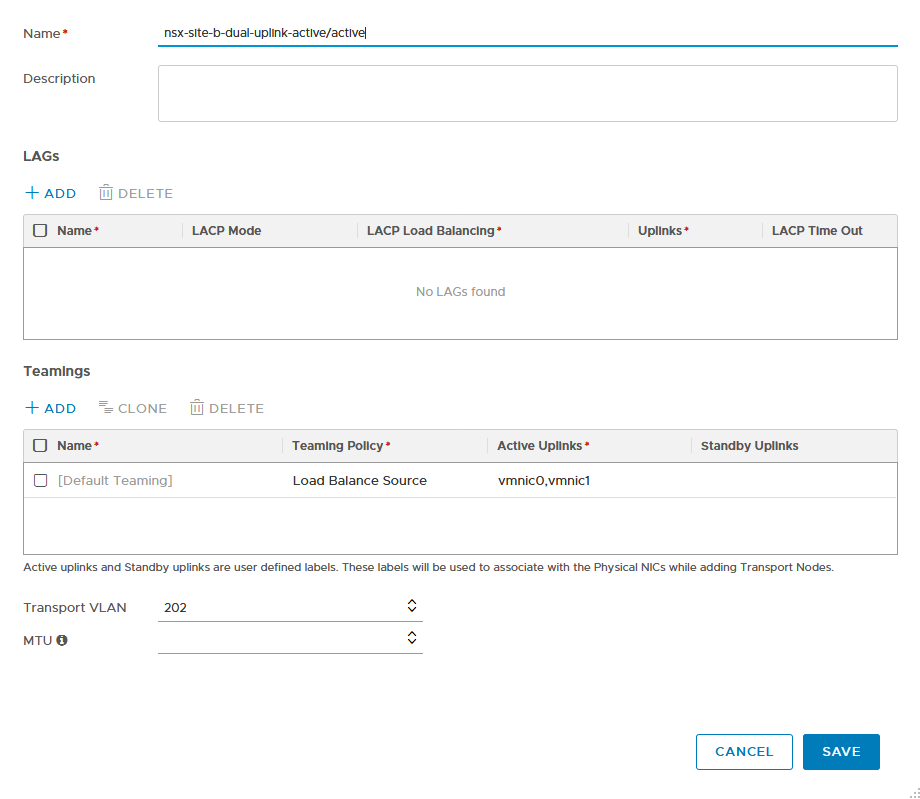
Create Uplink Profile
You can use the existing Uplink Profiles that are already available, but I need to set a different VLAN, so I create my own (under “System | Fabric | Profiles | Uplink Profiles” click ADD):
Create Transport Node Profile
This will create a profile to be used for the transport nodes we are adding. We create them under “System | Fabric | Profiles | Uplink Profiles” click ADD:
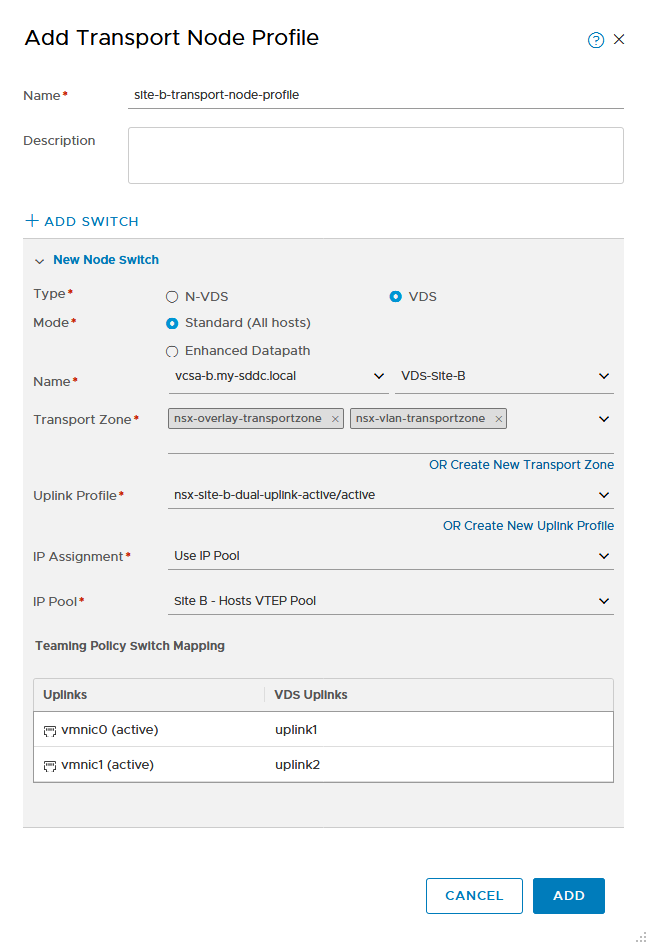
Here it is important to have the VDS upgraded to the right version, otherwise, it will not show up. Also important to have the VDS configured with the right MTU-size, it will give an error when it is not at least 1600 (but 9000 is preferred).
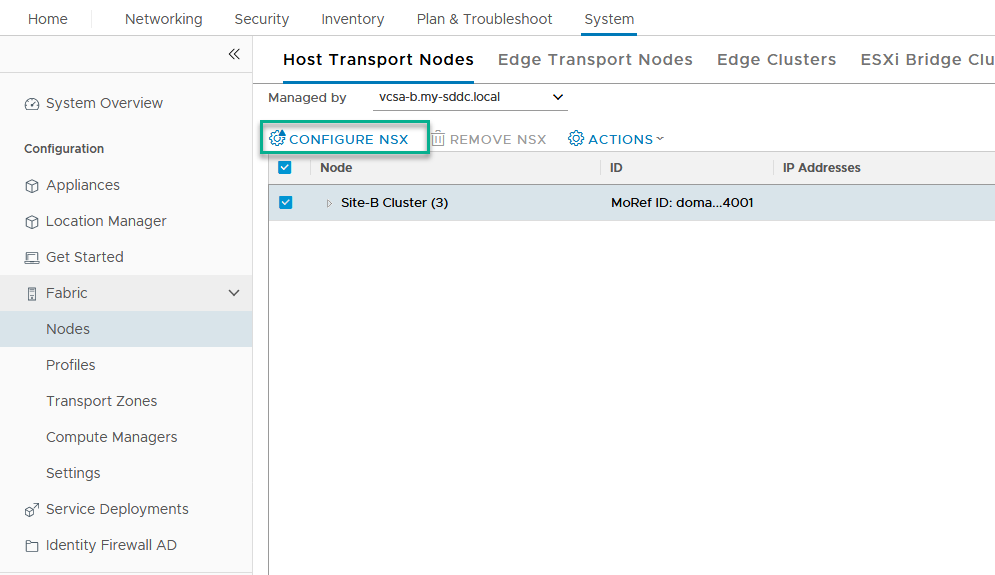
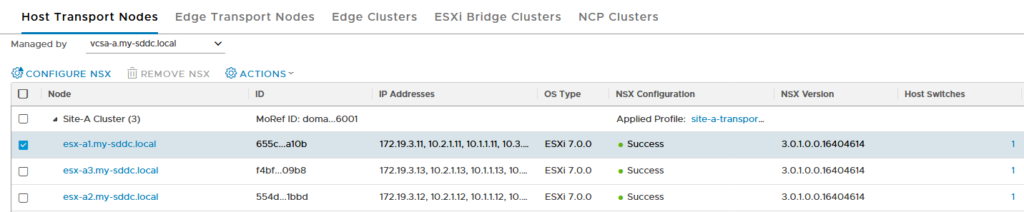
Configure NSX on Transport Nodes
After this is all done, we can go and add ourselves some transport nodes. For that, we go to “System | Fabric | Nodes”, select the correct Compute Manager (we added earlier) and click “Configure NSX”:
and we select the just created transport node profile:
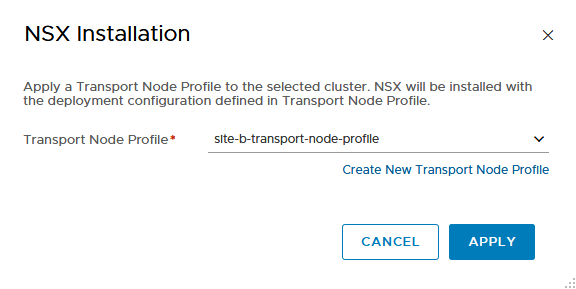
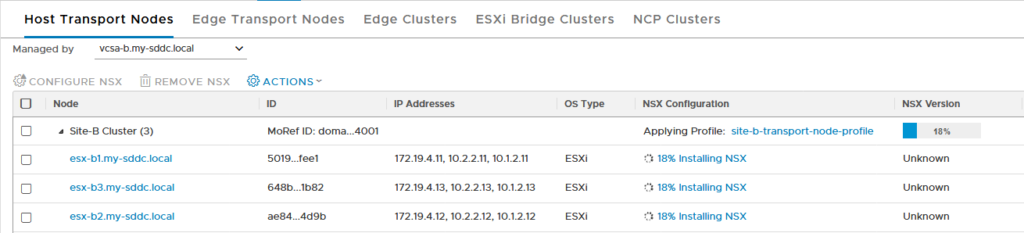
and click Apply. This will start the installation on the hosts:
And, when all is done:
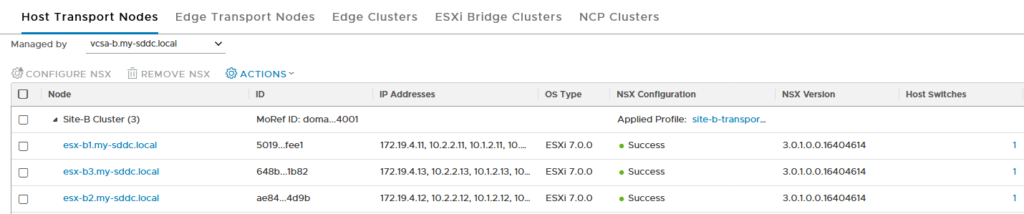
And we do the same for the other site:
And that’s it for the initial configuration. Next up, we are going to create us some virtual networks :).
2 thoughts on “NSX-T 3.0 – Initial Configuration”