Building the lab – vSphere and vSAN
After creating the NSX Managers (Local and Global, see https://my-sddc.net/nsx-t-global-manager-installation-and-initial-setup), and receiving the goods I ordered for the nested hosts, it is time to begin building the basics for the new lab.
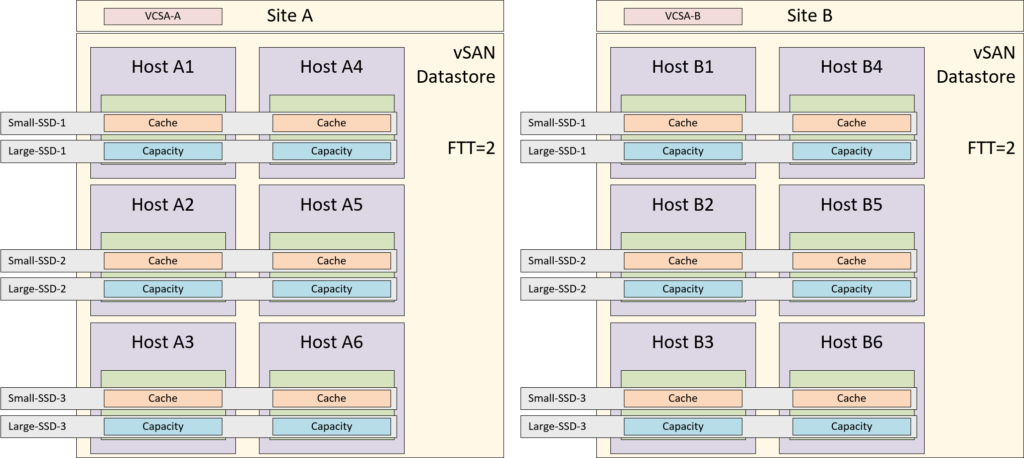
I have the availability of one HP DL380p Gen8, with two processors and 384 GB of memory. Two 450 GB 10K SAS disks for the basic virtual machines (vCenter, NSX-Manager and such) and I added two time three SSD’s. The idea behind this, is that I will create two six-node AF vSphere/vSAN clusters, with cache located on smaller (but more write performance and endurance) SSD’s and the capacity on larger (but less endurance) SSD’s. After some research I chose:
- Cache: HP S700 PRO 256 GB (Datastores named Small-SSD-1 to 3)
- Capacity: Crucial Mx500 2000 GB (Datastores named Large-SSD-1 to 3)
On this I will create two nested hosts, per set of disks. The idea is to create a six-node cluster and use FTT=2 to ensure that we optimize storage usage (through erasure coding and compression & dedeuplication) ánd allow for the failure of one full SSD without data loss.
It looks something like this:
I deployed two new vCenter Servers, on the HDD’s and used enhanced linked mode, to connect them to the already existing vCenter Server. The reason for different vCenters is because it is necessary for NSX-T to have a separate compute manager (because one vCenter Server can only be linked to one NSX-T Manager). And it also gives me the ability to (maybe) check out SRM in the future (something I have always been interested in).
Of course, I also changed the certificate for the VCSA’s and had them signed from my own CA, so no message of security problems here ;). I did the same for the NSX-T Managers by the way.
One other thing I did was make sure the configuration for all entities (VCSA’s and NSX-T Managers) is properly backed up to my Synology NAS, because I chose to use a RAID-0 on the two physical disks, to maximize size.
For networking, I have two physical interfaces connected and on them, I put multiple VLAN’s on my physical switch and tagged them to my host. Per site, I have the following VLAN’s (for now), put on the wire:
- Management
- vSAN
- vMotion
- (and some NSX-T VLAN’s for later)
The vMotion and vSAN VLAN’s are not going to be used on the physical wire, but I expect they need to exist, even for “in-host” traffic.
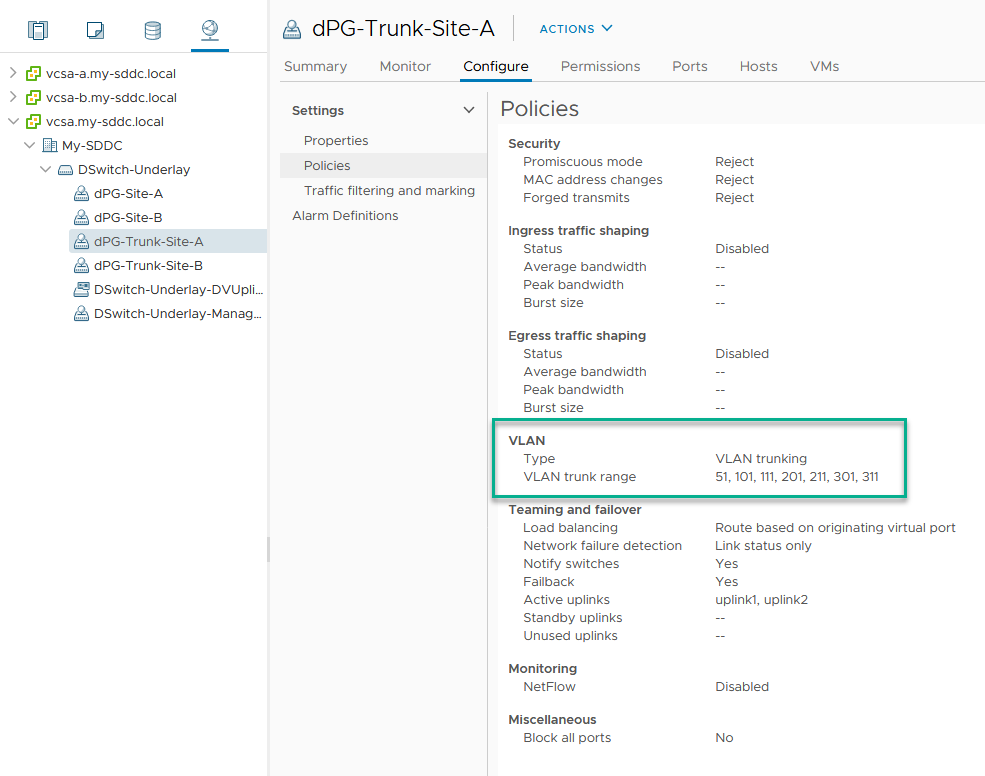
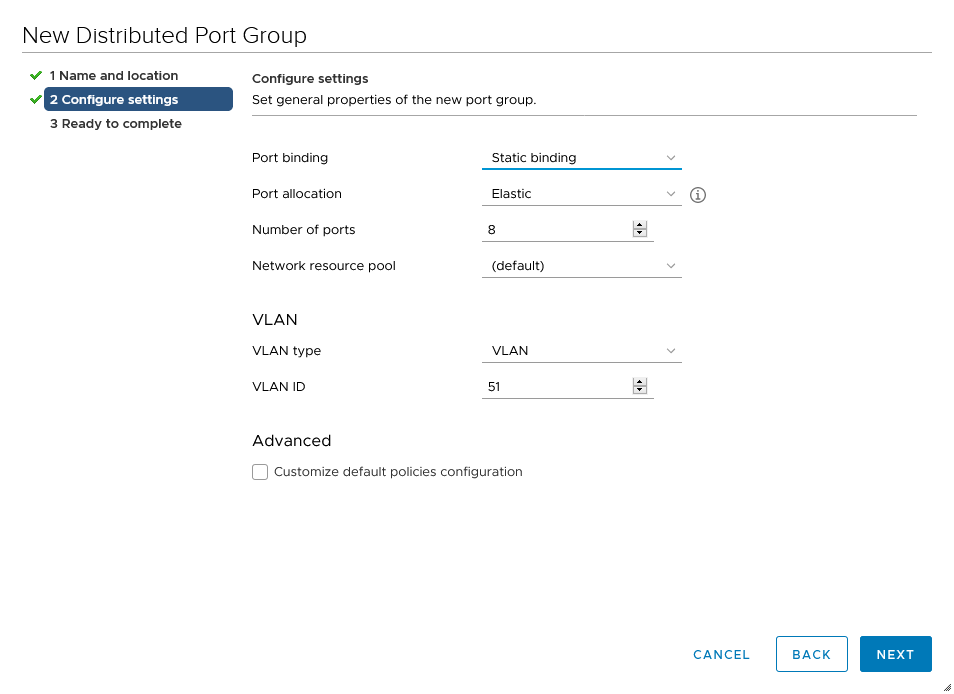
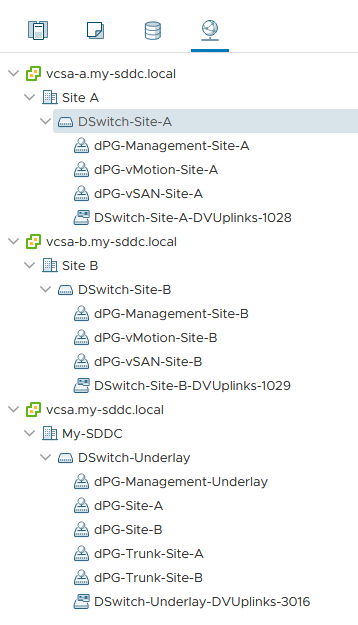
For this I created one distributed switch and attached the physical host to it. I created one distributed port group per Site and put the relevant VLAN’s on it:
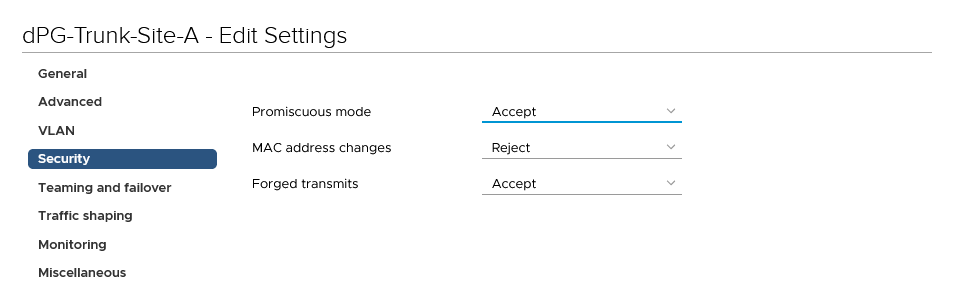
Important to note is that it is necessary to allow Promiscuous mode and Forged transmits on the port groups, because we are nesting hosts:
After all this is done, and the SSD’s have been places (all but one, which will come later today ;)), it is time to deploy some nested hosts. I use the William Lam repository for this, through the use of Content Libraries (can’t thank him enough for all the work he puts into this (and more)):
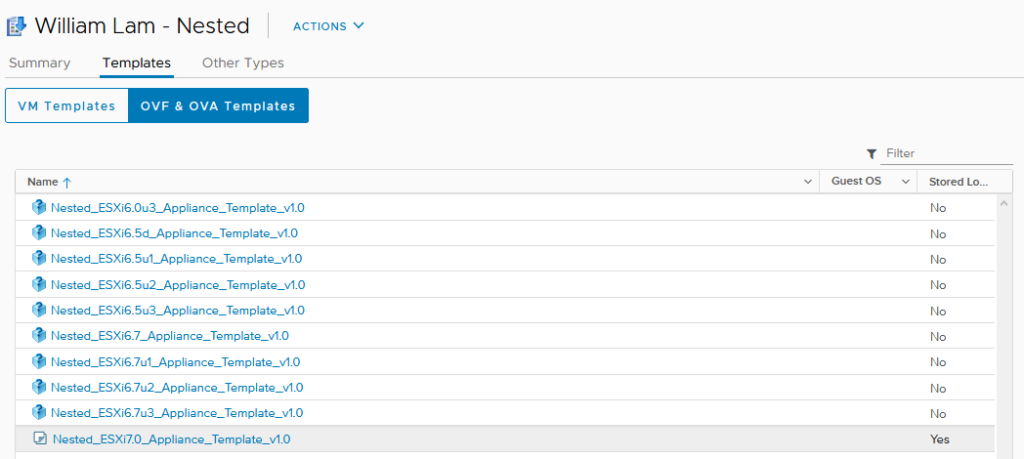
For now, the only downloaded ova, is the ESXi 7.0 one. That’s the one we are deploying.
So we deploy our hosts, as a new virtual machine from above OVA-template:

I’ll skip the wizard and just show the result:
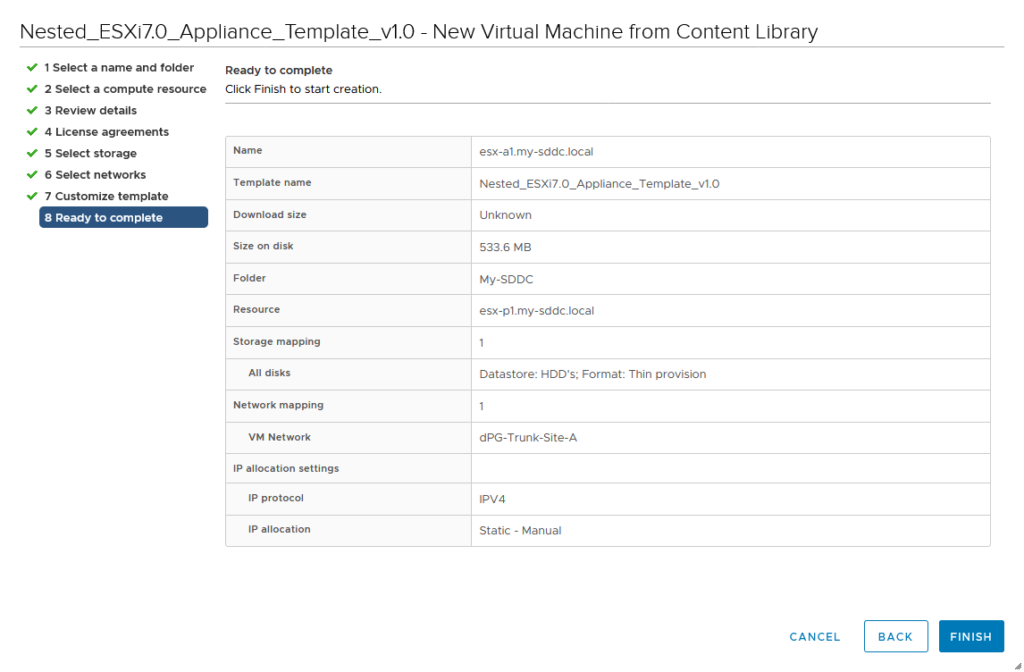
After the virtual machine has been deployed, I am going to do some adjustments, before powering on for the first time. First of all, I am going to place the disks on the required datastores. That is not a change you can do on the existing disks, so we need to remove the existing disk (2 and 3) and re-add them:
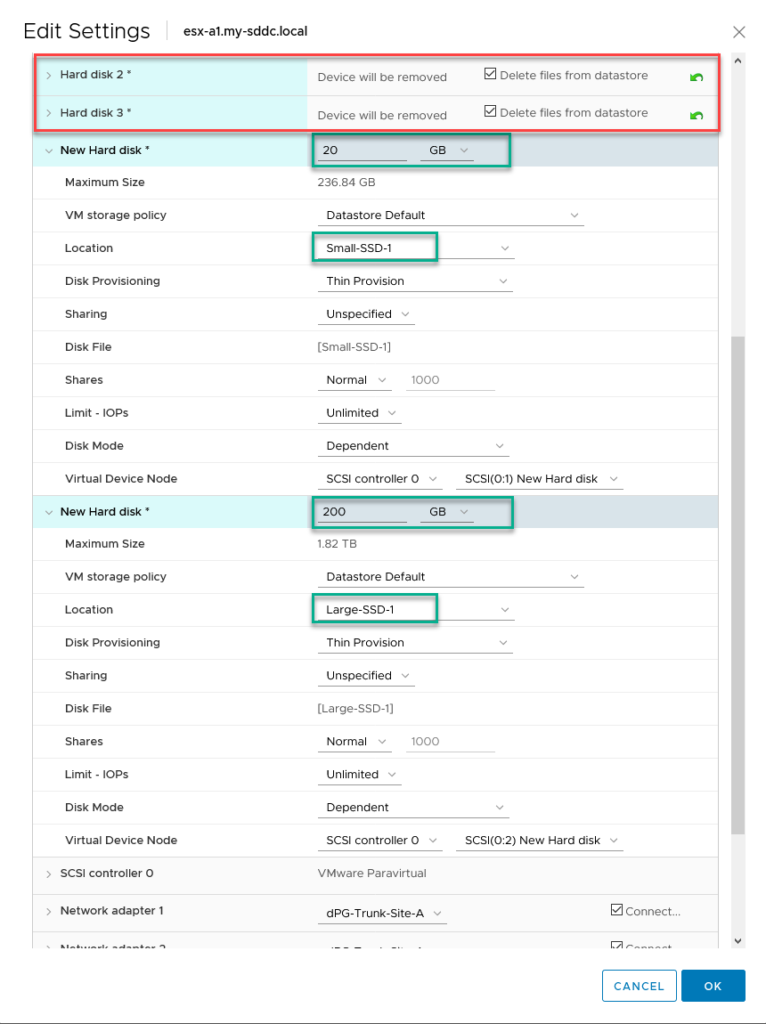
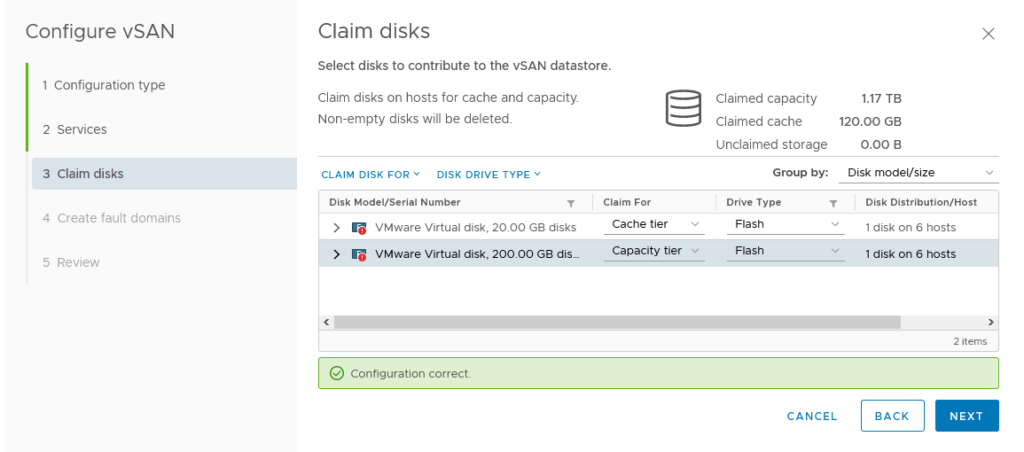
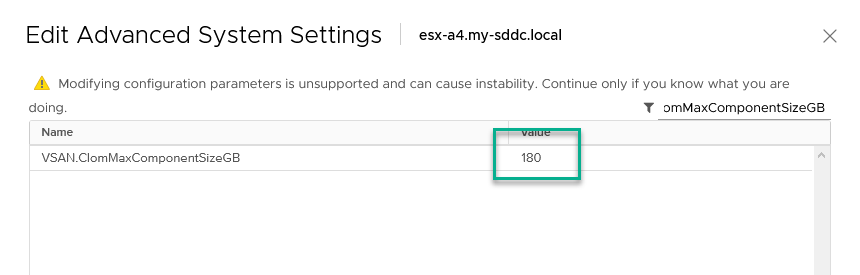
As you can see, I choose to go for a 20 GB cache and a 200 GB capacity disk per host. This way I can tune the VSAN.ClomMaxComponentSizeGB (see https://cormachogan.com/2015/12/07/vsan-clommaxcomponentsizegb-explained/) down to 180 GB, which will make sure my components won’t get too large. In theory, this would mean that I can place 10 hosts per “disk set” and since each cluster contains 2 hosts per disk set, it means I have space for 5 clusters at full capacity.
Second thing I’ll change is the amount of memory (32 GB) and the processor config. The latter has to do with the licensing. I have limited hypervisor licenses, so I will only deploy one processor hosts, but with multiple (4) cores per system, I can still run 4 vCPU virtual machines on them, if needed.
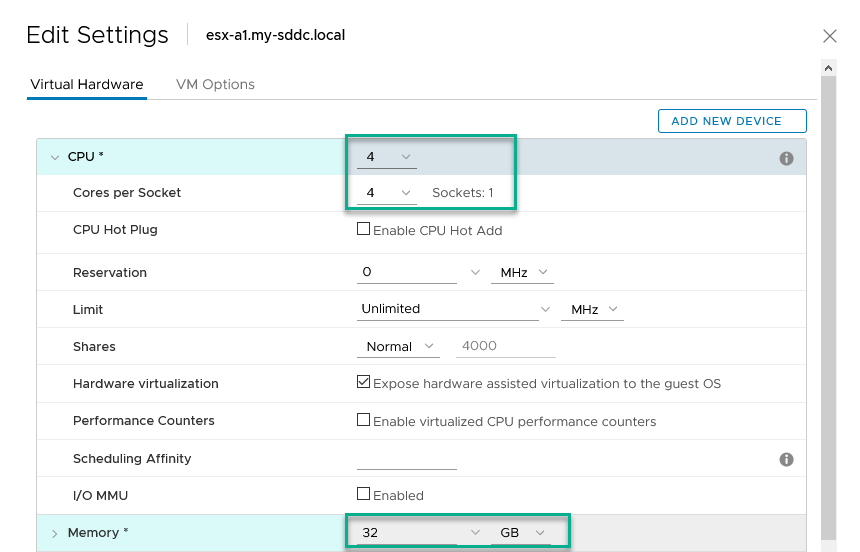
I’ll probably be massively overcommitting on memory (32 x 12 = 384 GB, but I have some other stuff running on the physical box as well, like a couple of NSX-T Managers and VCSA’s), but I expect memory management to handle that without too much issue.
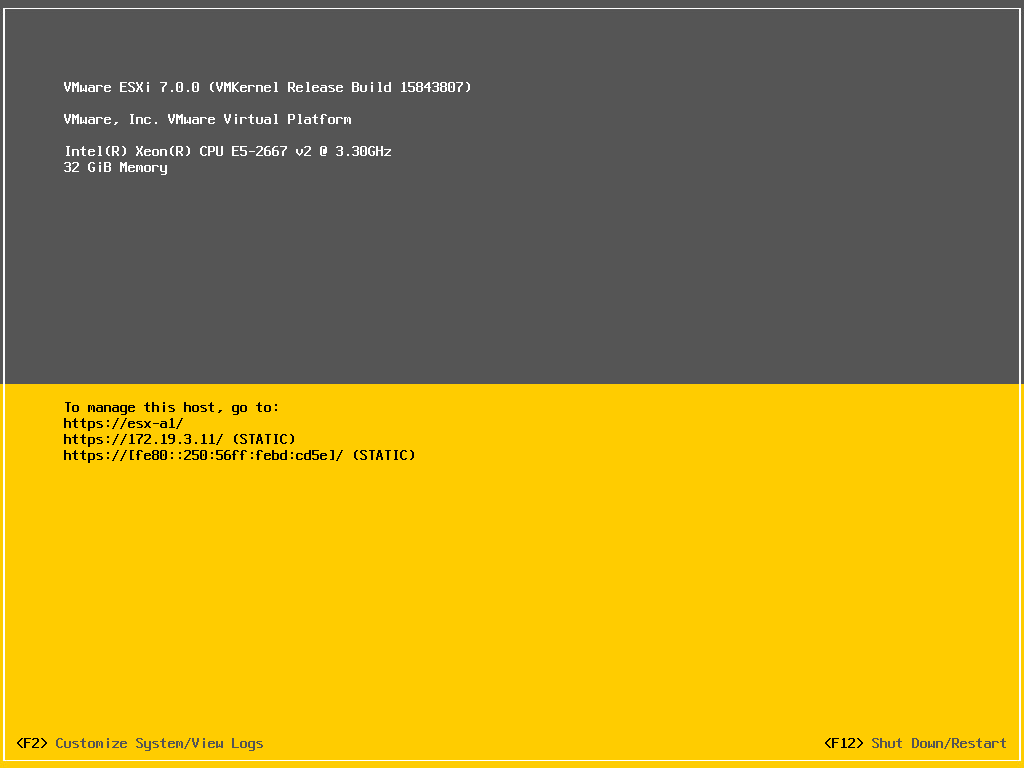
After all this has been changed, we can power up the host:
With one of the virtual machines deployed, I go into clone mode, not to have to do everything multiple times. One fun thing about deploying it in this way is that while cloning, I can change the host-specific settings, like name and IP-address:
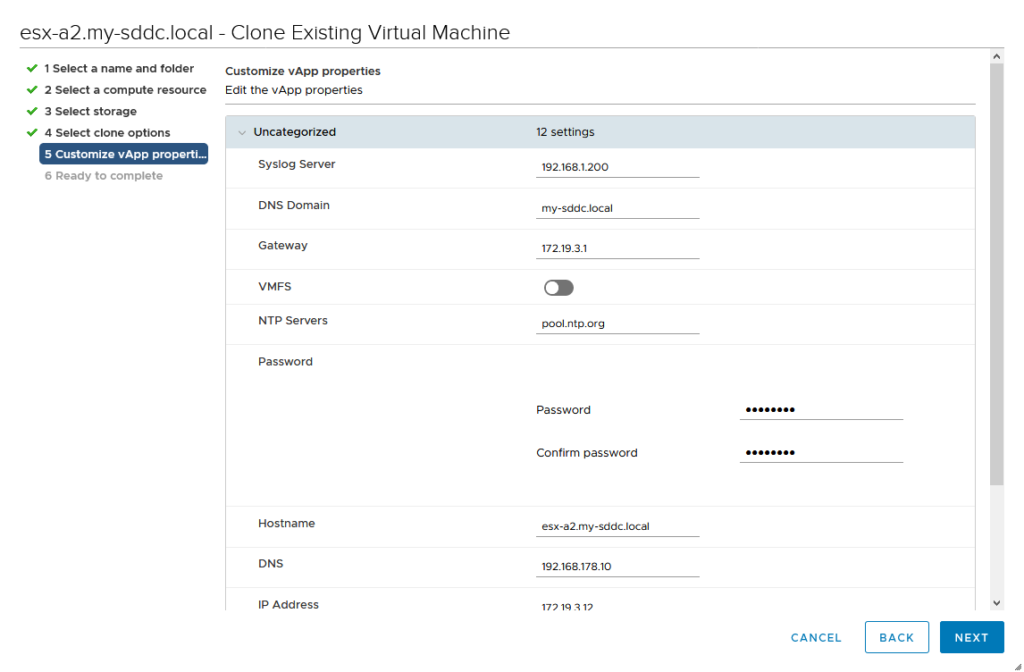
And keep the rest as it is.
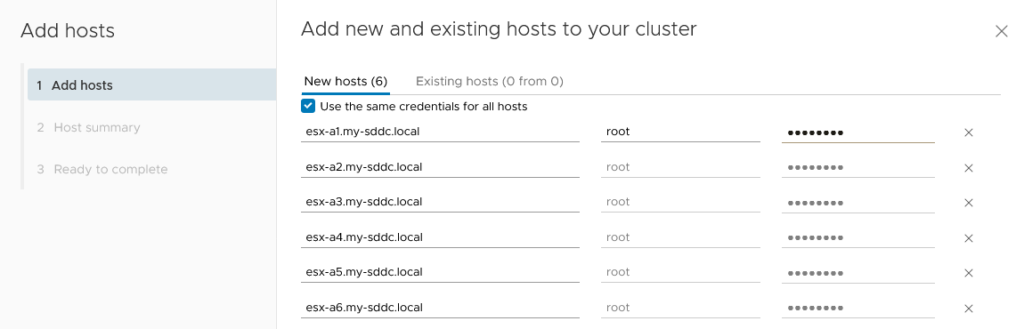
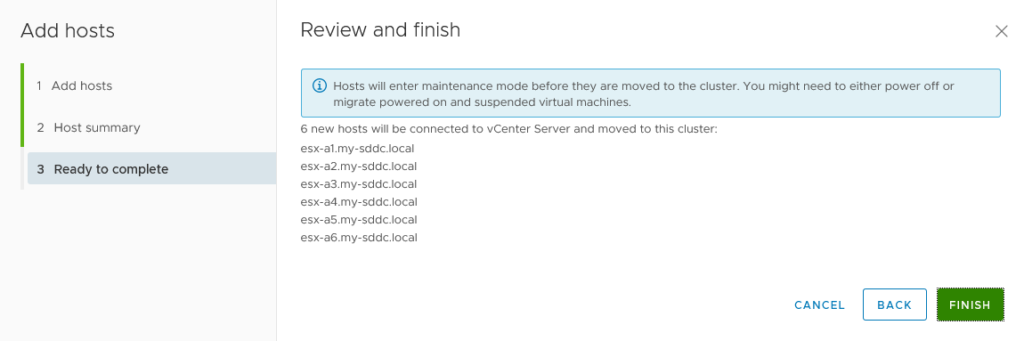
After all hosts in Site A have been deployed, add it to it’s respective vCenter Server:
From this point on, I am going to use “Cluster quickstart”. It is something that has been around for a while, but I never really used it in customers environments.
I start with creating one Distributed Switch (named for the Cluster) and assign both uplinks to it:

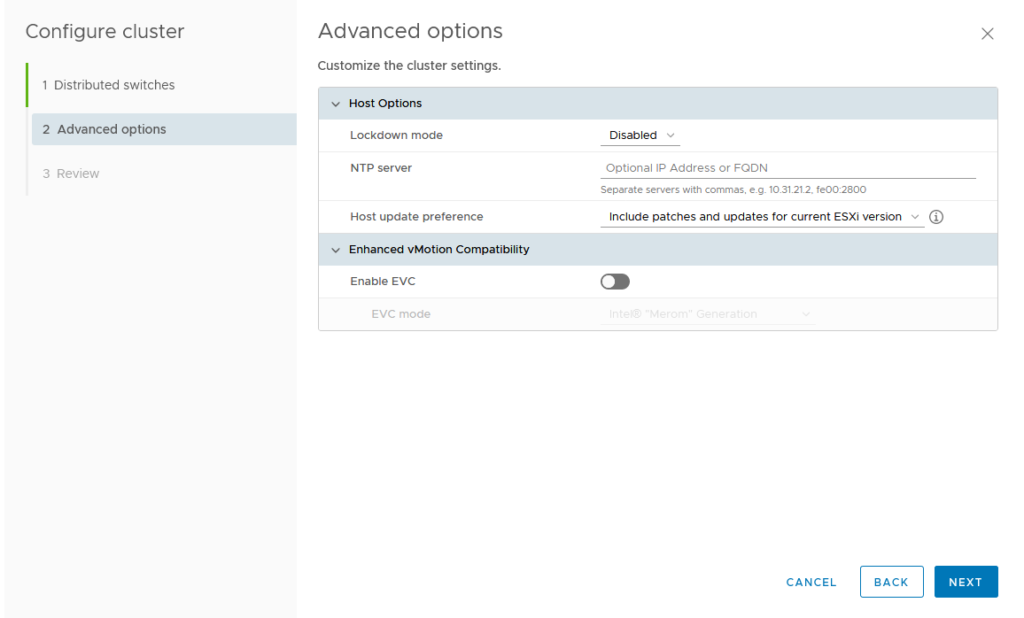
Then some additional settings:
and the review (which I will not post here, you get the gist of it ;)).
After the first task has been completed, we start with the next step, configuring vSAN for the cluster. First step, configure a vSAN interface for all hosts. Create a new Port Group:
And create a vSAN interface connected to this port group (It used to be possible to do this for all connected hosts, at once, but that option is not available in my lab).
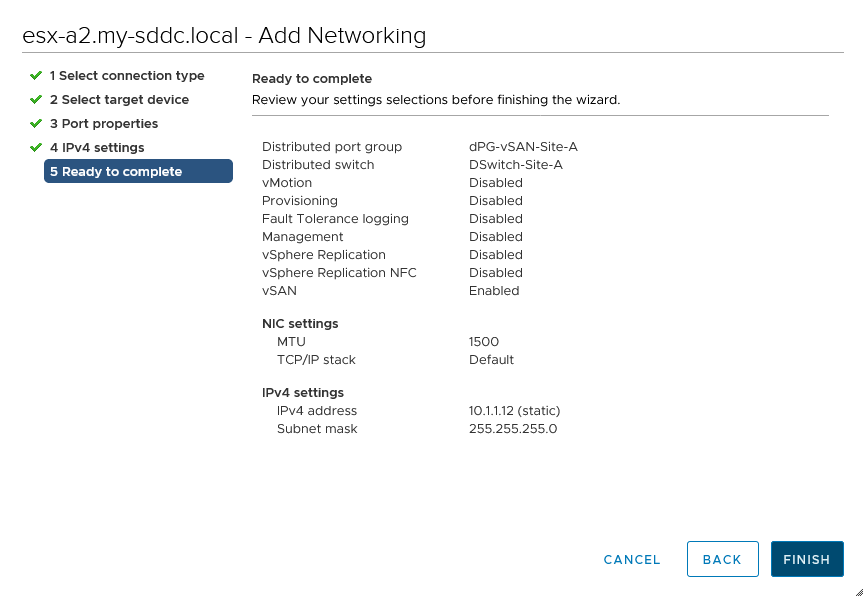
After doing this on all hosts, I have all things I need to create a vSAN datastore. In the meantime I also created a vMotion interface in the same manner.
A Single site cluster:
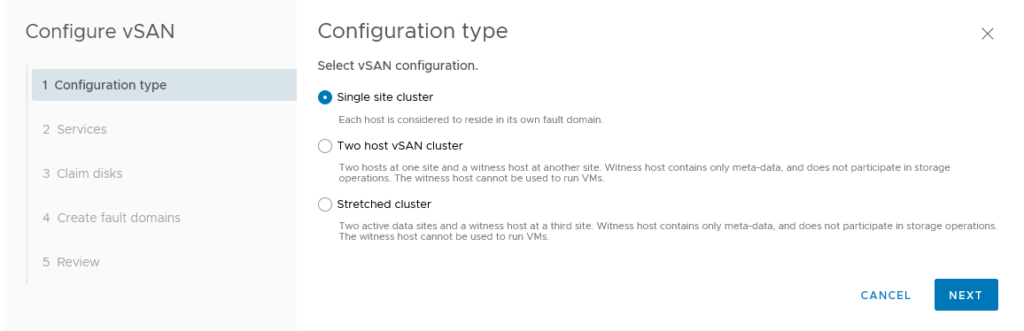

and claim the disks for their respective functionality:
(and not creating any fault domains).
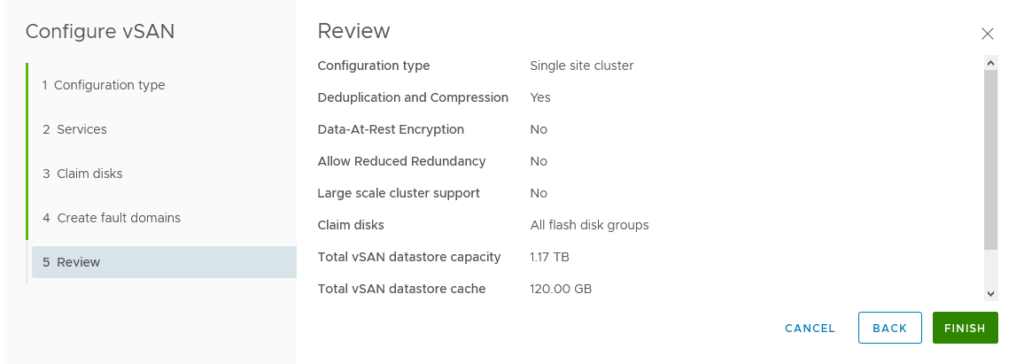

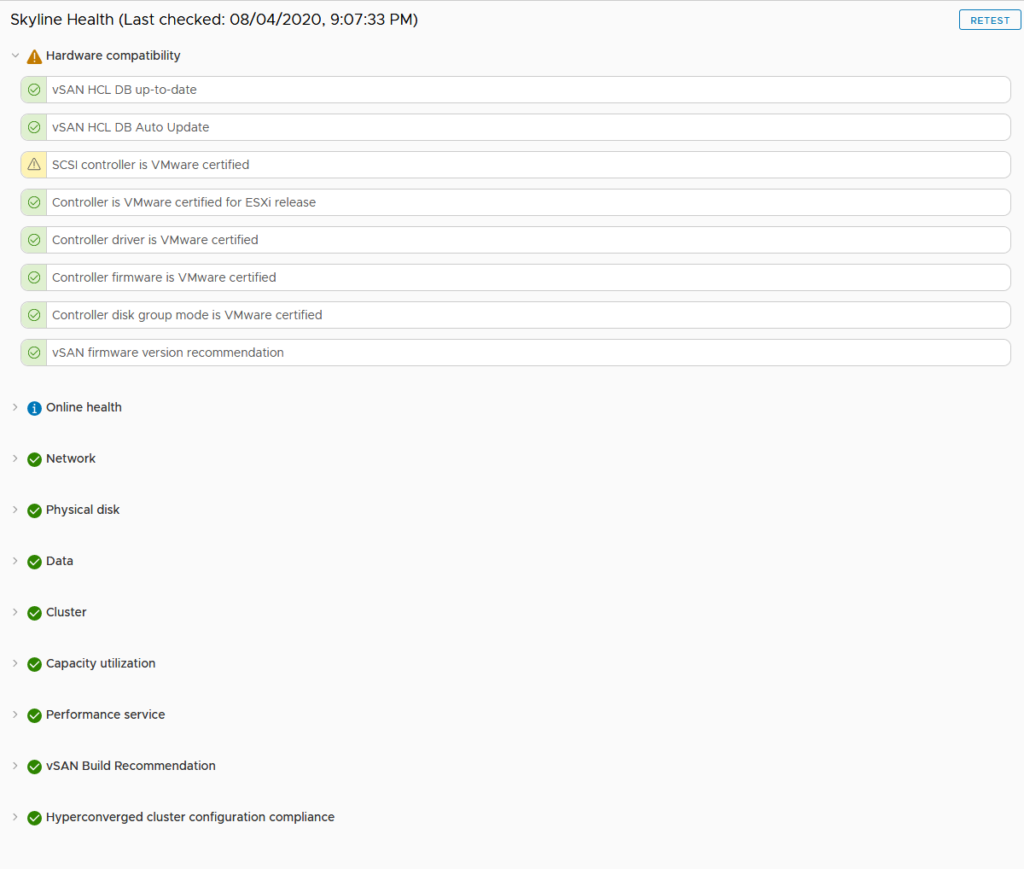
And all is well, except for one thing, which was expected:
And after all this, we are going to do the same for Site B. This time I used Quickstart for the configuration of vSAN as well and I must say, I am impressed with the simplicity of this. Kudo’s to the makers.
After all this configuration, we can change the vSAN max component size (like described before) for both clusters:
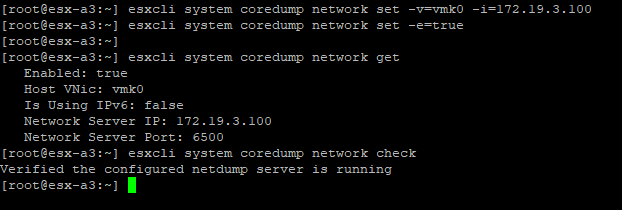
Last thing to do for now, is enable core dump collection. First we enable it on the vCenter server (and making sure it starts after a reboot):
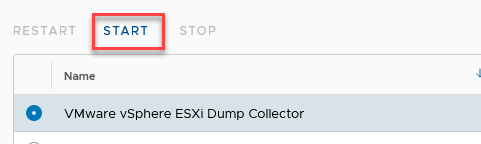

And then we configure each host to use it’s own vCenter Server as a dump collector target:
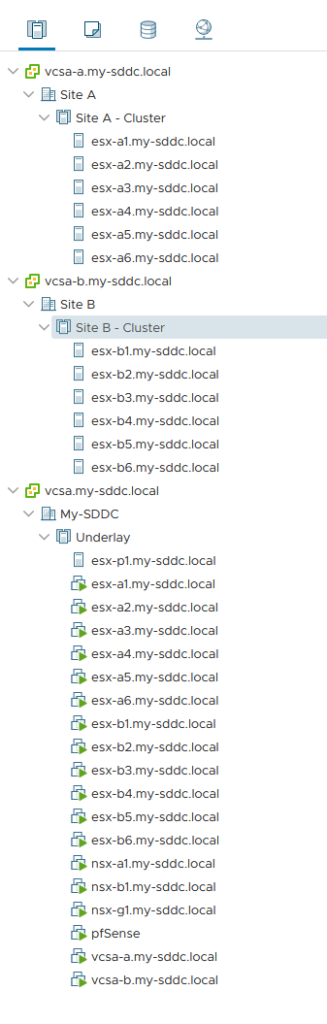
That’s it for now. Next up, networking with NSX-T. The current config:

By the way, the networking throughput on this nested config is not too shabby ;):

One thought on “Building the lab – vSphere and vSAN”