NSX-T 2.4 – Setup (1) – Transport Nodes
So, as you might know, I work for a company called PQR (www.pqr.com). Within PQR it is important for us to be able to show our customers all the functionality that they might be interested in, before implementing it themselves. This started of with something called the PQR Experience Center (or PEC for short), which was mainly focussed on the workspace part of IT.
In it, we are able to show customers how they can use workspace components within their environment. If they want to know how a specific application would perform on NVidia Grid cards, without actually purchasing them, they can try it out in the PEC.
After the huge success of the PEC on the workspace part, we have also added an SDDC part to our PEC. In it, we can show SDDC-related functionality to our customers. My role in this is that I set up the PEC on a couple of physical servers and create multiple nested environments to show the (mainly) VMware products to customers. We have also leveraged the PEC when doing demos on stage, for instance on the NLVMUG last year and on vNSTechCon, last september.
Because of the flexibility of this environment, it is easy to add a new NSX-T (nested) environment to our PEC and that is what I did. This post describes the way this is set-up.
Basics
So I started of with a new environment, consisting of one vCenter Server and four hosts. The hosts are installed based on the efforts of William Lam, which I owe a huge debt of gratitude to. It is very easy to role out a new environment. Check out https://www.virtuallyghetto.com/2018/04/nested-esxi-6-7-virtual-appliance-updates.html if you are interested.
In order to connect your hosts to the NSX-T network, you need the following items:
- N-VDS
- Transport Zone(s)
- Transport Node Profile
- Uplink Profile
- Underlay-network
N-VDS
N-VDS is a new construct which comes with NSX-T. It is like a distributed switch within vSphere, but managed entirely through NSX-T. Because of the fact that NSX-T supports multiple entities, like hypervisors, clouds and so on, it was necessary to use a construct that was not bound to vSphere. So an N-VDS can be created and connected to ESXi hosts, KVM-hosts, bare-metal servers and clouds.
N-VDS’s use uplinks to connect to the physical world. The creation of an N-VDS is done when creating a Transport Zone and the name cannot be changed afterwards (or at least I have not found a way yet).
Transport Zones
Transport Zones are like they are in NSX-V, boundaries for Logical Switches (Segments).
A Transport Zone can contain segments (overlay or vlan) and nodes connected to that transport zone can use the segments that belong to that transport zone.
Transport Zones come in two flavors. Overlay and VLAN.
You can create an Overlay transport zone, which will be based on overlaying (duh). This is comparable to the Transport Zones you create in NSX-V, which will contain logical switches (in NSX-T, starting with version 2.4, they are called Segments).
The second flavor is a VLAN-based transport zone. That way you can leverage VLAN-tagging on the underlying (physical( network, as you would with any normal port group within vSphere. This construct was added because with NSX-T you can’t microsegment virtual machines (or other entities) if they are not connected to an N-VDS.
I created two transport zones. One Overlay and one VLAN-based Transport Zone and I added them all to the same N-VDS (which is called NVDS-Overlay (yeah I know, that could have been named better ;)).
You connect the Transport-Zone to an N-VDS and that connection cannot be changed.
Transport Node Profile (only when using vCenter Server)
This describes the manner in which the Transport Node (host) will be connected to the NSX-T network. In it, you can define the connected Transport Zones, N-VDS’s and the profiles used to connect the transport nodes (host) to the physical network.
As you can see, in this profile it is possible to determine the method of how to connect to the physical network. It is possible to add multiple N-VDS’s, with each it’s own configuration.
This is only used when connecting a cluster within vCenter to NSX-T, in order to create a consistent configuration. When adding stand-alone hosts, this profile is not used.
IP Assignment and IP Pool
This is used to define the way in which the Tunnel EndPoints (TEP) get their IP-address. I have chosen to use IP pool for this, since there is no DHCP present in the network in which the TEP’s are connected.
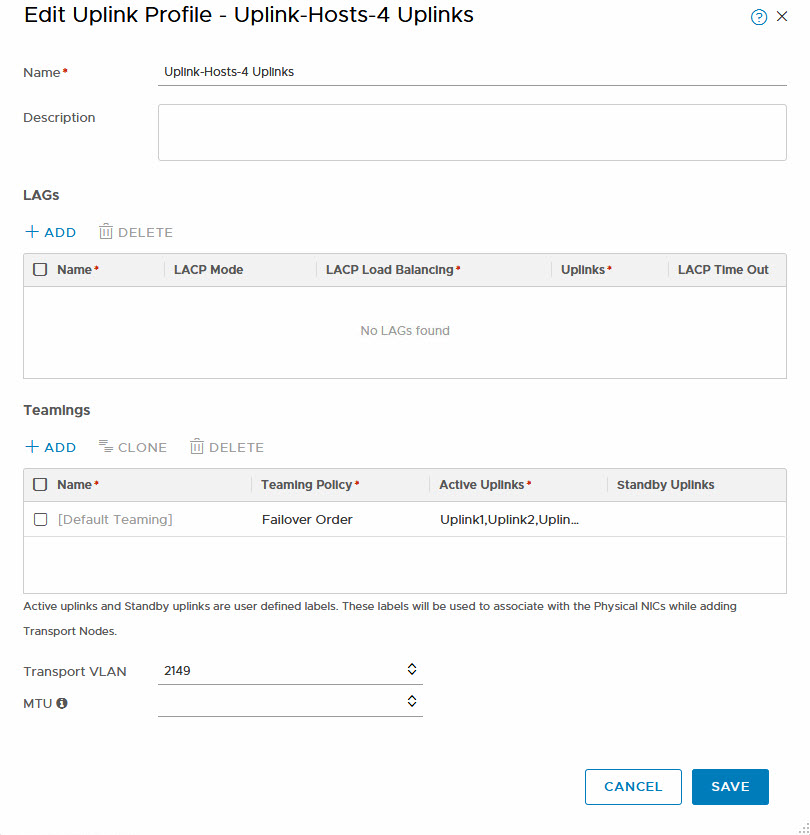
Uplink Profile
This is used to determine in which way the hosts are connected to the physical network. Select the number of uplinks, the teaming policy (Failover or Load Balancing) and the transport VLAN. MTU size will default to 1600, but it is possible to change that as well:
So after all this is done, it is time to connect the hosts to the NSX-T network. Originally I connected four hosts, now I am adding a fifth, but this one is not connected to a vCenter Server, but created as stand-alone, to demonstrate that it is not necessary to be connected to a vCenter Server to use NSX-T. I might connect the host later on, but for now, this seems like a nice opportunity to test the independence of vCenter, when it comes to NSX-T.
The first four hosts were called nsx-t-aX (with X being a number from 1 to 4), this one is called nsx-t-b1. I did have to update it to the proper ESXi build, since there are some requirements for NSX-T 2.4:

Adding node to NSX-T
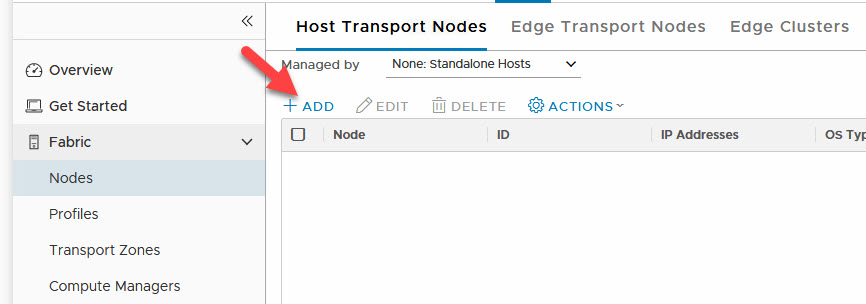
After this is checked, we can add add a node to NSX-T, through the Host Transport Nodes page, under System | Fabric | Nodes:
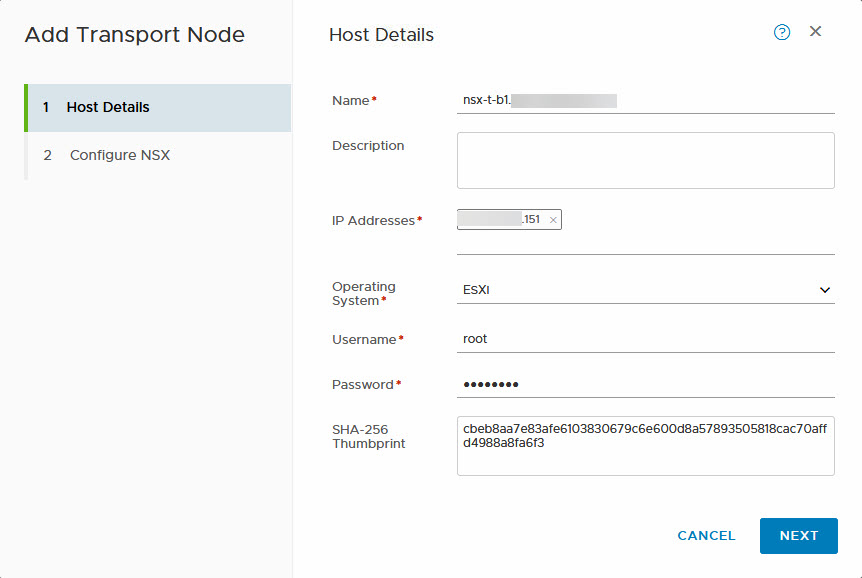
After that, the wizard will help us add the transport node to NSX-T:
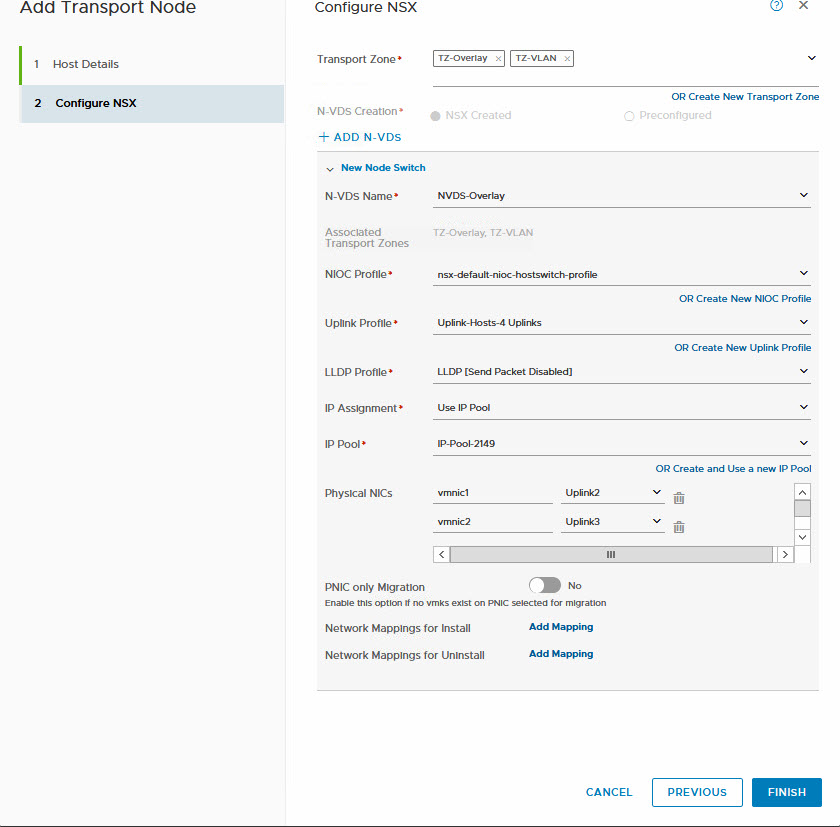
And it will start installation and configuration at this point:

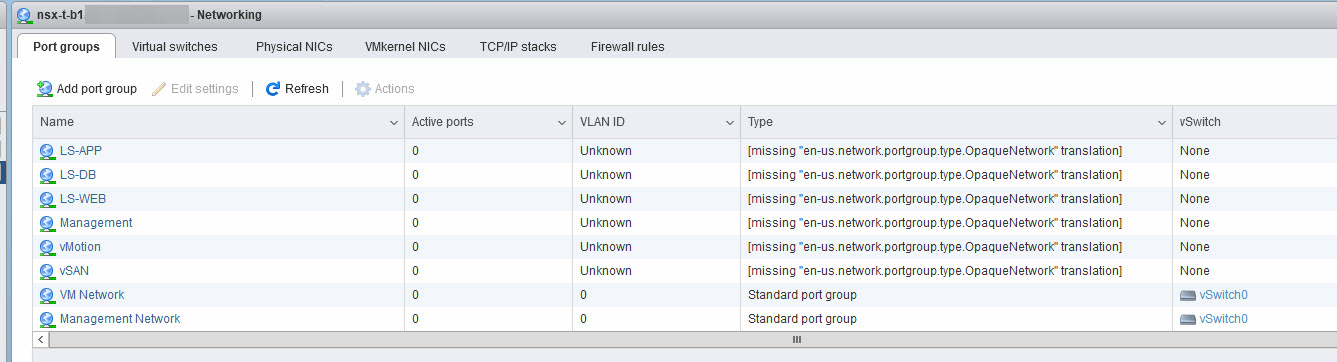
And after this, all is well and all associated networks are available to the host, albeit with an error in the host-based interface:
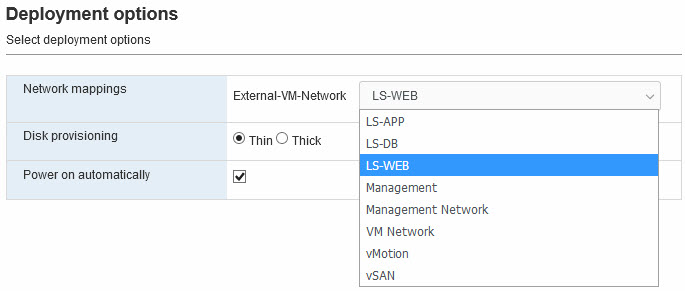
But when I deploy a new virtual machine, to an overlay-based network, I can:
Also, when powering on the virtual machine and giving it a correct IP-configuration , I can ping the rest of the network. Switched and routed:
web-server in the same subnet (other host):
gateway (dr-instance on same host):

app-server in different subnet (other host):

physical windows server (through north-south routing):

I chose to change the existing networking connections during the installation, but if you don’t want to, you can migrate vmkernel ports afterwards. I did write another blog about that: Migrating from Standard Switch to NVDS with NSX-T 2.4.
Next time I will write a blog about routing, since that has seen some major changes from V to T. Enough to make your head spin :).
5 thoughts on “NSX-T 2.4 – Setup (1) – Transport Nodes”
Curious. how were you able to do N-S without adding Service Router?
The reason routing continues to work is because the logical switches are VLAN-backed even though they are now in NSX-T on the N-VDS. So, the routing is taking place on the “underlay” network.
That could also be an explanation, but in this case it was an (already configured) T0 and Overlay-segments. The creation of those parts was not part of this blog though.
I was using Overlay-based logical switches (or segments), and I was using an (already configured) T0, connected to the segments The creation of the T0 (and the creation of the segments, for that matter), was not part of this blog. No dynamic routing at this stage, just plain old static routes configured on the T0. So the SR is already there, as part of the T0.