Microsegmentation with NSX-T (part 1: methodology)
After a number of blogs on network-virtualization, I thought it was time to start writing some blogs on another of the major three use cases: Security, through micro-segmentation. In my line of work most organizations where I implement NSX (first V and now T) are primarily interested in the security aspects of the product. In my presentations on NSX I usually use two pictures to show what security is like in most traditional environments. It looks something like this:

(for the people interested, this is Bodiam Castle in England).
A castle with thick walls, a moat and possibly a drawbridge (not in this picture, though), representing a perimeter firewall. A method to keep the bad guys out, at all cost, through determining which traffic is allowed in and out, and which traffic is not. Also (since the arrival of the Next Generation FireWall (NGFW)) it can look ínto the traffic coming in to the castle, to see if it is not (for instance) a horse filled with enemy soldiers (trojan).
But when the bad guys outsmart the good guys, eg. they find a way in, maybe through one of the weaknesses of the people living inside the castle, all the treasures are up for grabs and the jewelry from the lord and lady of the manor could be stolen. Not something you want to have happened, as Chief Medieval Security Officer…
The “desired” state would be something like this:
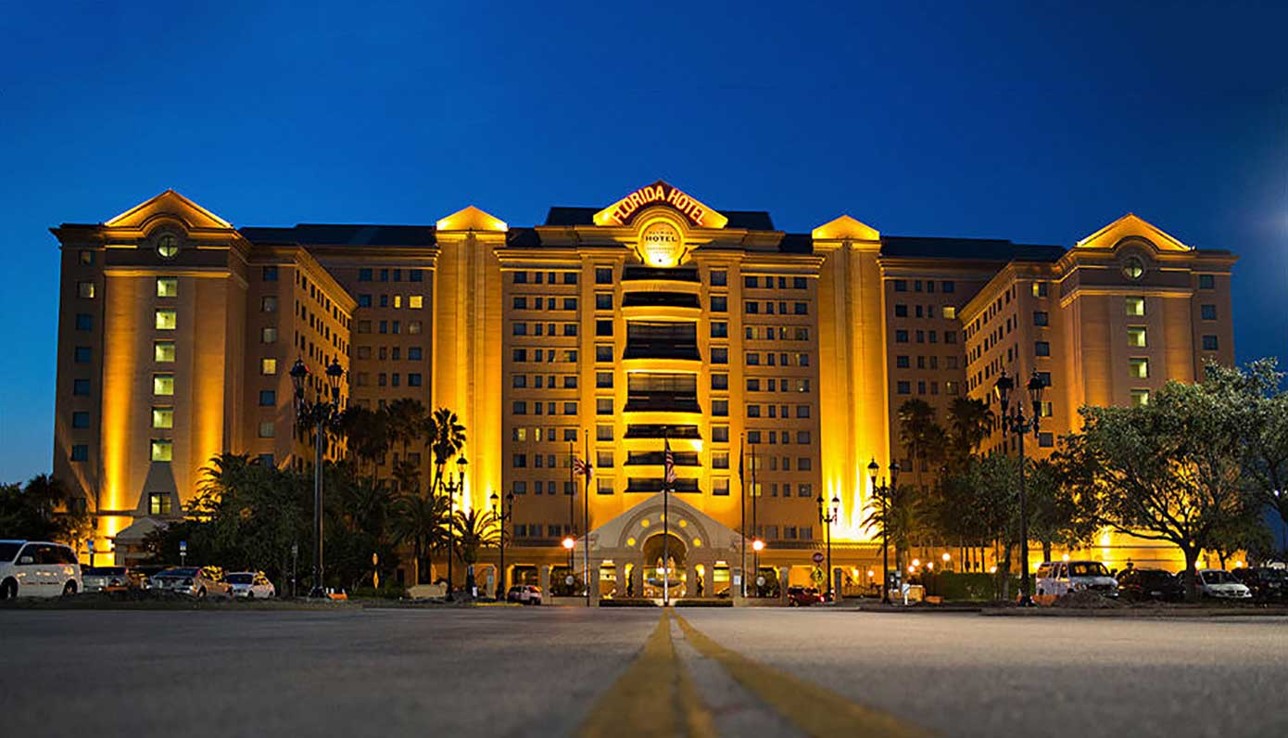
(Florida hotel in Orlando), where everyone is welcome in the lobby, but each of the chambers is protected from unwanted access. And only if you have the correct key-card, are you allowed into your own chamber. But you are not allowed to enter the chamber next-door or the chamber across the hall. You are only allowed access to the place that you need access to. Let’s call it “Zero Trust” (off course, not my own finding ;)).
And NSX is able to help organizations accomplish this latter model.
Because of the virtual networking, which is done in the kernel of the hypervisor or (with NSX-T) is passing trough the N-VDS on bare-metal or cloud-based virtual machines, we can define granular rules on which traffic is allowed and which traffic should be blocked.
Methodology
With NSX implementations I often use a method of setting up security within an organization as a growth model. Don’t attempt to start your micro-segmentation journey by creating a set of rules for each virtual machine individually. Also don’t (as a first step) try to only allow traffic from one virtual machine to another, that is necessary. Basically, don’t run before you know how to walk.
I use a phased approach to help organizations micro-segment their virtual machines. Start with larger chunks and work your way towards more granularity. Using the following steps:
- Define and secure environments
- This includes Emergency rules, Systems Management rules and rules for Infrastructure traffic.
- Define and secure inter-application traffic
- Define and secure intra-application traffic
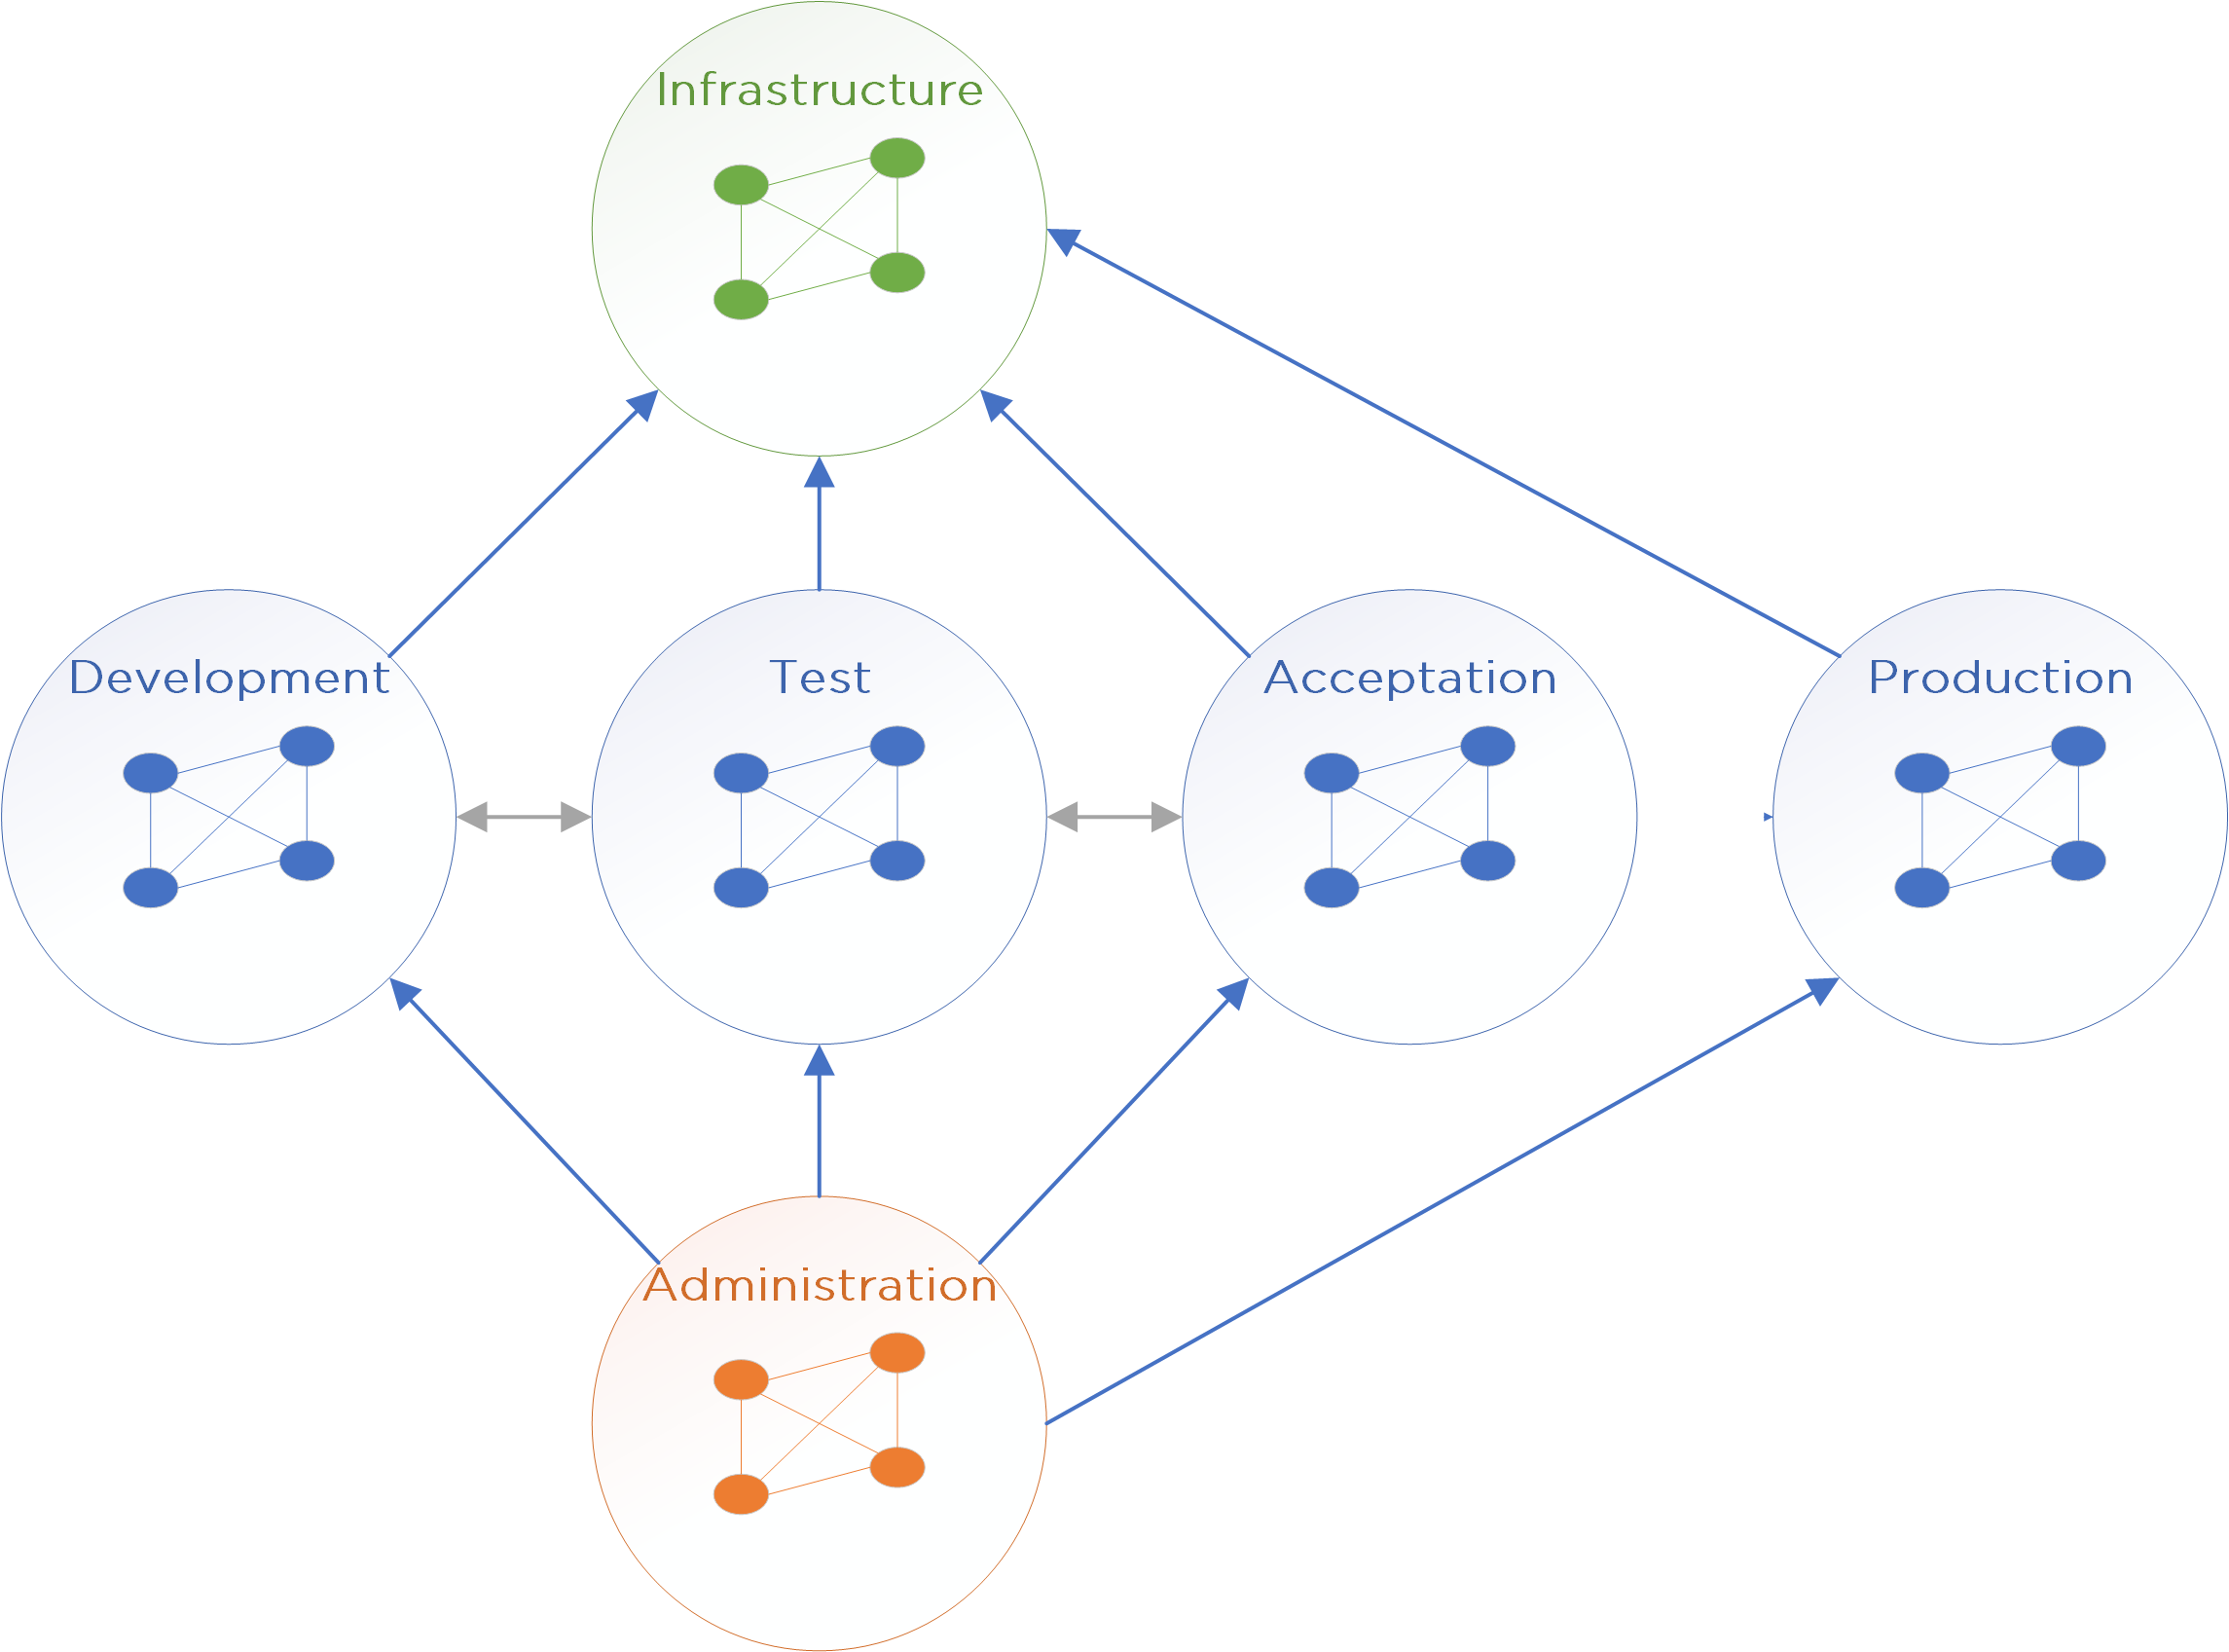
Step 1: Define and secure environments
In order to accomplish this with I usually start with defining Environments. Say something simple like:
- Test
- Development
- Acceptation
- Production
In the Netherlands we call this OTAP (Ontwikkel, Test, Acceptatie, Productie) and it is a method of dividing the environment that is used in most (larger) organizations, so it is also very useful when we talk about securing workloads. Often the organization already has a means of defining which virtual machine belongs to which environment, so setting up all virtual machines into one of these groups is pretty simple.
There is however one more group that is used within almost all organizations and that deserves it’s own group: Infrastructure. There usually is only one set of machines that service DNS, AD and NTP (and/or other infrastructure functions) to all environments alike.
Often one additional group is added, called “Management” when there is a separation along those lines. Sometimes organizations have multiple groups within aforementioned groups, so Production might be split up into multiple smaller groups.
However the division, the method can be applied (almost) anywhere. So divide your virtual (and physical) machines into environments and define that no traffic is to be go across environments unless it is necessary.
And, just for safety reasons, I always start of with two rules, that have top-priority and which can be used in case of an emergency. A rule that allows all access to members of a certain group and a rule that blocks all access to members of a certain group. The first rule gives you a very quick way to make sure the DFW is not in the way of traffic, so if a problem occurs, you can leverage this. The second one is a method to quickly quarantine a virtual machine, by cutting of all traffic to and from that virtual machine, for instance in case of a virus or ransomware attack.
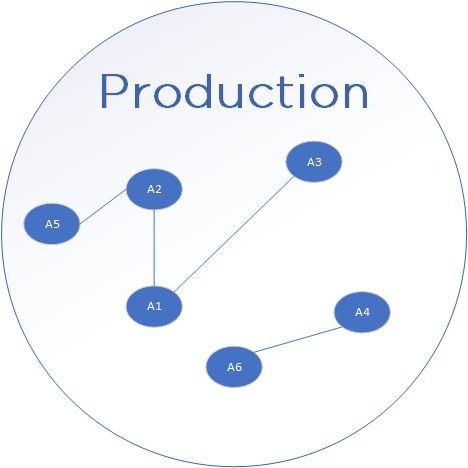
Step 2: Define and secure inter-application traffic
When you start of with defining rules based on environments and your are happy that all traffic between environments is correctly defined, the next step would be to look at applications.
First define an application as a whole and define which virtual machines are part of your application. When you have done this, you can define that all traffic within an application is allowed (much like the traffic within the environments in step 1), but traffic from one application to another, is only allowed if it is necessary for the correct functioning of that application. This is called inter-application security (or at least, that is what I call it ;)).
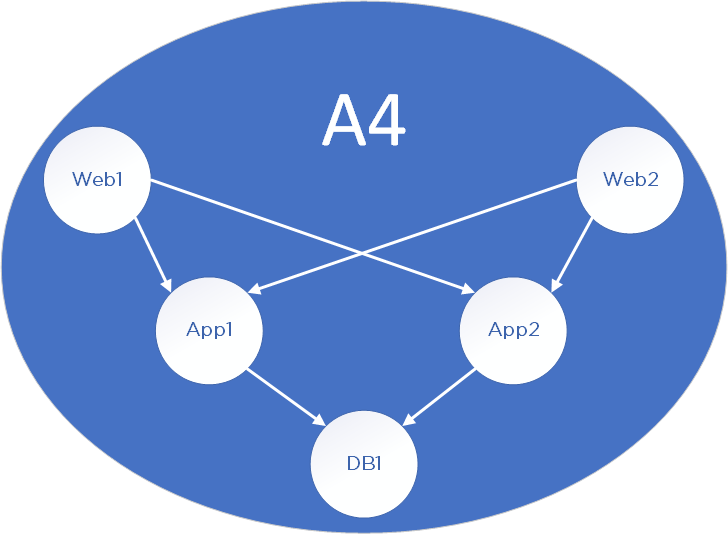
Step 3: Define and secure intra-application traffic
After all inter-application traffic is defined in rules, you can go and look inside each application and go for the full Monty. Define which traffic is allowed from each component within the application to other components. Let’s call this intra-application traffic and this is usually the final step (step 3) in the micro-segmentation journey.
How this is accomplished within NSX-T
With NSX-V I was a big fan of the Service Composer, but NSX-T takes a slightly different approach. It still uses the term policies and groups, but they are different entities within NSX-T.
A Security Group is still a group of entities, but there are less criteria that can be used to make up a group. This is mainly because NSX-V was tied to vCenter and therefor it was easy to use all information from within the virtual infrastructure to define if a virtual machine should be part of a security group or not.
Within NSX-T the most used method of filling groups (and to be honest, this is also the most used method in V), is through tags. It is however still possible to use OS version if needed. The best example for me, is the “older Windows” version, which is no longer patched and needs to be restricted from accessing certain parts of the network. By creating a group consisting of all virtual machines of Windows 2003 (and lower), you don’t have to look at each individual vm. When a new virtual machine is created with an old Windows OS, it will automatically be treated as needed.
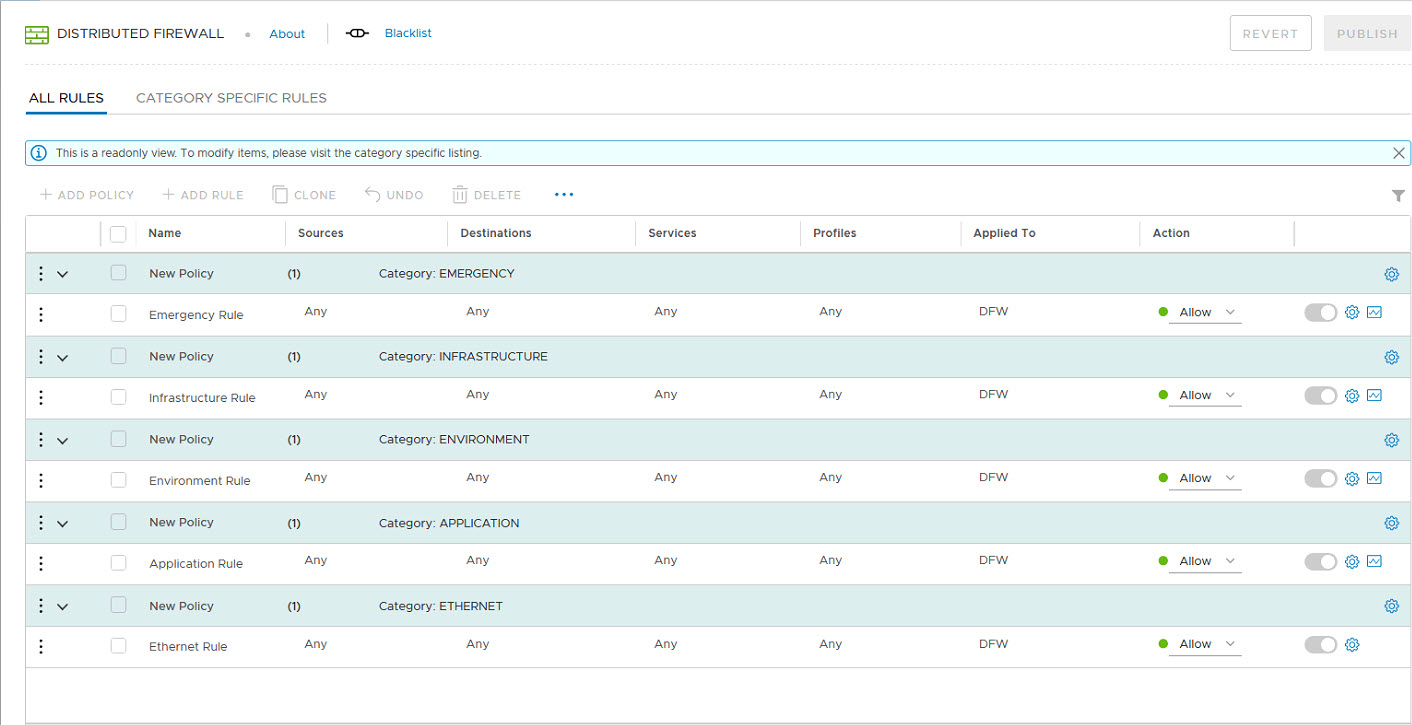
Within NSX-T my methodology of helping organizations to secure their environment, gets helped tremendously, because within the policy manager, policies are created based on this:
Well, I couldn’t have put this is in better, if I tried…
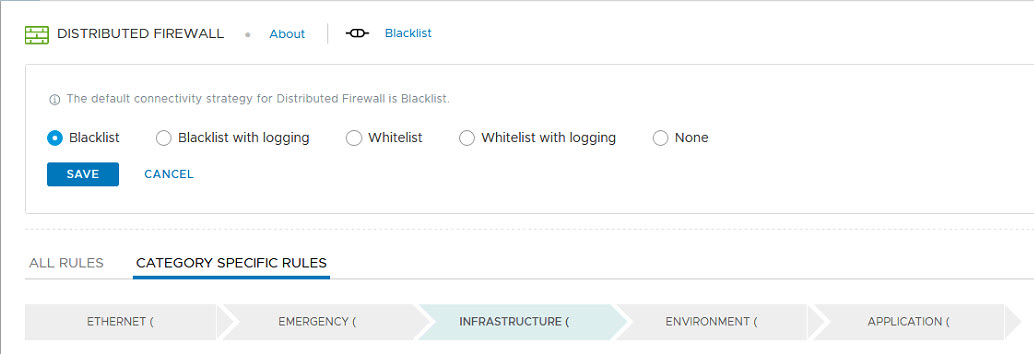
The order of the boxes is (almost) the same order in which they are applied. The only difference is the ethernet-rule, which is applied last. So first all emergency-rules, are applied, then all infrastructure-rules, environment-rules, application rules and the last rules are ethernet-based:
The “default connectivity strategy”, is used to define if your last rule is “deny” or “allow”. When you want your default rule to be “deny”, your default connectivity strategy would be whitelist (eg. you whitelist all allowed traffic and in the last rule all other traffic is dropped) and the other way around.
Off course, when you start building your rule-base (especially in a brown-field scenario) it would make sense to have all “non-defined” traffic to be allowed to passed through, because you don’t want to break things. You might want to log this traffic to see which traffic is still traversing the network and if you really need this. If you do, create a rule (in the appropriate section) and be done with it.
After you have monitored this traffic for a certain amount of time and you feel that all traffic that needs to go through is going through, you can finally change the default behavior to “Whitelist”, thus blocking all traffic that is not specifically allowed and reaching “Zero Trust”.
Next up: Methodology in action
7 thoughts on “Microsegmentation with NSX-T (part 1: methodology)”
In our company we use AutoNSX- that can do everything mentioned here with no scripts, programming, and so on. Also AutoNSX has integration to vRNI so once we run discovery from vrni, AutoNSX enables rules directly to NSX based on vRNI grouping and firewall rules recommendation. So far we do micro-segmentation with 5 steps and DevOps team is able to segment a single application within 5 minutes. Moreover, AutoNSX has it’s own flow and packet collector so if targeting an organization didn’t install vRNI AutoNSX still able to do rule creation. With this approach, we keep governance under control and not depending on scripts or expensive tools. Check it https://digitout.net/services/autonsx/
Thanks for the addition!
Great article thanks
The link to part two is broken. This link should work:
https://my-sddc.net/micro-segmentation-with-nsx-t-part-2-methodology-in-action/
I thought this was both well written and useful.
Thanks, I have changed the link, it wasn’t adjusted when I moved providers :).