Micro-segmentation with NSX-T (part 2: Methodology in action)
Now that we have learned the theory in Microsegmentation with NSX-T (part 1: methodology), we can look at the application of this methodology in practice.
Methodology in action
So after all this, let’s see a little bit of this methodology in action. First of all, it is important to know which traffic is flowing in the environment. An excellent tool to help in this respect, would be vRealize Network Insight, but not every organization is able to use this, so for this specific example, I will be using the tools that are available to all organizations (when buying NSX), vRealize Log Insight.
With vRLI it is possible to see the traffic that is flowing. I really liked the tool “Application Rule Manager” within NSX-V, but unfortunalely, this is not (yet?) available for NSX-T. This is also because of the disconnect between NSX and vCenter Server.
So let’s say that we have two environments in our infrastructure, Production and Development both with two applications in it (P1, P2, D1 and D2).
For this we can use the same components that we already used in earlier blog-posts on network-virtualization. I have two three-tier applications, one called 3_Tier-App and one called 3_Tier-app-RJO, both consisting of two Web Servers, two Application Servers and one Database Server. Those we will use as P1 and D1. Then I have two stand-alone web-servers, which will become P2 and D2.
First we create two Tags:
- Development
- Production
When creating a tag, we can also (optionally) define a scope. This is a way to further specify the content, if you want that. For instance, the tag applied to one virtual machine can be “Application A”, while the scope can be “Web Server”, while another virtual machine gets the tag “Application A” and the scope “Application Server”.
This way it is possible to have the information that VM’s that are assigned this tag and scope, are application servers within Application A. But it is also possible to select all servers in Application A, by just using the tag and ignoring the scope.
For our environments, we are just using tags and not using scopes. So our six virtual machines in the Production environment are tagged as Production and the six virtual machines in de Development environment are tagged as Development:

The arrow indicates that it is important to hit that checkmark when adding a tag, because without it, no tags are stored, when hitting save (yes, I found that out the hard way ;)).
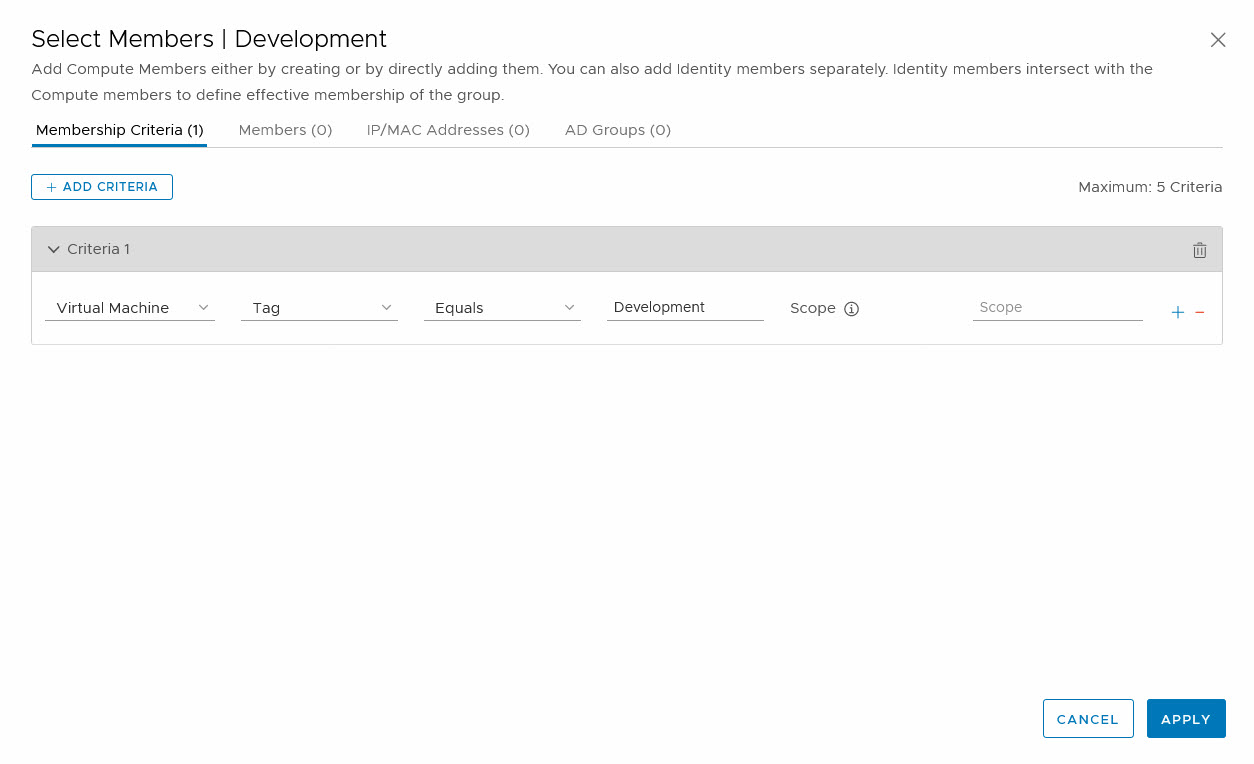
When all virtual machines are tagged, we can create a new group, with a membership-criterion where tag equals Development:
And when we look at the members from this group, we can see that all virtual machines that have been tagged as Development are now part of the group:
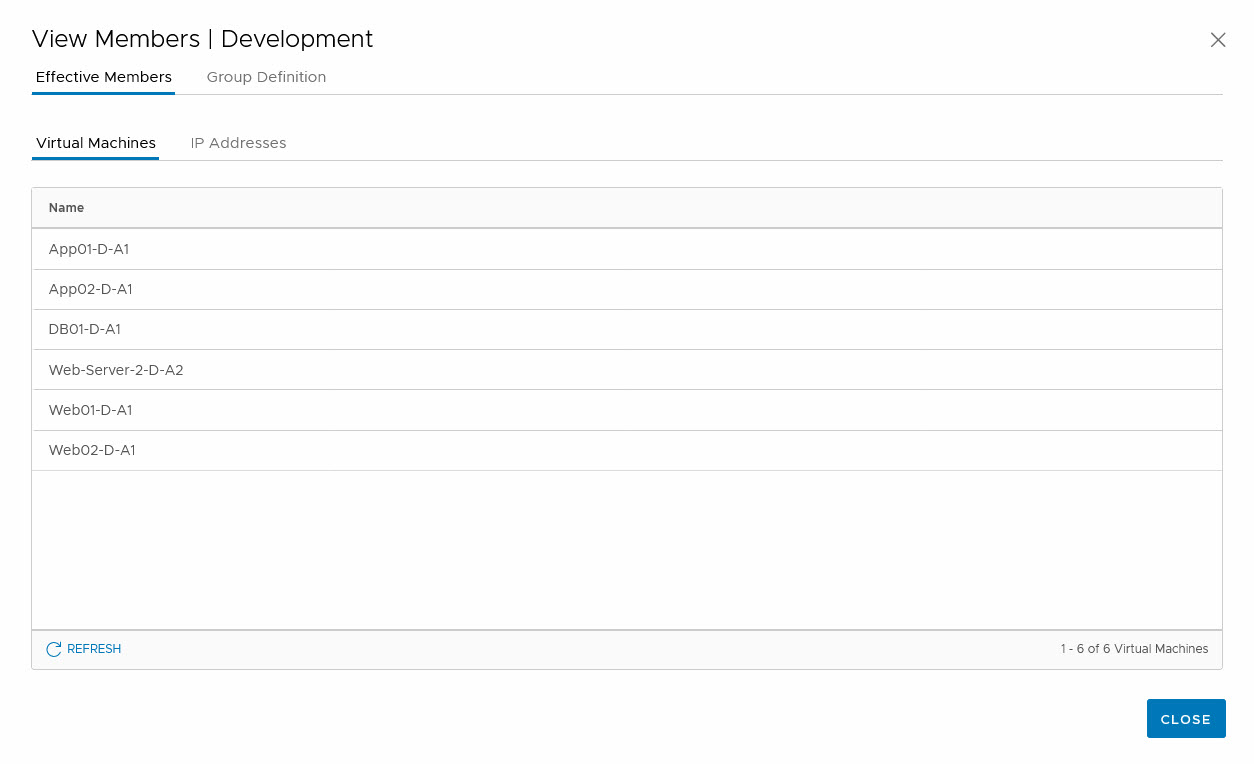
(and the same goes for the Production group off course)
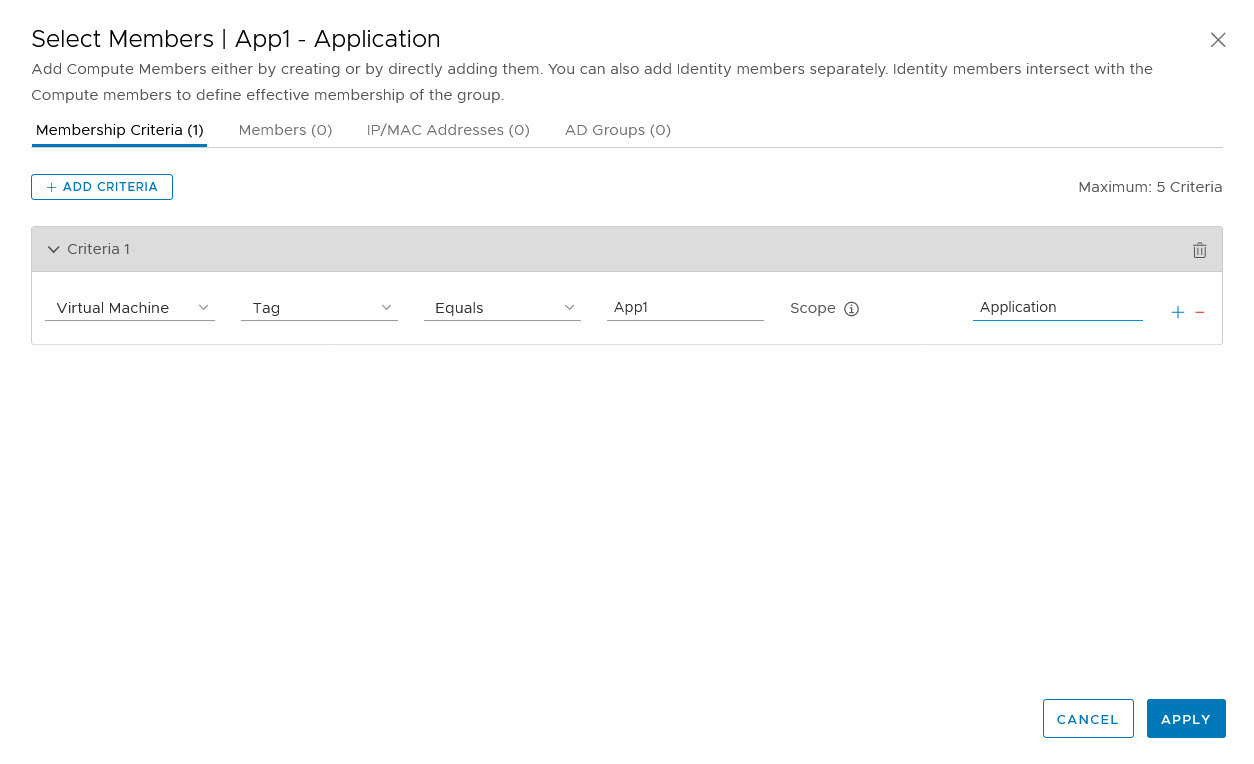
I did the same for tagging all virtual machines with the application they belong to and in this case I used the scope to define the layer in which they are present:

(to make it a little easier to see the difference between the virtual machines, I changed the name a little to show to which environment and application they belong). So if I create a group in which I want to see which App1 servers belong to the Application Layer (independent of the environment they are in), I can use one criterion:
and see all members:
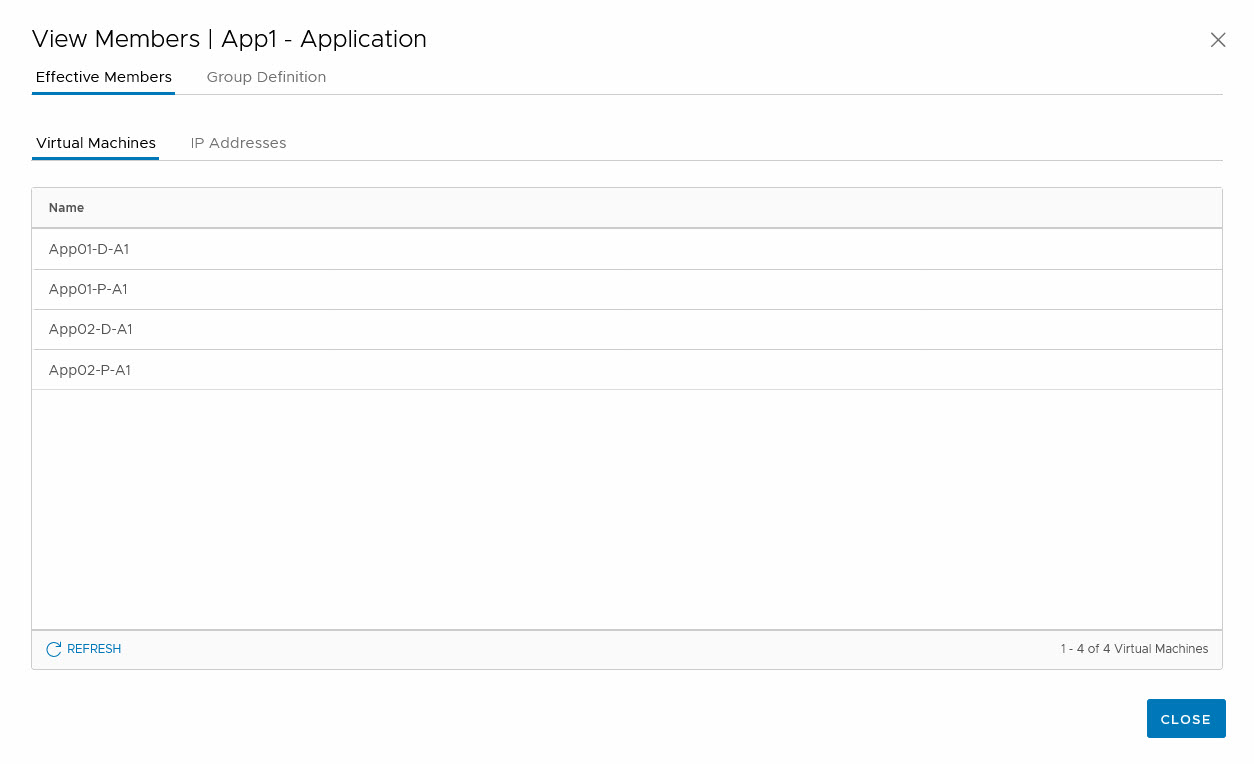
So as you can see, this is a group where the environment is not considered.
Creating an Environment Policy
So after we have grouped all virtual machines in a logical way, we can define that the Production and the Development environment have no need to communicate with each other. Well, let’s say that they are allowed to ping each other.
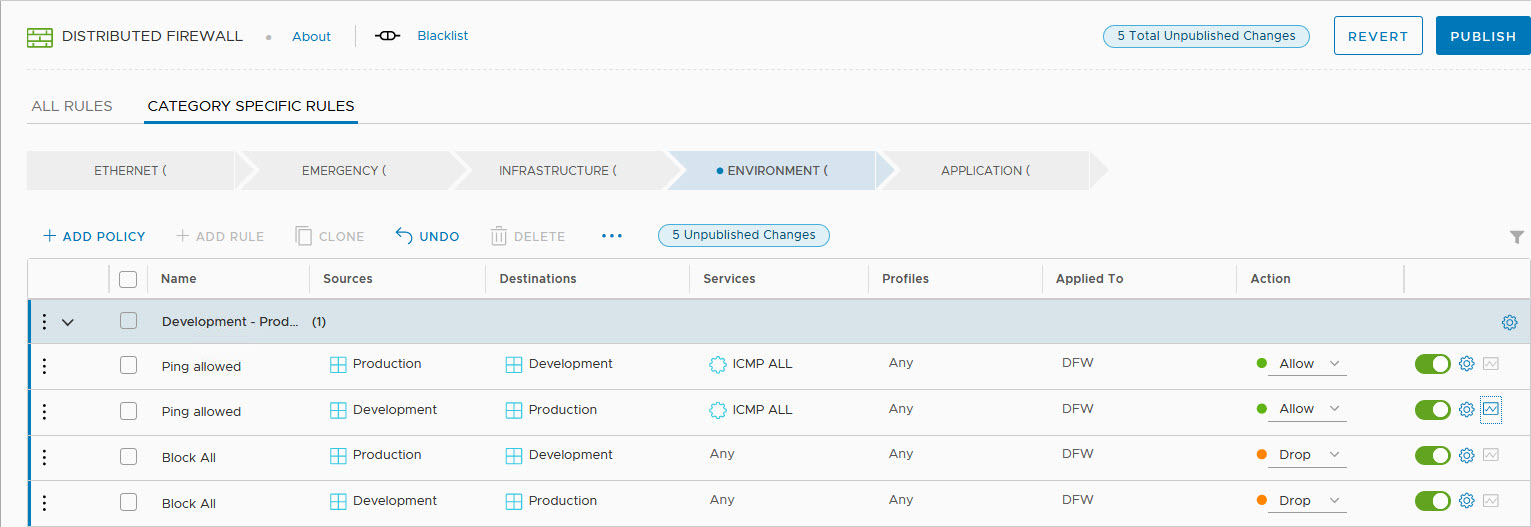
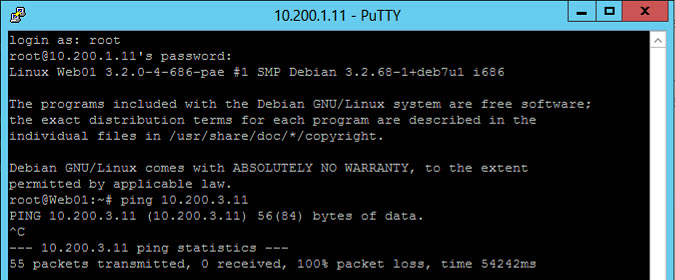
When we apply the rules, by publishing them, all traffic between the environments is disallowed, with the exception op ping:
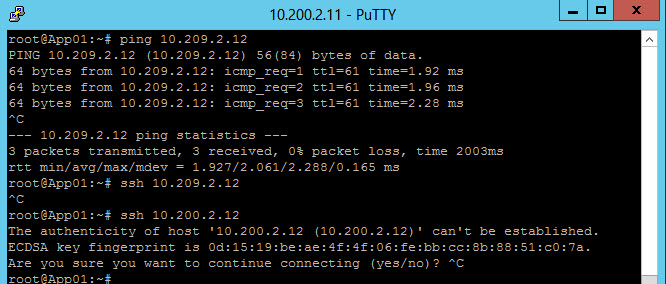
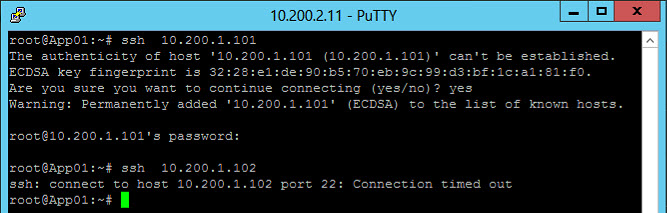
What you can see here is first a ping from one of the application servers in the Production environment to one of the application servers in the Development environment. This is allowed. After that it tries to connect on ssh to the same server and the last command is an ssh session into the second application server within the Production environment (which is allowed, because it is in the same environment).
So just a couple of lines of DFW-magic and no matter how the network is connected, the Development virtual machines are cut off of the Production virtual machines and vice versa.
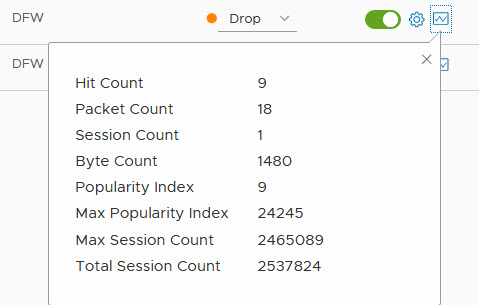
I can see how many hits I get on the rules that block traffic, so to get an idea of the amount of traffic that is blocked:
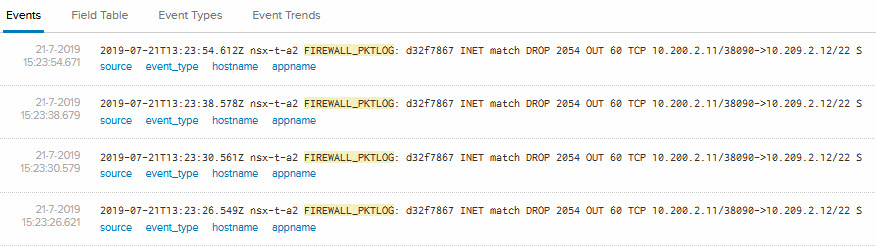
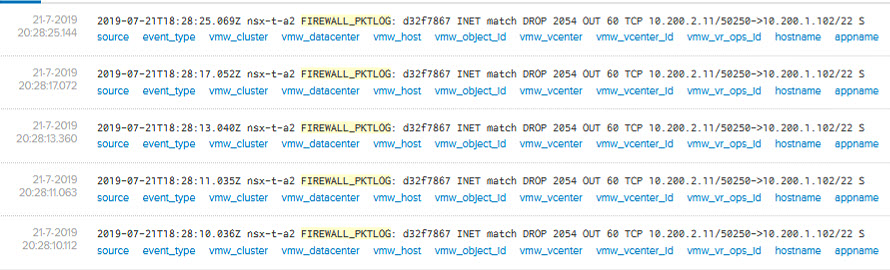
And because I enabled logging for the “block” rules, I can see the traffic that was blocked by the firewall in vRealize Log Insight (port 22 being ssh):
Inter-Application traffic
After the environments have been neatly separated from each other, the next step is to define which applications are allowed to talk to each other, and what are they allowed to say.
Because we already neatly had our applications defined in the previous step, this comes down to the basics. So just creating rules in the Application section of the DFW and determine which applications are allowed to talk to each other. We don’t need to use the environment in which they live, because if all is done well, we have all environment rules neatly defined. So when we consider App1 and App2, it doesn’t matter in which environment they live, the rules we create are environment-agnostic.
In this case, we allow ssh from App1 to App2, but not the other way around. This is not the best example, I agree, but hey, for now, this will have to do :).
All other traffic is denied between the two apps. First we define the groups. So one group for App1 and one group for App2. As said, no reference to the environment the apps run in:

After this, the rules are defined:

And we can try them out. From one of the virtual machines within App1 (Production), try to connect to App2 (Production) on SSH and in the second step, try to connect to App2 (Development):
As you can see, the first one is allowed, the second times out, and gives us some nice logging in Log Insight:
So these are the inter-application rules. Now, on to the final step, the intra-application rules. So the rules needed to secure our three-tier-app and only allow the necessary traffic between the parts of the application.
So we define our different layers into groups, using the tags that were set earlier on the virtual machines:
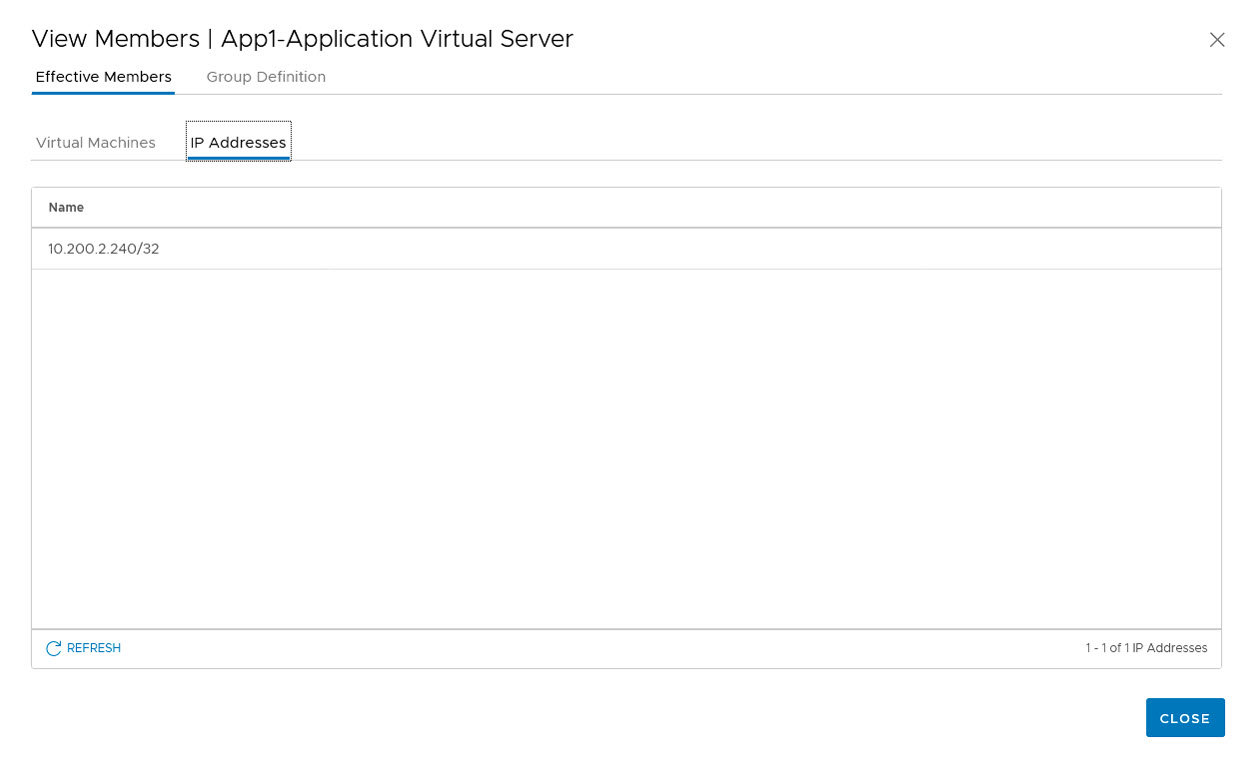
Because we are using a load balancer on the application layer, from the web-layer, we have added a group for the virtual server:
 And then we can define the rules, needed to have the application run:

And see that the application still works:
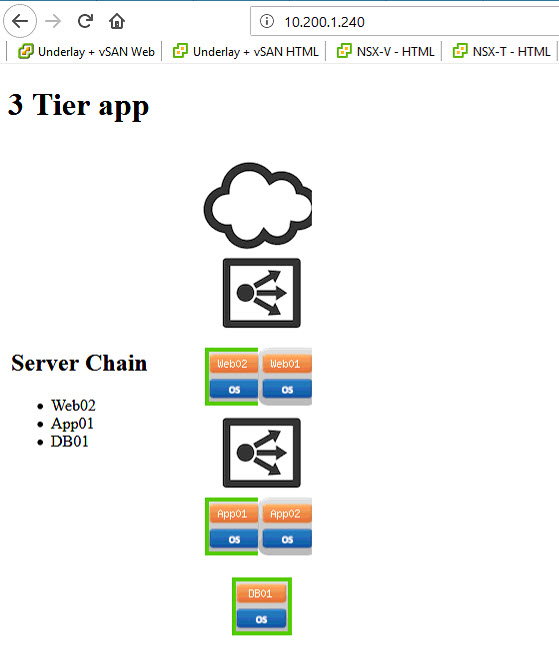
While the web-server is no longer allowed to connect to the Database Server, not even through ping (remember, we created a rule that allows ping between environments, not within environments ;)):
So we have micro-segmented this small infrastructure, where we defined Environments and Applications and created tags, groups, policies and rules to determine which traffic is and which traffic is not allowed.
Next time I will (hopefully) go into the Identity Firewall. A method to have rules based on user accounts and group memberships. Not just on single user systems (like VDI), but also on multi-user systems (like RDSH).
2 thoughts on “Micro-segmentation with NSX-T (part 2: Methodology in action)”