VCF on VCD: Replace Hosts in Stretched Cluster
From one of my customers, I got a question on how they can downsize a stretched cluster in a VCF environment. This is basically following the first 5 steps in the “Replace a Failed Host in a Stretched Cluster” article: https://docs.vmware.com/en/VMware-Cloud-Foundation/5.0/vcf-admin/GUID-92FD3AEE-5B5F-421C-B722-44AE0314D84E.html
So I though, I’d try it out.
We need to do the following steps:
- Get Host ID’s
- Get Cluster ID
- Prepare JSON file
- Run JSON file
- Decommission hosts
So, first, we get the Host ID’s. For this we go to the “Developer Center” in the SDDC Manager and click on: API Explorer.

There we find the “Hosts” Categorie and Execute “Get”
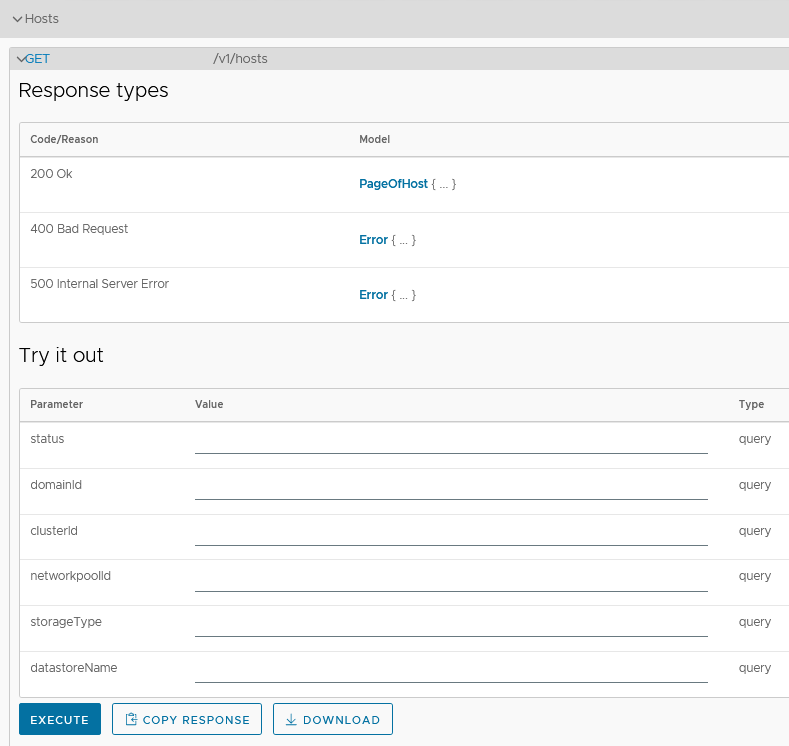
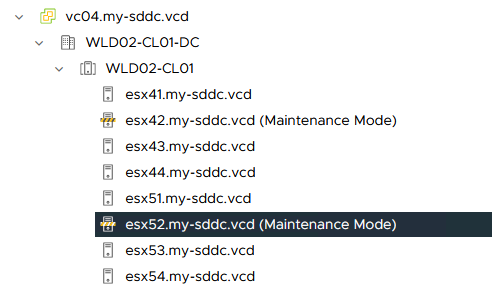
We get a list of Hosts, and we can find the ones we need. In my case, I want to remove esx52 (because I have an issue with the local datastore) and to make things equal, I will also remove esx42:
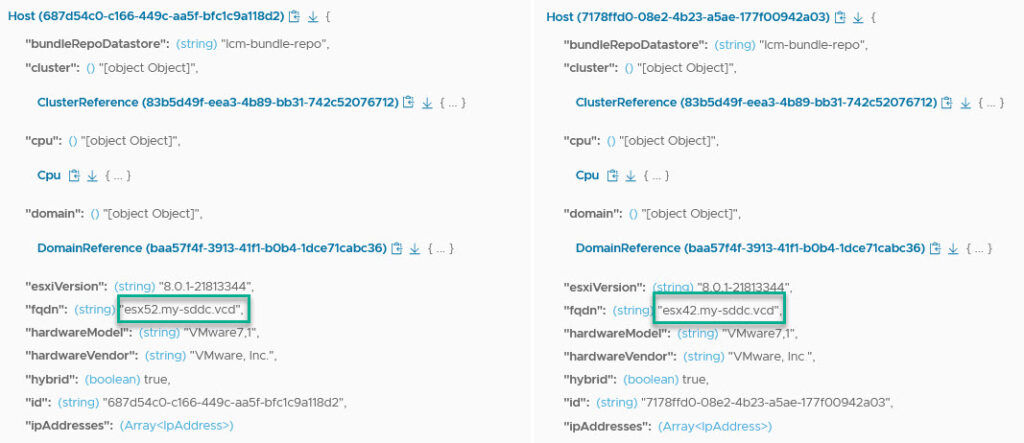
From here we make a note of the “id”: (string) value. In these cases:
- “7178ffd0-08e2-4b23-a5ae-177f00942a03”
- “687d54c0-c166-449c-aa5f-bfc1c9a118d2”
Next, we will go looking for the Cluster ID. For this we find the Category Cluster, and Execute the “List” command:

and get the Cluster ID for the cluster we are going to perform the activity on:
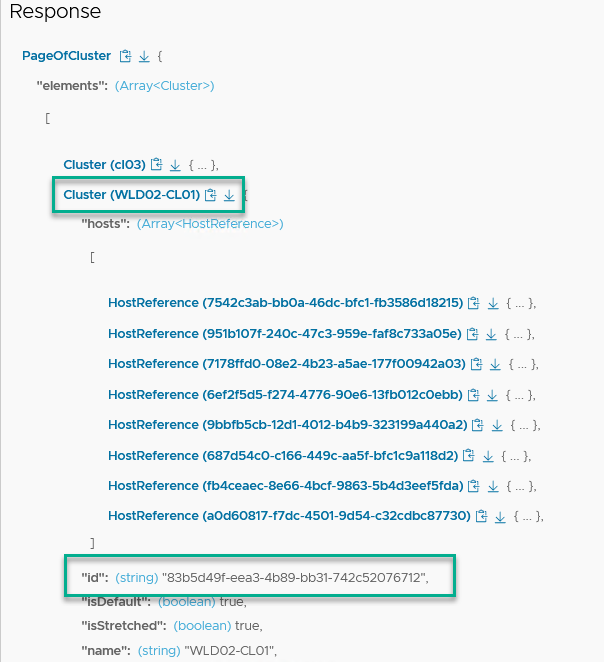
So, the Cluster ID is: “83b5d49f-eea3-4b89-bb31-742c52076712”.
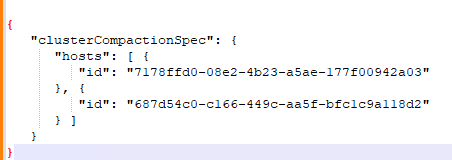
With this information, we go and create the correct JSON file:
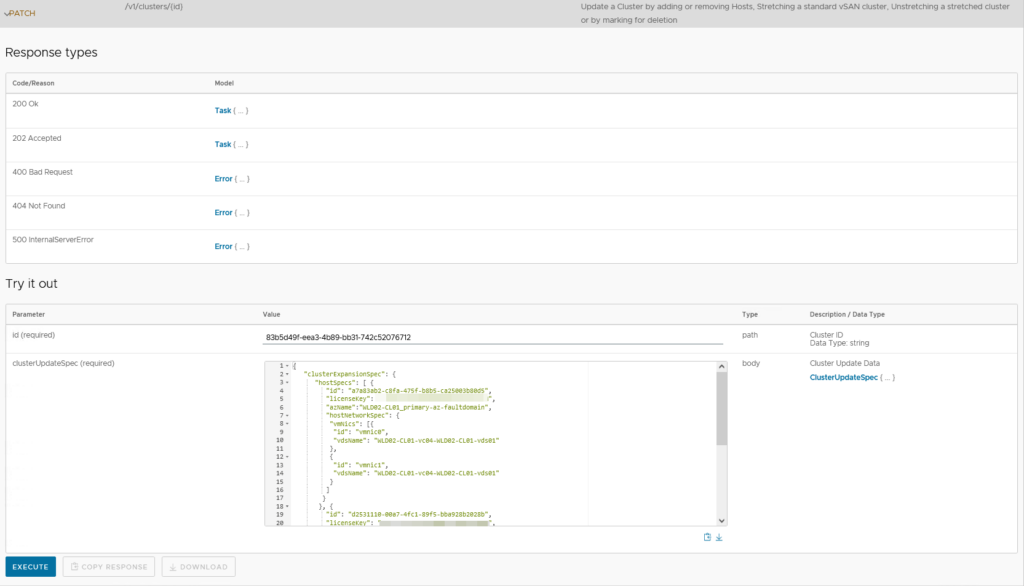
With this JSON, we go to the Category Clusters and find “Patch/v1/clusters/id and fill out the right information. The Cluster id as well as the content of the created JSON:
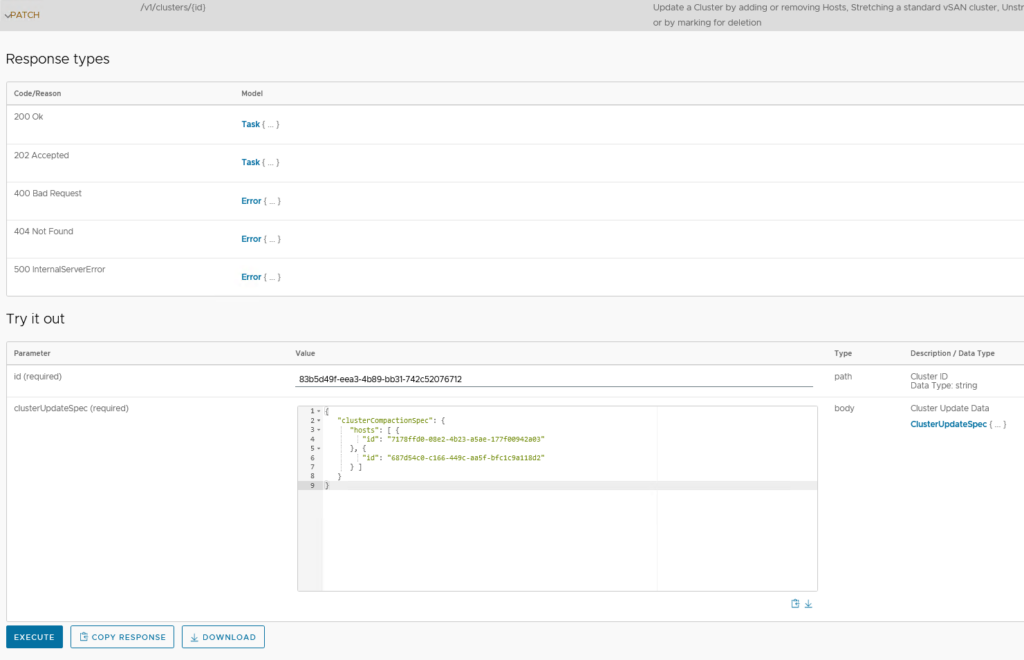
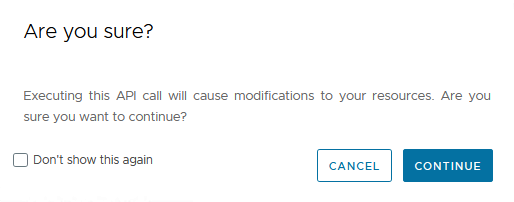
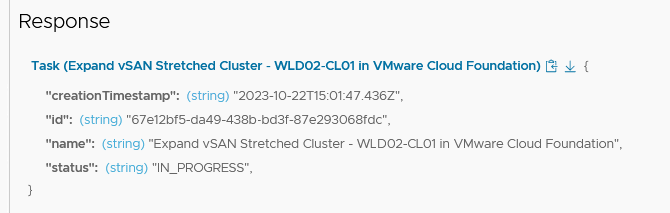
and click on Execute. First, we get a confirmation and when we accept this, we will see a Task appearing in the Tasks list:
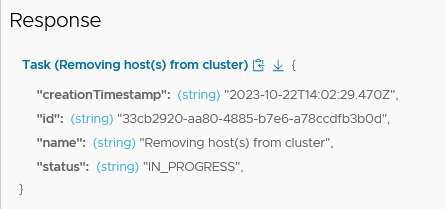

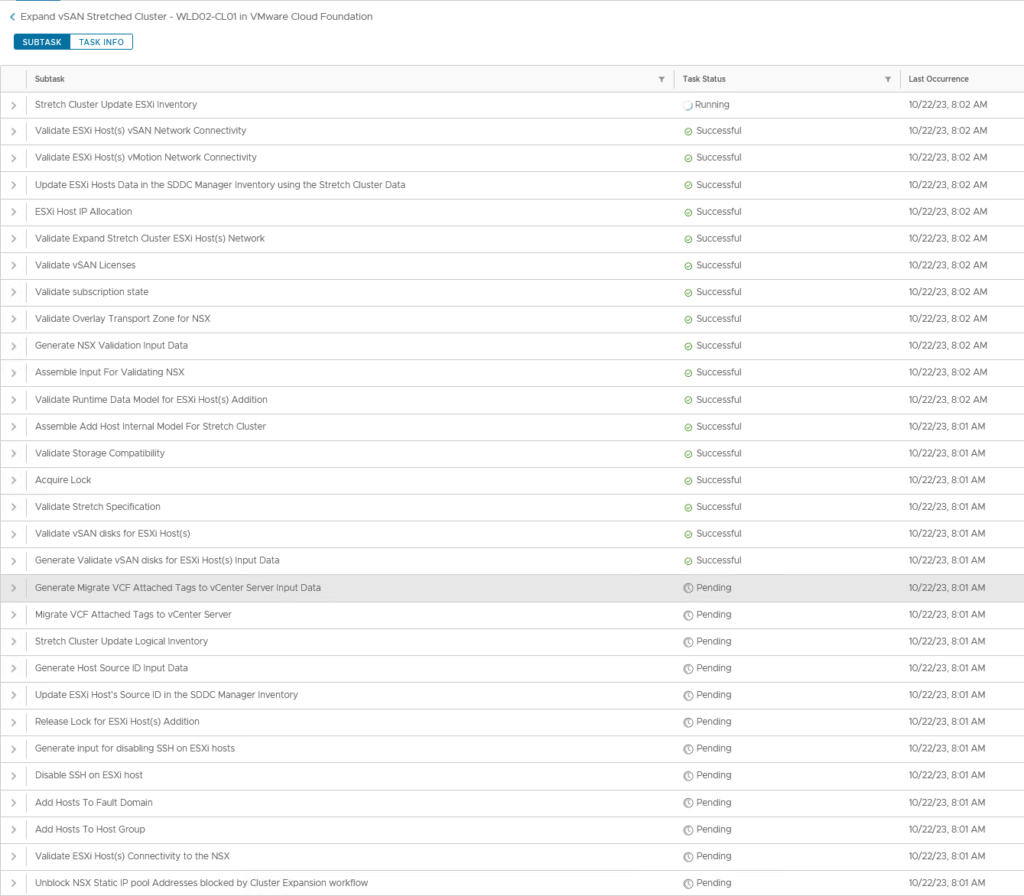
and the subtasks:
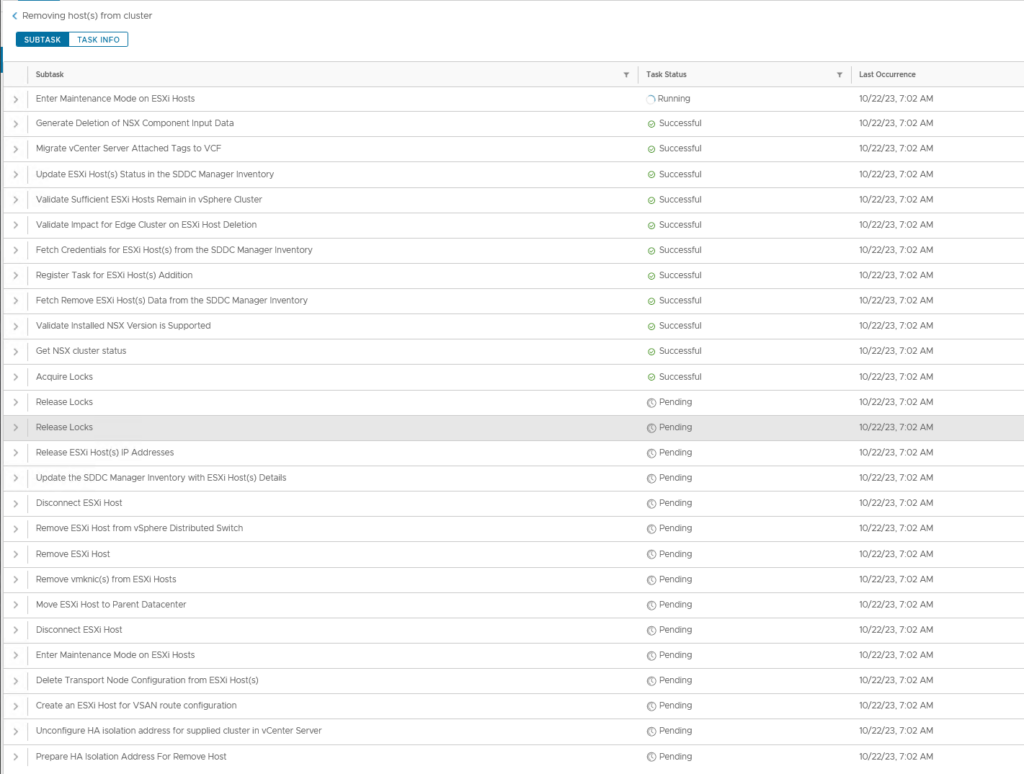
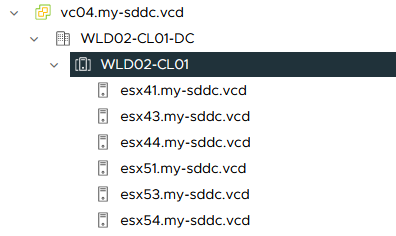
The hosts are placed in Maintenance Mode and removed:
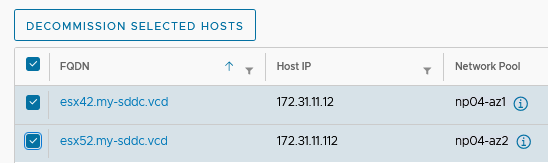
When all is done, the cluster is down two hosts and we see that there are two hosts that are available for Decommission in SDDC Manager:

So we will Decommission them, clean them up, reinstall them, and then, part 2, add them to the cluster again.
After the reinstallation, we commission the hosts (see earlier posts on this) and after that, we go back to API Explorer.
The next steps follow the procedure described in: https://docs.vmware.com/en/VMware-Cloud-Foundation/5.0/vcf-admin/GUID-928542C0-65E1-46F1-A62D-E7A106AC593B.html#GUID-928542C0-65E1-46F1-A62D-E7A106AC593B
So, Part 2, adding hosts to a stretched cluster. For this, we follow the following steps:
- (Commission Hosts, this has already been done)
- Find the ID’s for the hosts (same way as in the first phase)
- Find the ID for the cluster (same way as in the first phase)
- Find the names for the Availability Zones
- Create JSON
- Execute JSON
The first 3 steps have been performed and give us:
Hosts:
- “a7a83ab2-c8fa-475f-b8b5-ca25003b80d5” – esx42 (AZ1)
- “d2531110-00a7-4fc1-89f5-bba928b2028b” – esx52 (AZ2)
Cluster:
- “83b5d49f-eea3-4b89-bb31-742c52076712”
The AZ Names, we find in vCenter:

So:
- WLD02-CL01_primary-az-faultdomain (AZ1)
- WLD02-CL01_secondary-az-faultdomain (AZ2)
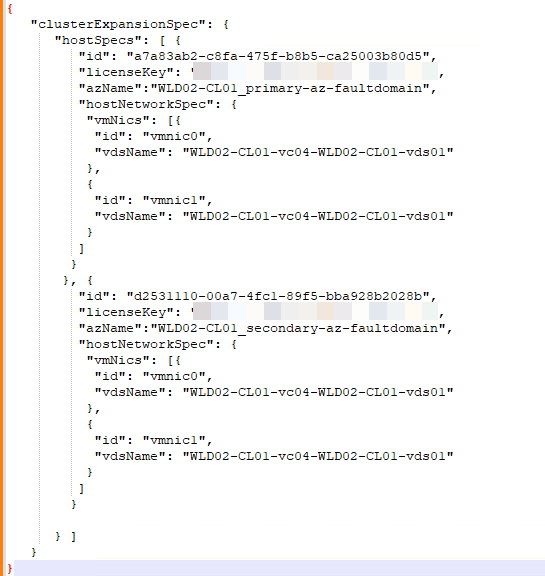
With this information, we can create our JSON:
and run the JSON as part of the “Patch /v1/clusters/id”:
Which creates the task:

And it’s subtasks:
And after this has been completed, we have two new shiny hosts, added to our stretched cluster:
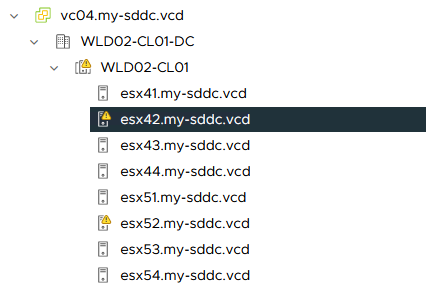
(be it with some warnings, but those will be solved).