Good housekeeping on NSX-T, backups and certificates
In every production environment it is critical to do some good housekeeping, but the same goes for a lab environment, so I added a signed certificate and configured a (scheduled) backup for my NSX-T Managers.
As you might know, I have three NSX-environments in my lab, two sites (A and B), and one Global Manager (G). For all environments the configuration is more or less identical, so I’ll only show the configuration of one of them.
Backup
Especially important in a dynamic environment, because there might be changes made programatically, so a regular backup is a vital part of maintaining your environment.
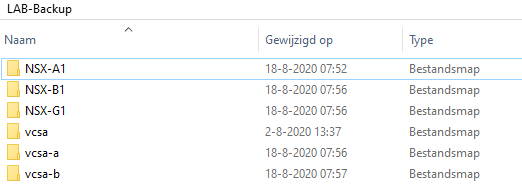
Backup is only possible on SFTP, so you have to have an SFTP target. Luckily I have that, on my Synology NAS. On this NAS I have created a share, named LAB-Backup and subfolders for all my managers:
To create the backup, go to System | Backup & Restore and click “Edit”
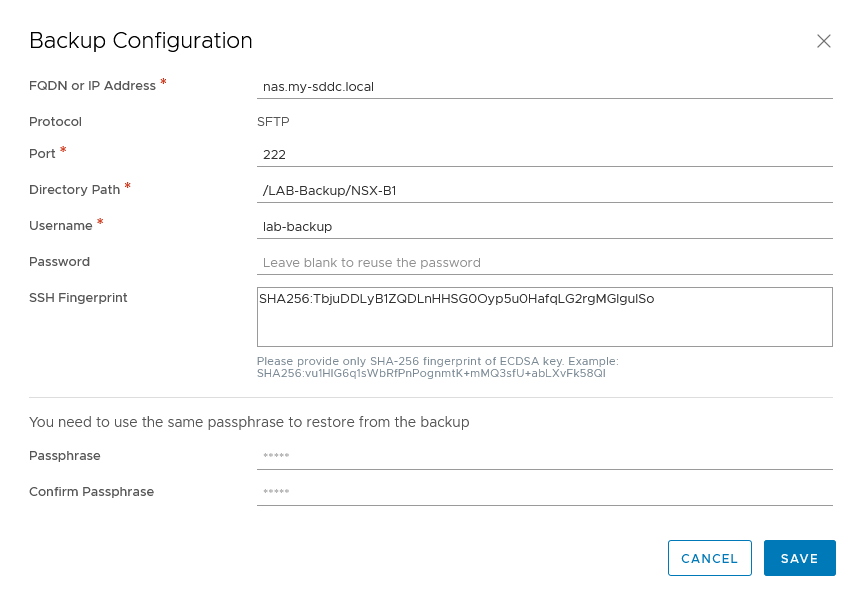
Fill in all fields. In my case I changed the default port (22) to a custom port (222), because I use 22 for other purposes.
If you don’t know the SSH Fingerprint, leave it blank, when clicking “SAVE”, it will show it and you are able to add it.
After the configuration is done, we can set a schedule:
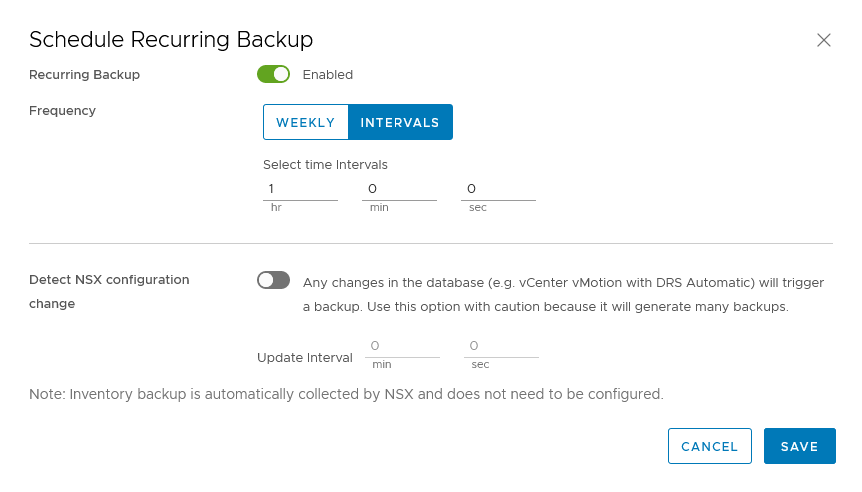
Notice the ability to backup based on changes. As it says, be careful using this, because if your environment is dynamic, this will cause a lot of backups and since there is no possibility to reduce the number of backups (through this interface), this can grow large very fast.
In our environment, we backup once an hour, and keep them until clean-up time.
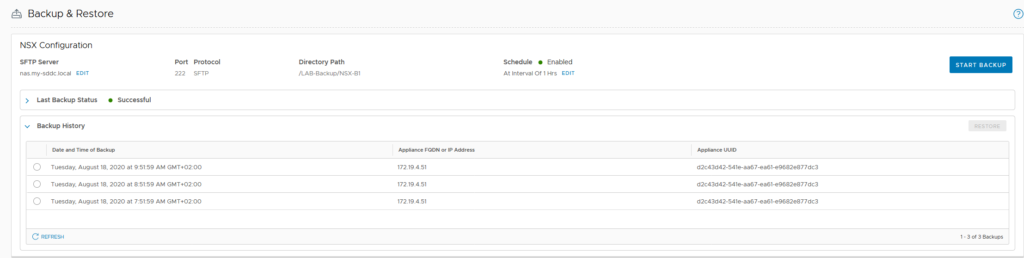
When this is all configured, the backup will start running and show up in the Backup History:
Certificates
Next up, certificates. This is always a little but tricky, because there are a lot of dependencies and factors that play a role. A very big thank you to vraccoon (https://vraccoon.com/2020/05/change-nsx-t-3-ssl-certificates/) , where I found very useful information to deploy the certificates, but I had to do some additional stuff and use a different method of pushing the certificates, so I decided to write up my own configuration.
Also big thanks to Rutger Blom, who described the way that I can use Postman more efficiently: https://rutgerblom.com/2019/06/16/getting-started-with-the-nsx-t-api-and-postman/
We are replacing both the node-certificates (one in our situation) and the cluster certificate.
The following steps need to be taken:
- Create the correct template (and publish it) with Microsoft CA
- Import CA certificate in NSX
- Create CSR and Private Key
- Sign the CSR and create the certificate
- Create a file with the new certificate ánd the CA-certificate
- (Change CRL setting on NSX)
- Import Certificates in NSX Manager
- Change Node to use new certificate
- Change Cluster to use new certificate
- Test
Create the correct template (and publish it) with Microsoft CA
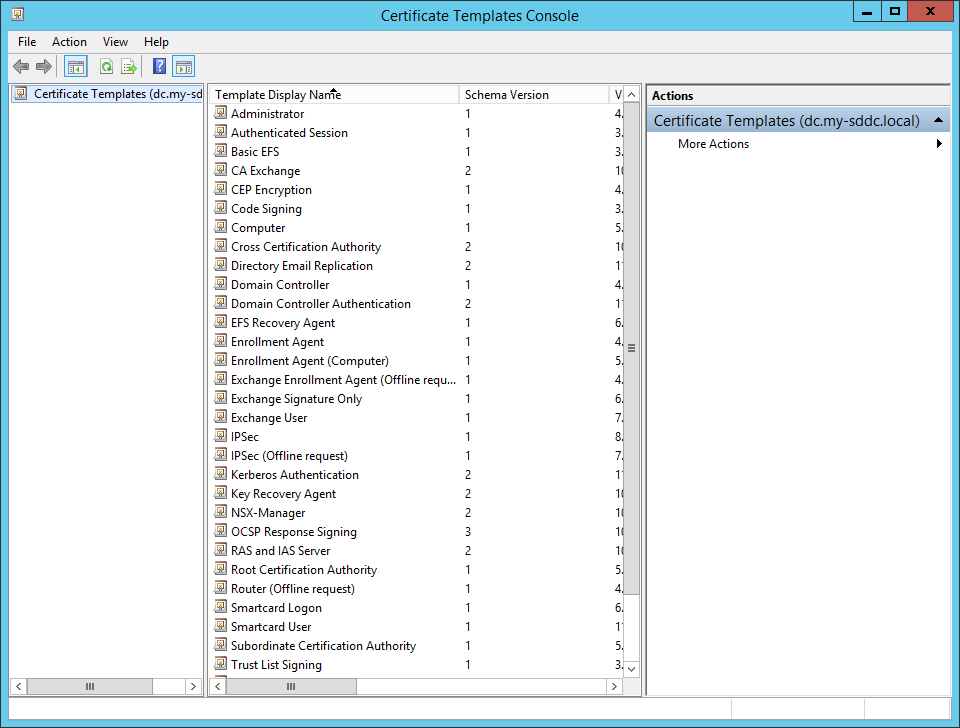
We need a new template, because in the default Web Server template, “Basic Constraints” is not an available extension. We create a new template, based on the Web Server, by duplicating one. This can be done in the “Certificate Templates Console” on the CA (you can start mmc.exe and add the correct snap-in or start it from certsrv.msc, right-click “Certificate Templates” and click “Manage”):
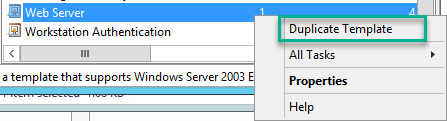
Here we select the originating template (Web Server), right click it and select “Duplicate Template”:
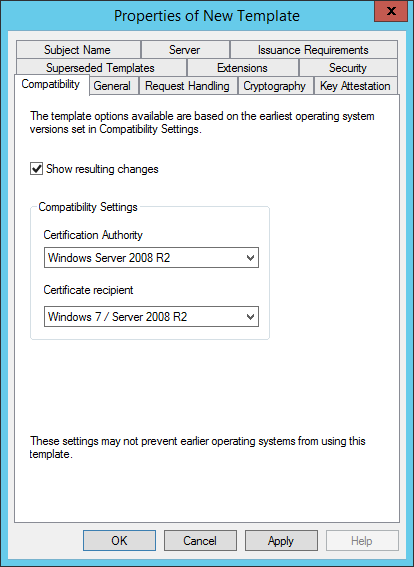
Then we change the Compatibility Settings:
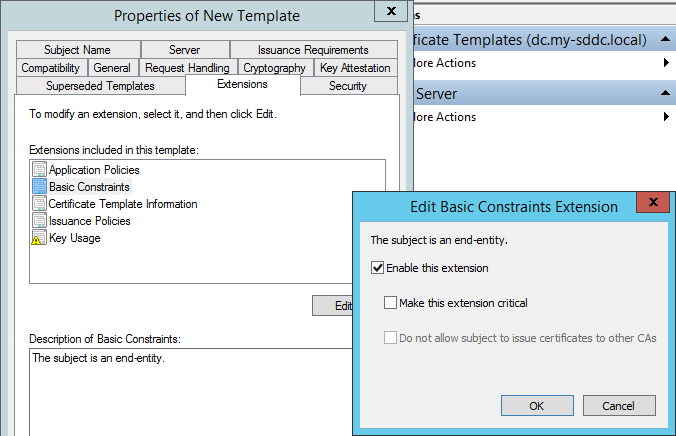
Activate the “Basic Contraints” extension:
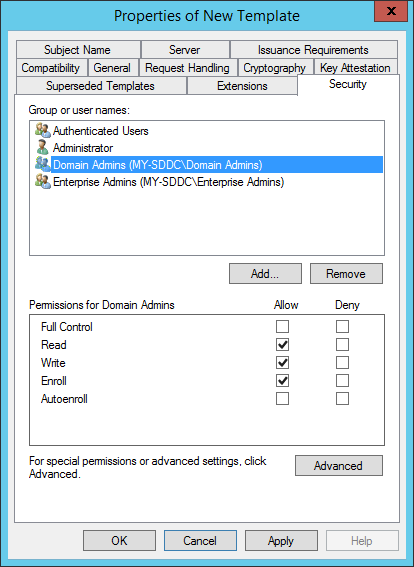
And make sure that the Domain Admins have the ability to enroll:
And, of course, give it a nice name:
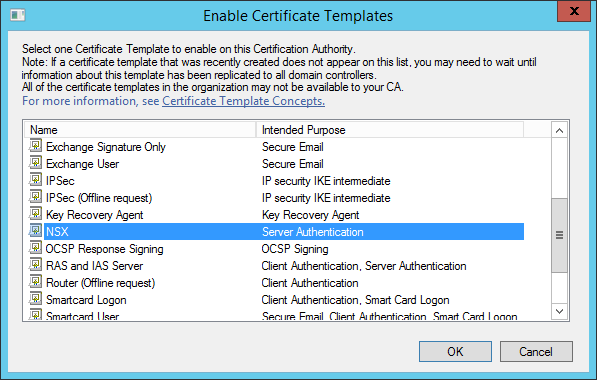
When the template is created, we need to publish it:
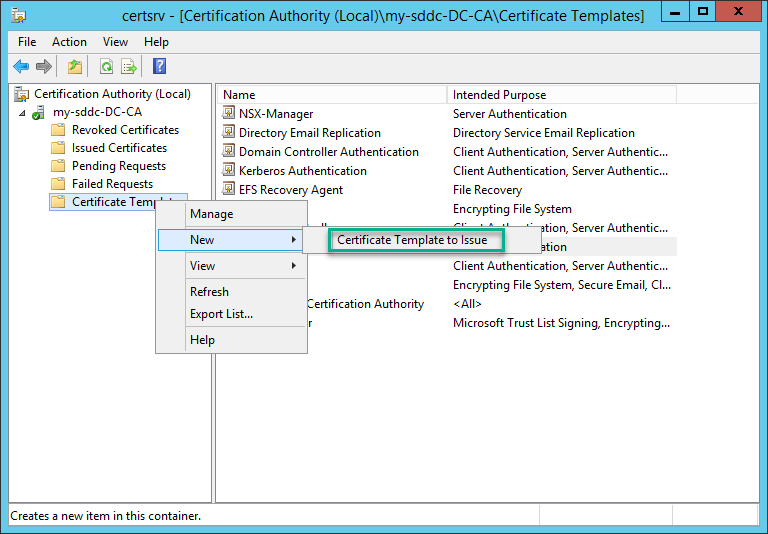
This is done in certsrv.msc. Select the correct template and click “OK”:
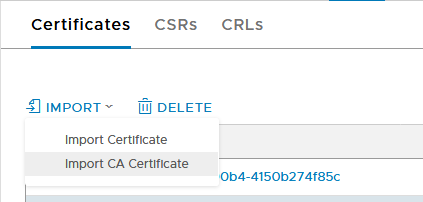
Import CA certificate in NSX
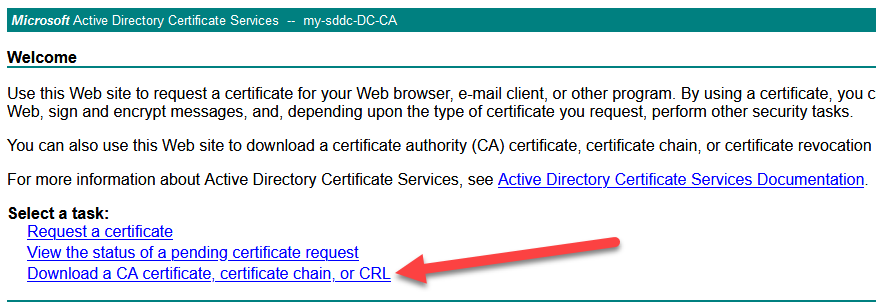
Before we create the CSR’s and Private Key’s, we want the NSX Manager to be aware of the existence of the CA itself, so that certificates that are signed by the CA are trusted.
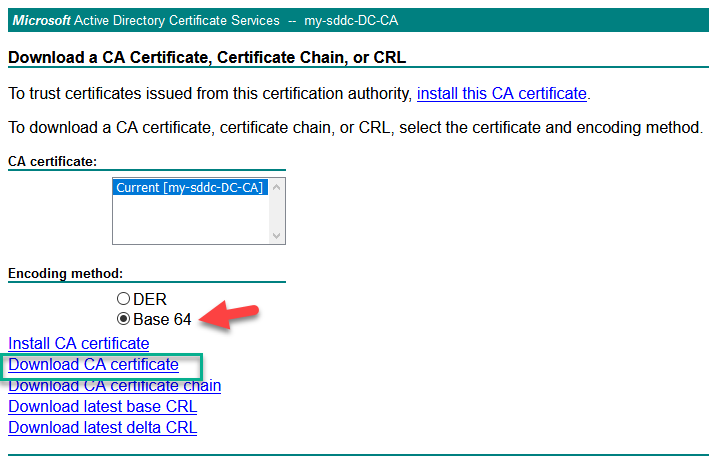
We export the CA certificate and import it into NSX (from the certsrv website from your CA, so in my case http://http://dc.my-sddc.local/certsrv/):
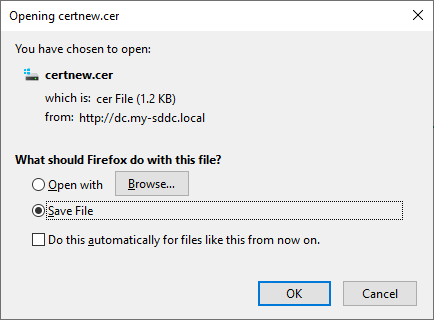
Save the file on disk:
And import it into NSX as a CA certificate:
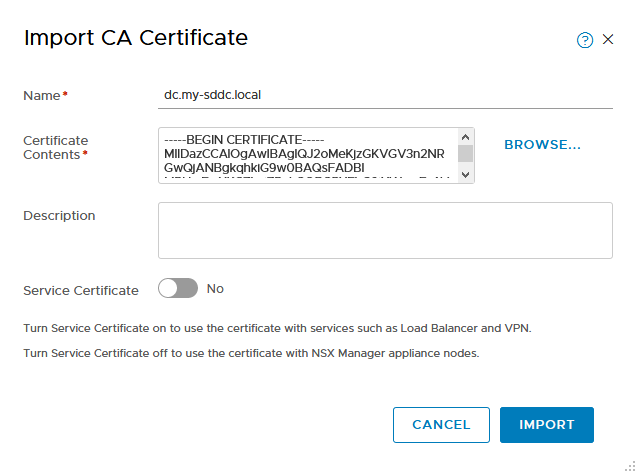
(deselect “Service Certificate”).
Create CSR and Private Key
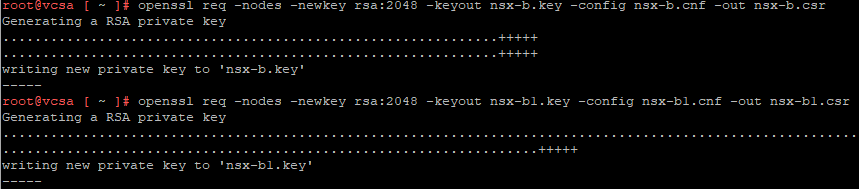
For this we need to use “openssl”, so I use one of my vcsa’s where this is installed, but you can use other machines if you prefer.
Logging in to the vcsa and using SSL, we create two files with the correct information, called nsx-b1.cnf (for the single node) and nsx-b.cnf (for the cluster):
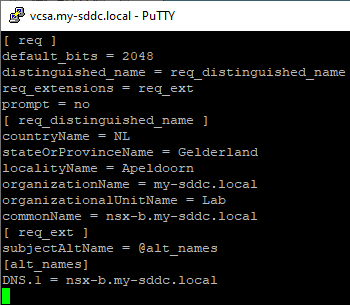
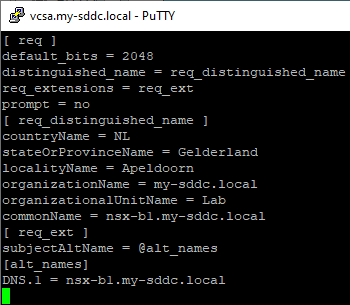
with these files we are creating a csr and a private key, by issuing the commands:
openssl req -nodes -newkey rsa:2048 -keyout nsx-b.key -config nsx-b.cnf -out nsx-b.csr
openssl req -nodes -newkey rsa:2048 -keyout nsx-b1.key -config nsx-b1.cnf -out nsx-b1.csr
The files, we then save to a useable location:
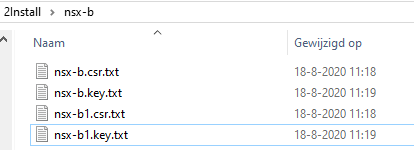
And then we commence to the next step.
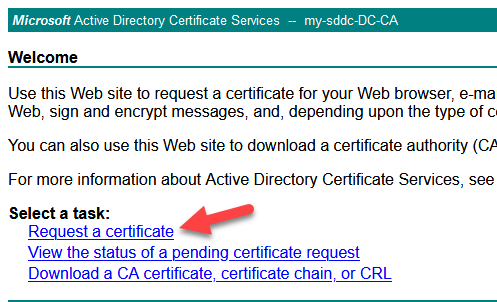
Sign the CSR and create the certificate
For this we go to the website from the CA and select “Request a certificate”:
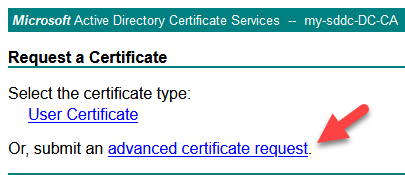
We fill in the contents of the Node CSR-file and select the created template:
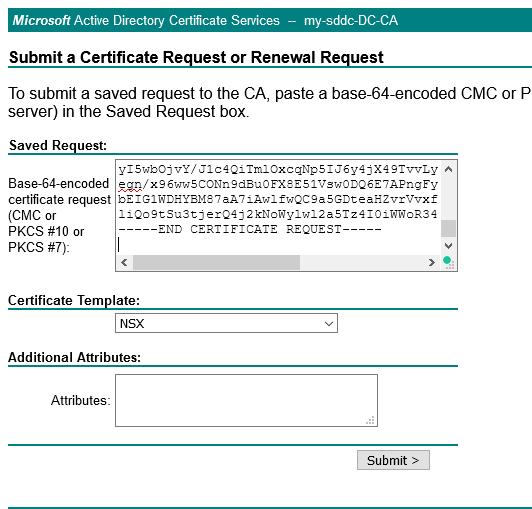
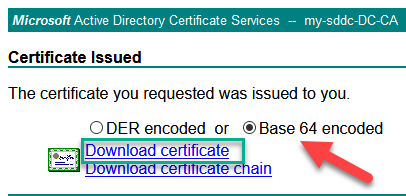
Click on submit and download the file in Base 64 format:
do the same for the cluster CSR.
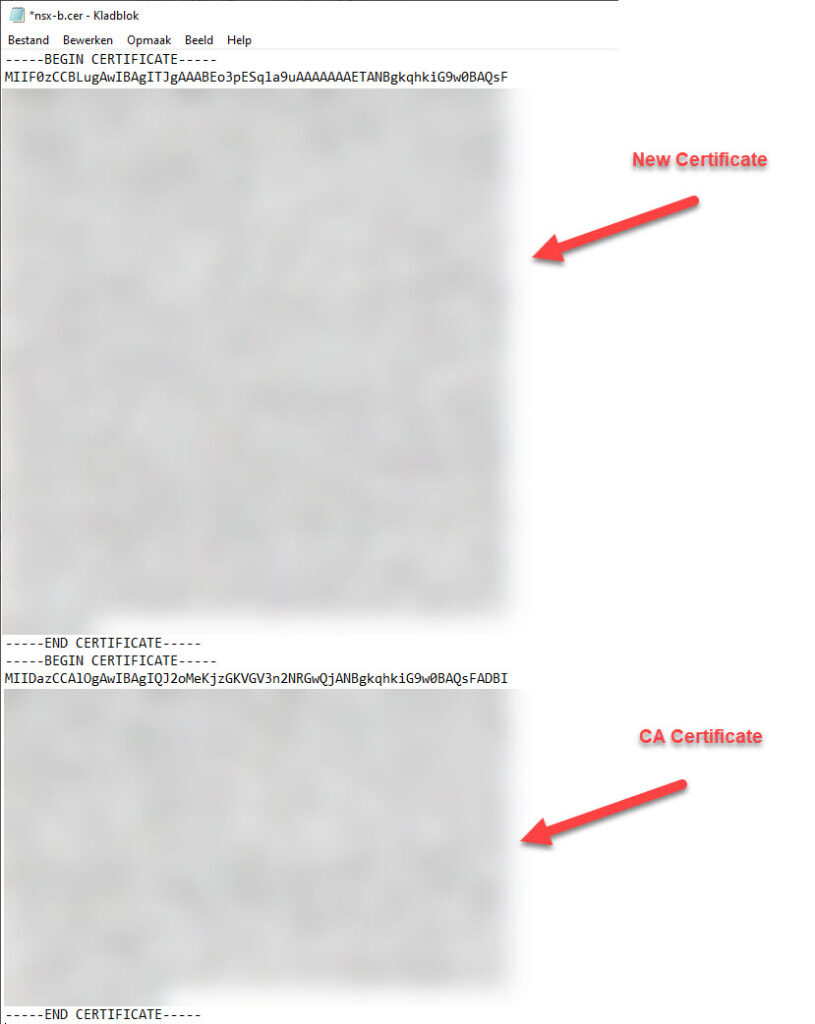
Create a file with the new certificate ánd the CA-certificate
The files we now have, need to be adjusted. So we open them (with notepad for instance) and add the CA-certificate to the end of the file, like so:
(Change CRL setting on NSX)
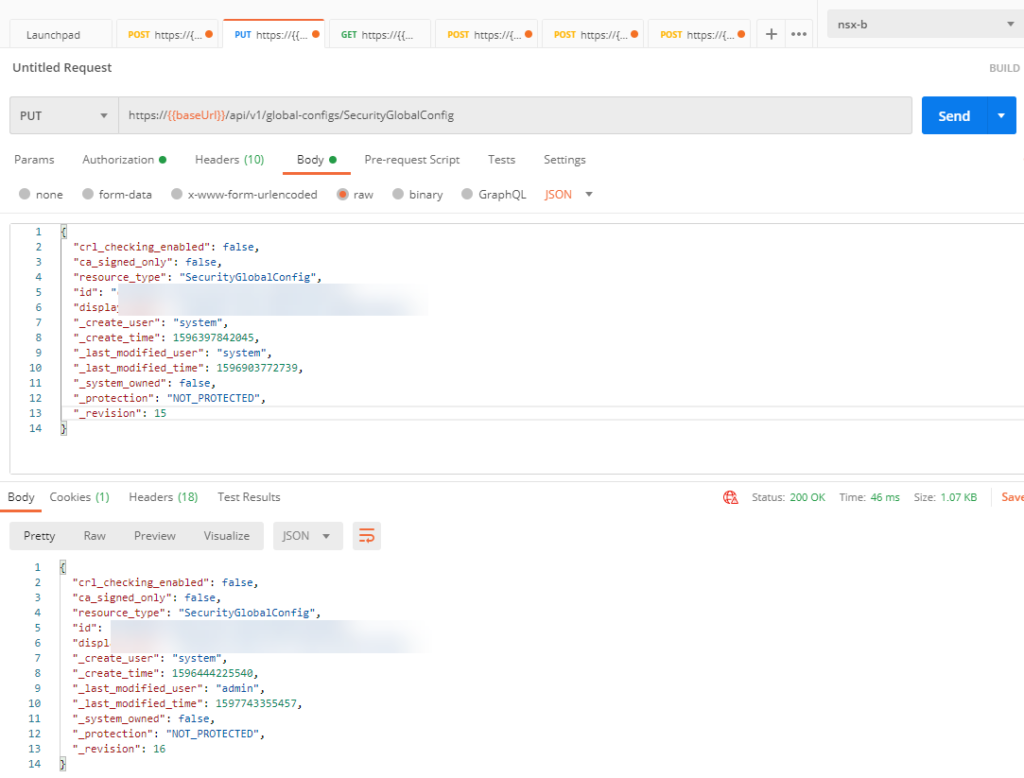
In my case, I needed to adjust the CRL setting on NSX, because my NSX Manager was unable to check the CRL from the CA. To do this, I use Postman and send the following REST API:
First we do a GET to get the current configuration:
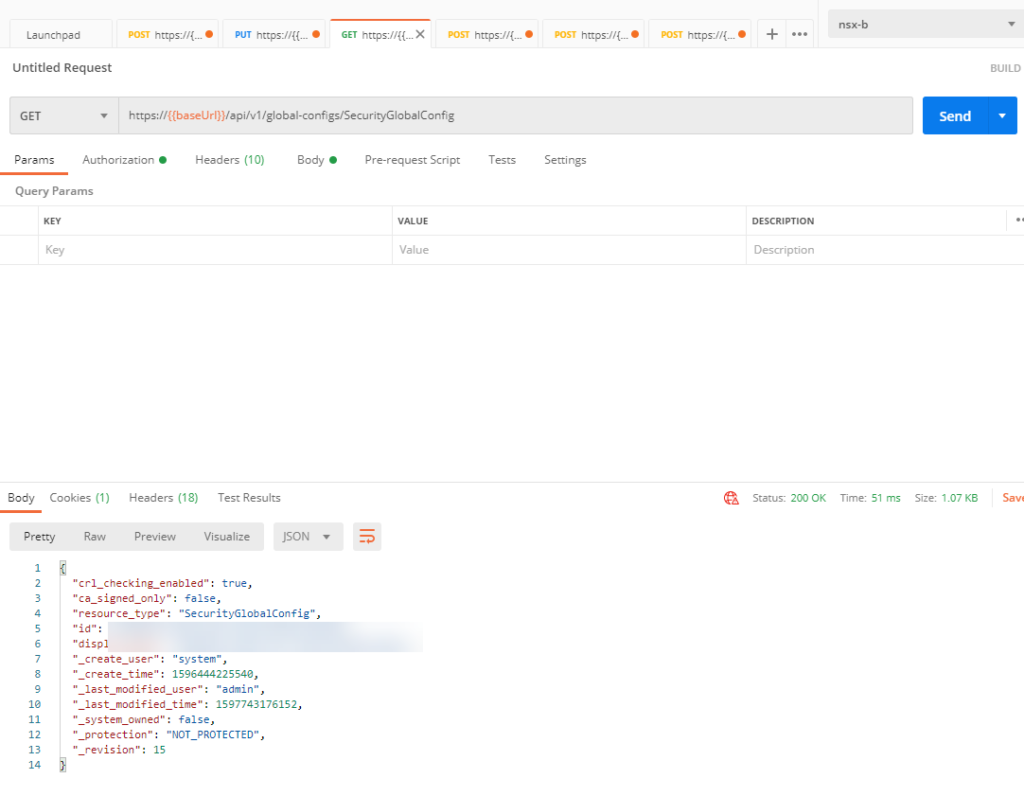
We then copy the body and create a “PUT”request, where we change the value of “crl_checking_enabled”: false:
Import Certificates in NSX Manager
Almost finished. Now we import both certificates in NSX Manager:
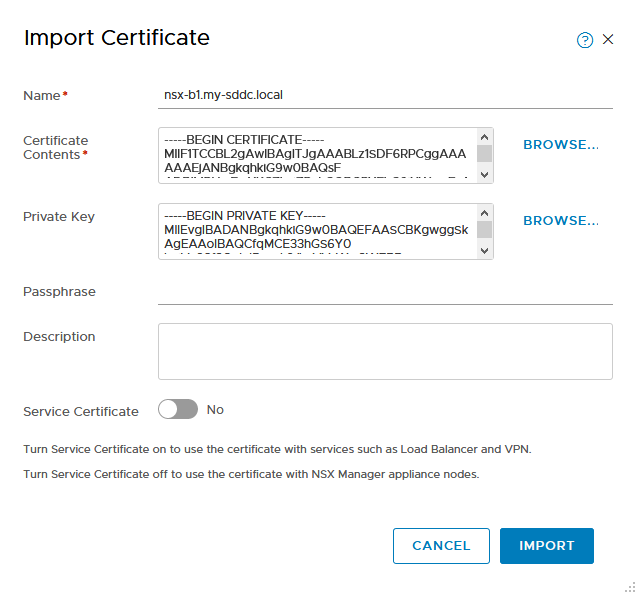
we select the files we have created. So the certificate file, including the CA certificate for the “Certificate Contents” and the key file for the “Private Key”. Again, deselect “Service Certificate”.
We do this for both the node(s) and cluster certificate and note the ID’s that are created for them:

These will be used in the next steps.
Change Node to use new certificate
Here we POST a REST API with the following syntax (replacing the certificate_id with the correct ID, recorded in the previous step):
https://{{baseUrl}}/api/v1/node/services/http?action=apply_certificate&certificate_id=3ef74721-d02f-4128-ac5d-5f22409553cc
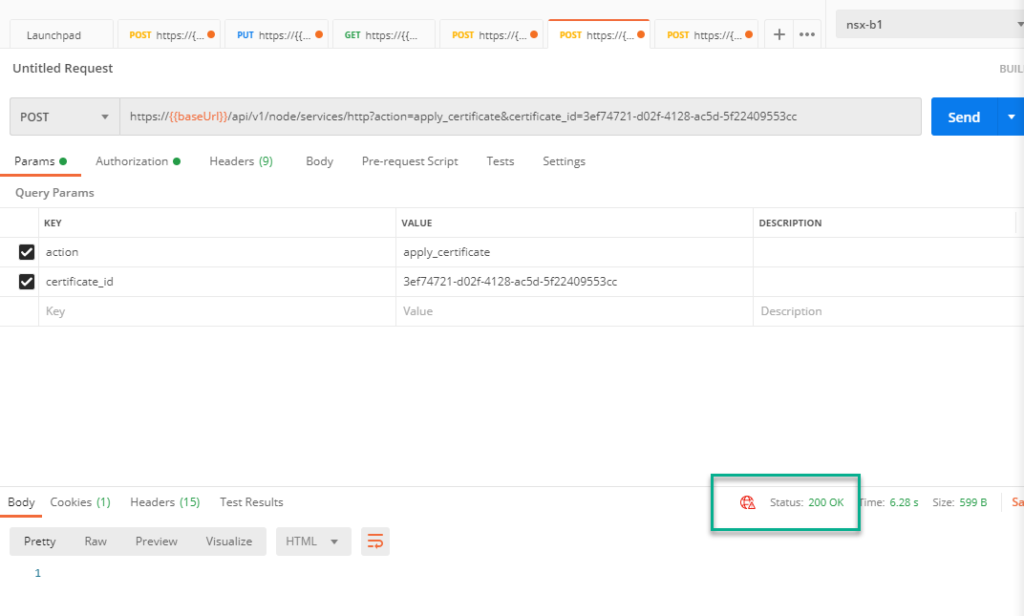
It comes back with status 200 OK, to show that this was succesful.
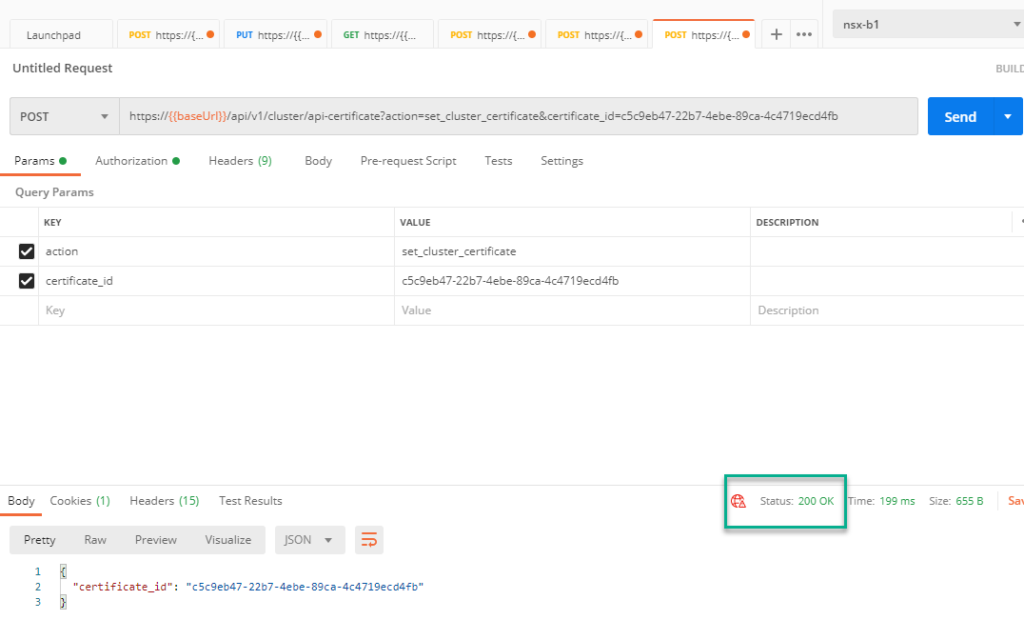
Change Cluster to use new certificate
Last step is to select the cluster certificate for the cluster address. This is done through the following POST request (again, replace the ID with the correct ID):
https://{{baseUrl}}/api/v1/cluster/api-certificate?action=set_cluster_certificate&certificate_id=c5c9eb47-22b7-4ebe-89ca-4c4719ecd4fb2
And after all this, we need to reboot the appliance(s) to activate the certificates.
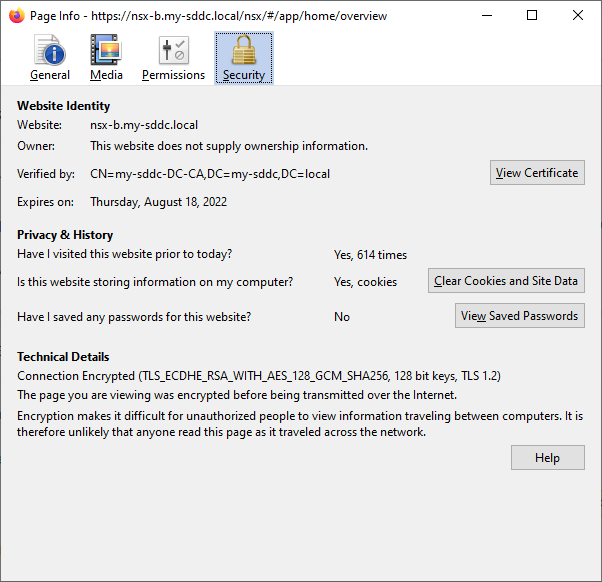
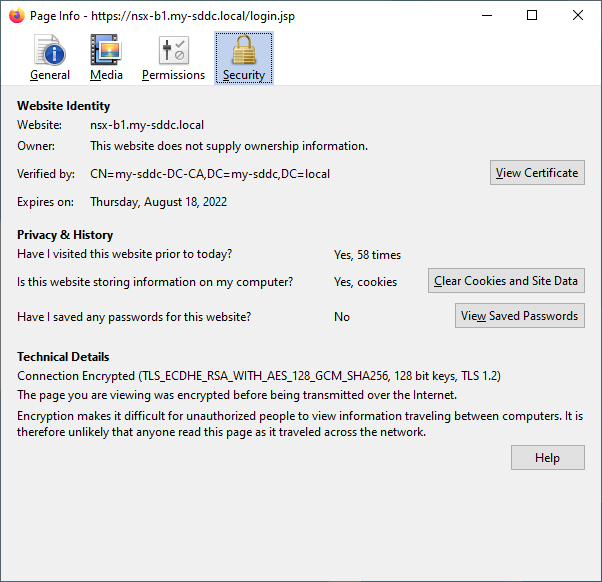
Test
And when this is all done, we can see the correct certificates in use, for both the cluster and the node: