Upgrading to 3.8 with VMware Cloud Foundation
I started off with VCF 3.7.1 in order to get a few upgrade options towards (then) 3.8. Now that 3.8.1 has been announced, we get even more upgrade options. One thing to realize is that upgrading is a step-by-step approach. If I look at the release notes for the different versions, I see the following:
You can upgrade to Cloud Foundation 3.7.2 only from 3.7.1. If you are at a version earlier than 3.7.1, refer to the 3.7.1 Release Notes for information on how to upgrade to 3.7.1.
You can upgrade to Cloud Foundation 3.8 only from 3.7.2. If you are at a version earlier than 3.7.2, refer to the 3.7.2 Release Notes for information on how to upgrade from the prior releases.
You can upgrade to Cloud Foundation 3.8.1 only from 3.8. If you are at a version earlier than 3.8, refer to the 3.8 Release Notes for information on how to upgrade from the prior releases.
So that means first upgrading to 3.7.2, then to 3.8 and then to 3.8.1. In testing and playing with the material, I already did an upgrade to 3.7.2, so now I am going to upgrade to 3.8. This blog describes the steps taken to do an upgrade
Prerequisites
Although I am running in a nested environment and don’t run supported hardware, when you are running in a production environment, you need to make sure that all drivers that are needed/installed and all firmware that you are running, is supported with the version of VCF that you are upgrading to.
I know that you would be running vSAN Ready Nodes, but I have found out in a production environment, that even that doesn’t guarantee the right level of compatibility.
In this specific case, we had a storage controller that had vSphere support for a certain driver version, but that same driver version was not supported for vSAN. Also, we had to upgrade the firmware of the controllers. This was moving to 3.7.2.
Now that we are looking at upgrading to 3.8 and the driver version that ships with ESXi now is supported, but the firmware needs to be downgraded.
So check your HCL! Find out the version of the driver that ships with the ESXi version that is used within VCF and check both vSphere and vSAN support, versions, and firmware. Because if you don’t, the upgrade will fail.
Because we are “living” in a nested environment, we have unsupported hardware. In order to get the upgrade working, we have to skip some of the vSAN checks in order to be able to proceed. For this, we edited the file
/opt/vmware/vcf/lcm/lcm-app/conf/application-prod.properties
In it, we can see some vSAN checks, and I have disabled those, to make sure it doesn’t fail during the precheck of the hosts.
Precheck
After the prerequisites have been met and all drivers and firmware had been found to be valid, we go to the Precheck.
The Precheck is a process within VCF that checks if all is good for the upgrade. We move into the Management Domain environment and in the Update/Patches tab, we see the option to do a precheck. After doing this precheck, the information is retained for a limited amount of time (one hour?) and then it is lost and you need to redo the precheck. This to make sure that you are always doing a precheck right before doing an upgrade.
When the precheck has been performed and passed, we can get a nice report:

All is green, so we can proceed to the next step.
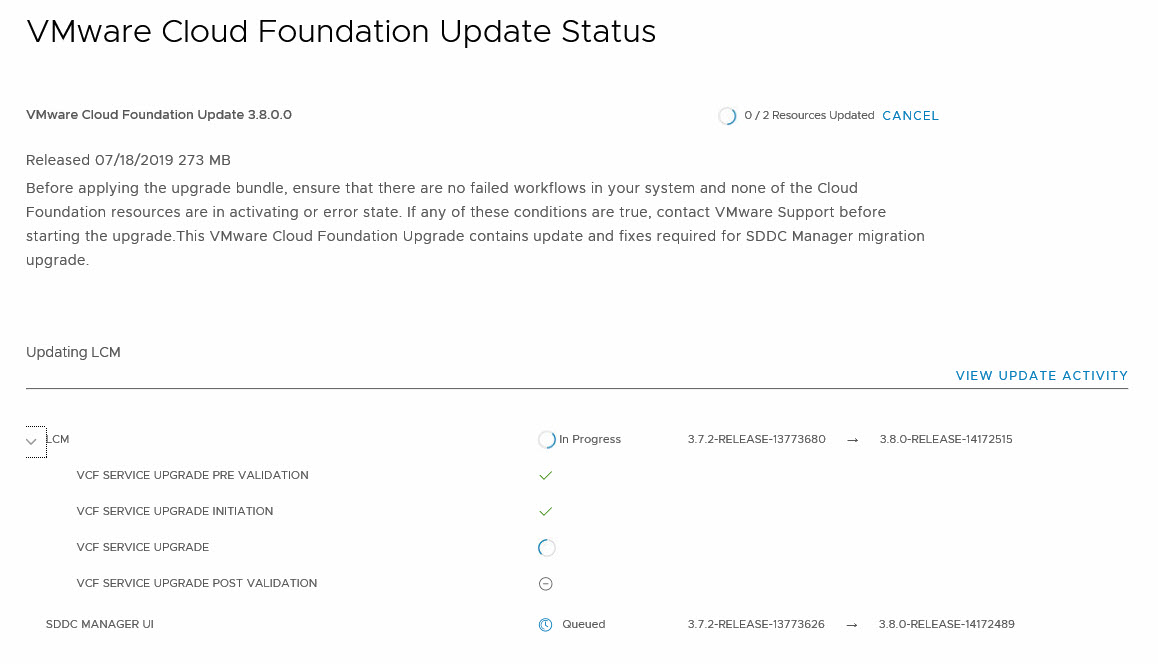
Updating Management Components
The first step in the upgrade process is the upgrade of the VCF Management Components. It shows the current versions we are running:

We can choose to schedule the update, to a time that is best suited to our environment, or choose to just go ahead and do the update now. Of course, we do the latter. This will also schedule the update, but it is scheduled for a couple of seconds in the future.
Once the update starts, we see a screen informing us of the status of the update:
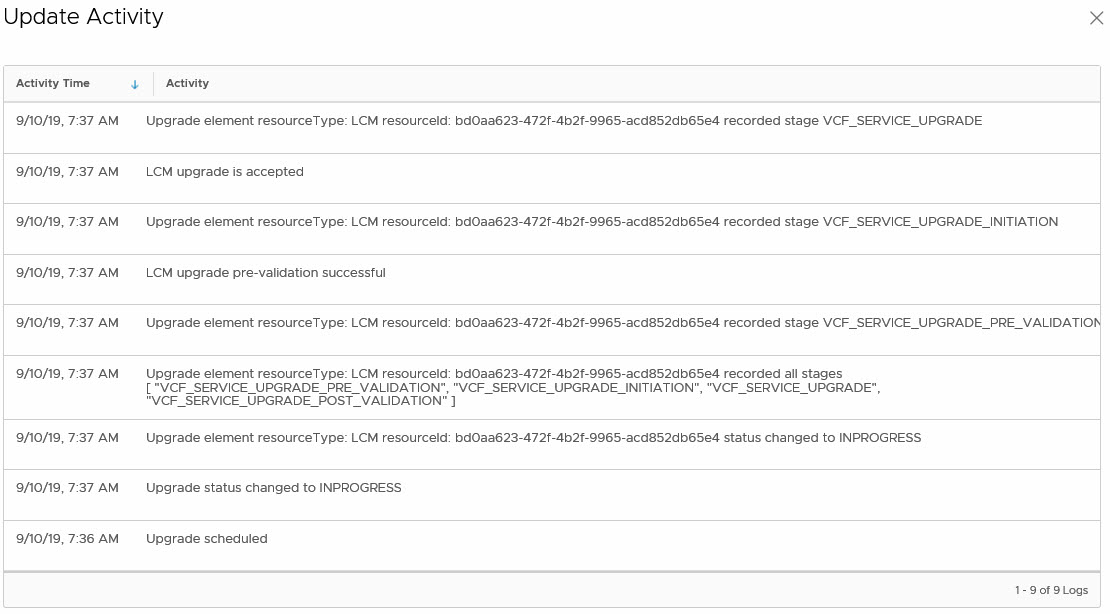
If we want, we can get some additional information by clicking on “View Update Activity”:
After the update is done, it tells us how long it took (in this case it took about six and a half minutes), and we can continue with our process, by clicking Finish.
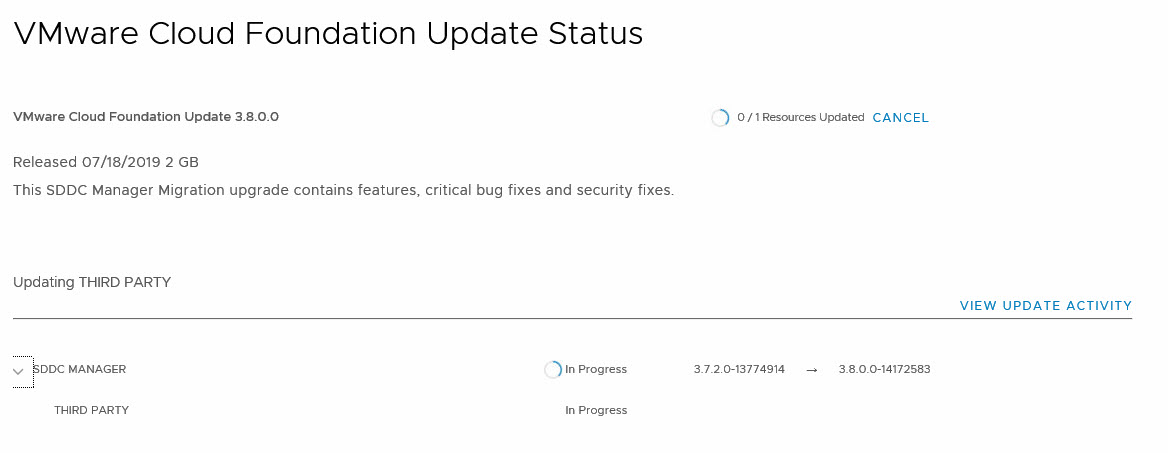
Updating SDDC Manager
The next component in the upgrade process is the SDDC Manager itself. For this, we first need to download the correct bundle (it didn’t give me the option before). After this is done, the action is basically the same as previous. Click Update Now (or schedule your update for a later date or time) and go!
Because this is a larger upgrade, it will be done through the deployment of a new virtual machine. This will then migrate the data over from the old virtual machine and after that is successfully done, it will delete the old virtual machine and take its identity.
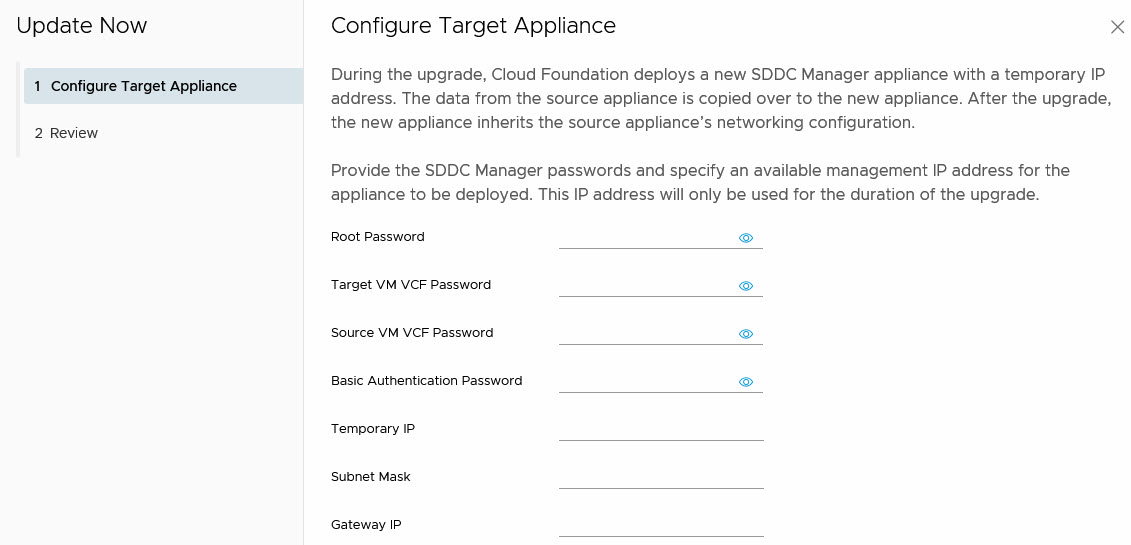
Once filled in, you get a review screen and when clicking “Finish”, the upgrade will commence. Again we get some insight into the process:
I must say that this update took a little longer than I expected, but that might be related to the nested environment I am running. So after about half an hour, the new SDDC Manager is up and running and holding all the old configuration ánd the old IP-address. Although in my environment the screen never went to complete, after I saw the old virtual machine being deleted, I waited for a while and looked at the logging, and finally decided to connect to the server.
Two things it didn’t do automatically though:
- Create a signed certificate for the SDDC Manager
- Rename the SDDC Manager virtual machine to the original name
Both can be performed manually.
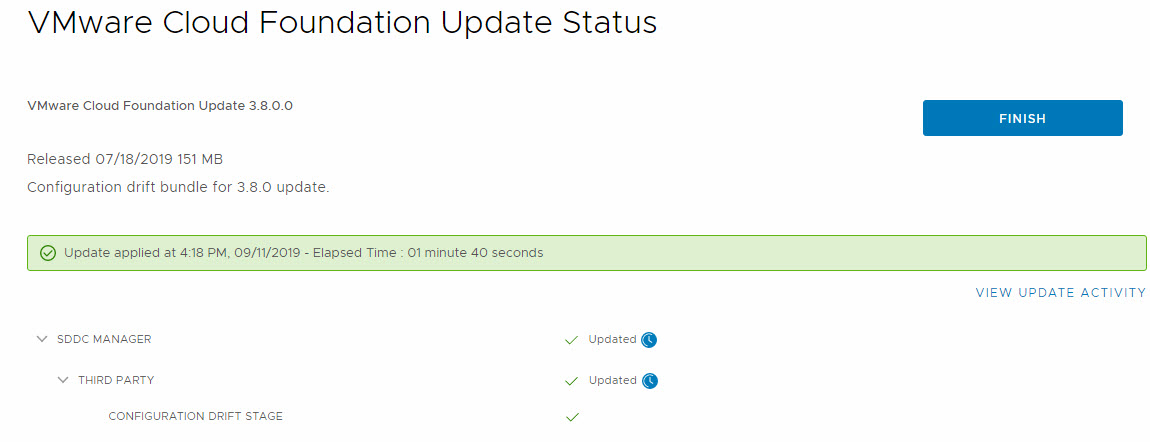
The next stage in the update process is the “Configuration drift bundle for 3.8.0 update”. Again, first download the bundle, then do a Precheck and after that comes up without issues (or with expected issues like an incompatible controller for vSAN, because it is nested ;)), do the update. After this is done, we do get a nice “Finish” button :).
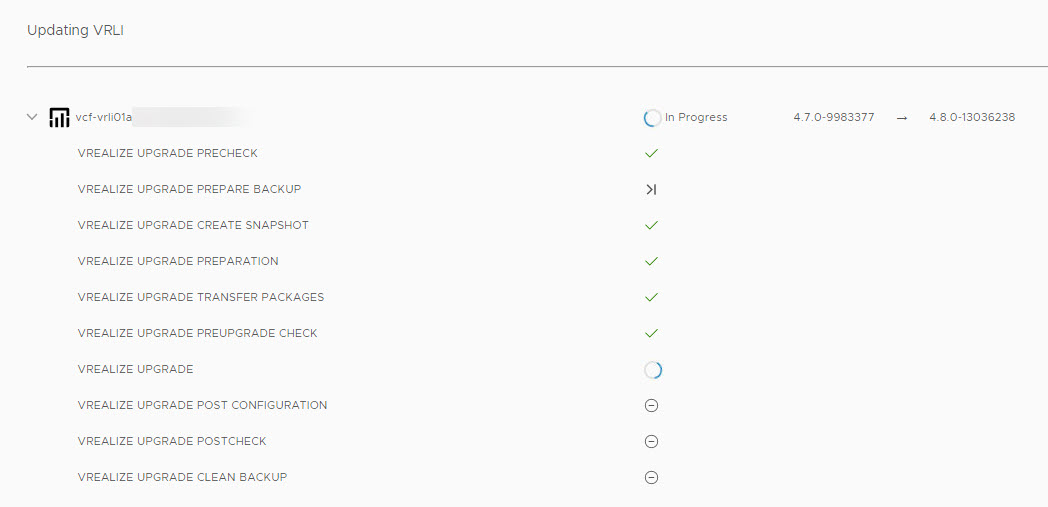
Updating vRLI
Then we have to wait for the SDDC Manager to realize that there are some more updates to perform. First off vRLI. After that, the PSC’s, vCenter Server and ESXi hosts still need to be updated, as does the NSX-V Manager.
After a certain amount of time (and I might have helped a little bit), the vRLI update becomes available. Again updating is a single click:
There is a catch here. You need to have vRSLCM deployed (under vRealize Suite), which is responsible for the update of vRLI. So if you don’t have vRLSCM, you will get failures when upgrading. They are not very helpful in solving it.

So again, clicking Update Now and we get information on the upgrade of vRLI:
Updating NSX
After the upgrade is successful (and this might take some time, especially if you are, like me, running in a nested environment, we get to the next step. Update of NSX for vSphere. Again, a couple of steps: Downloading the bundle, clicking “Update Now”:

We can follow the steps:

Updating vSphere
And again, when it’s successful, we go on to the next stage. Bear with me, we’re almost there. Next up vCenter Server and PSC’s:

Update once again gives us some insight into the process:

And then we finally have reached the last step of the upgrade: ESXi:

And see it’s progress:

And after this is done:

We can go on to the next update, which just came out:

But that’s a story for another time ;). Although, I can inform you of the steps here, since I am currently in the process of doing the upgrade:
- SDDC Manager
- vRLSCM
- PSC’s + vCenter
- ESXi
No upgrade for vRLI and NSX-V in this release. So all and all, a lot quicker to update to 3.8.1. than it was updating to 3.8.
Conclusion
As you can see, updating VCF isn’t very hard. It does take some time (in my case 4 days, with some bumps along the road, mainly because I run nested and low on resources), but the order is given to you and there is not a lot that you can do wrong.