Upgrading the demo environment, with vSphere 7 and NSX-T 3
After the release of NSX-T 3.0, nothing stands in the way of upgrading our demo environment to NSX-T 3.0, making it ready for vSphere 7.
Because I wanted to see the checks in the upgrade process of vSphere 7, where it will inform you of the interoperability of NSX-T, I started with the upgrade of the vCenter Server:
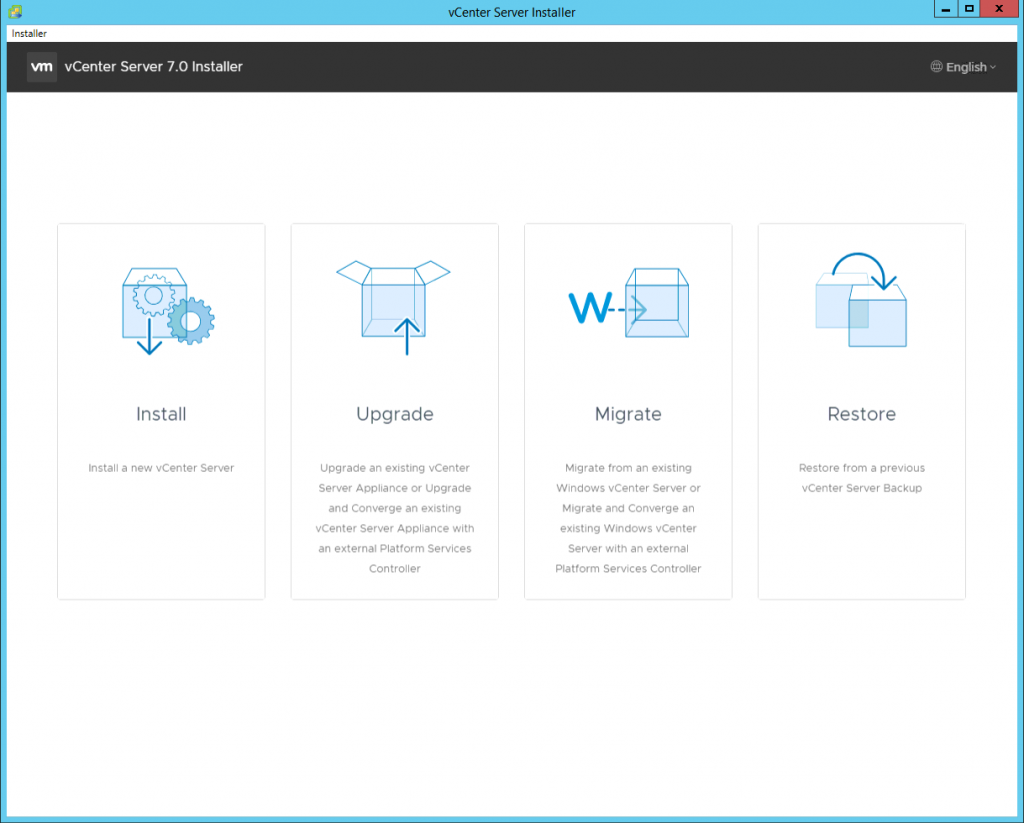
and choosing Upgrade. After following the wizard a new appliance is deployed. This appliance will then be used to upgrade the current appliance.
In the second stage of this process, we can see that there is an extension registered that is not supported:
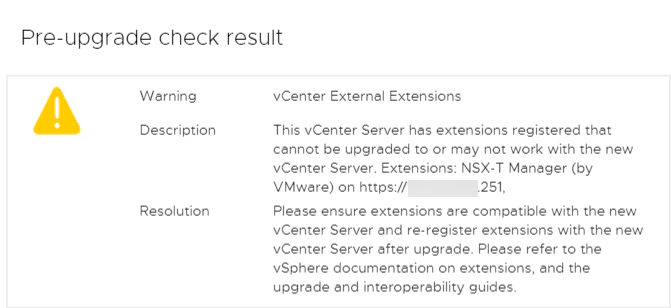
So it is important that we first upgrade NSX-T to version 3.0 and after that we can go ahead with the upgrade of vCenter. I let the new vCenter appliance run, so we can come back to that later.
Starting with vSphere 7, the Update Planner can give you this information beforehand, from within the vCenter Server itself.
Upgrading NSX-T
Upgrading NSX-T is a very easy process. I have downloaded the “mub” file and with that file, we can go ahead with the upgrade.
This needs to be done on one of the nodes, when you use the VIP-address it will tell you which one:

When connected to the right manager directly, we can go to the upgrade screen:
and upload the file to the NSX-T Manager:

After doing this, we can start upgrading:

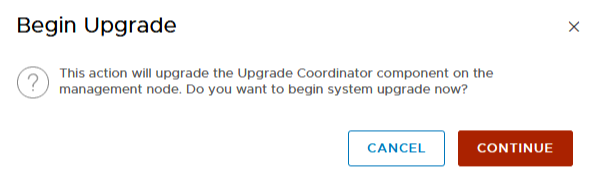
After accepting the license agreement, we go ahead with the first step, upgrading the Upgrade Coordinator:
After the Upgrade Coordinator has completed, we can see the upgrades that are planned:

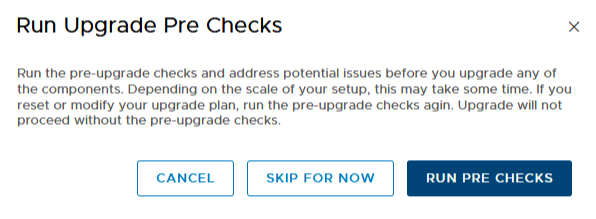
and we can go ahead with the first step, the Pre Checks:
This will do prechecks on all of the components, to see if there are any blocking issues. In my demo environment, I have seen issues when upgrading NSX-T every time so far, but they were around disk space on my nested nodes, so that can be easily solved, with a reboot of all hosts.
The error on the Management nodes does need some attention:
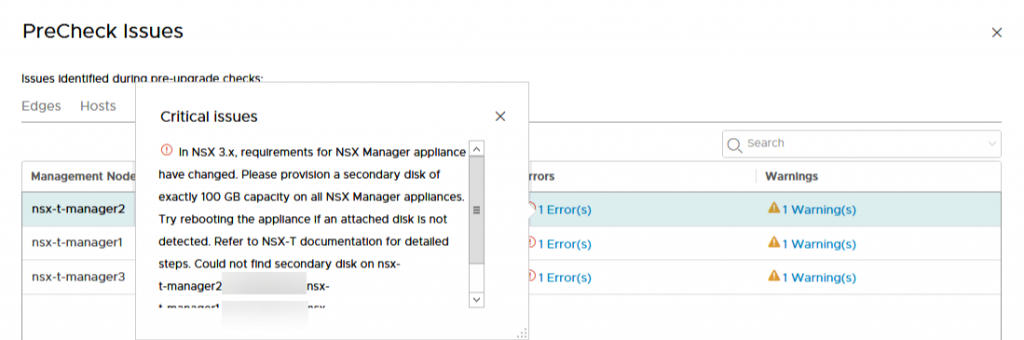
Because of the different requirements for storage on NSX-T 3.0, it is necessary to add a 100 GB disk to all NSX-Managers. This does not need a reboot, but if the disk is not detected, a reboot might be necessary.
So after the disks have been added to the NSX Managers (and we solved the warnings, which were about the back-up that hadn’t run within the last two days), we rerun the precheck and all is well:
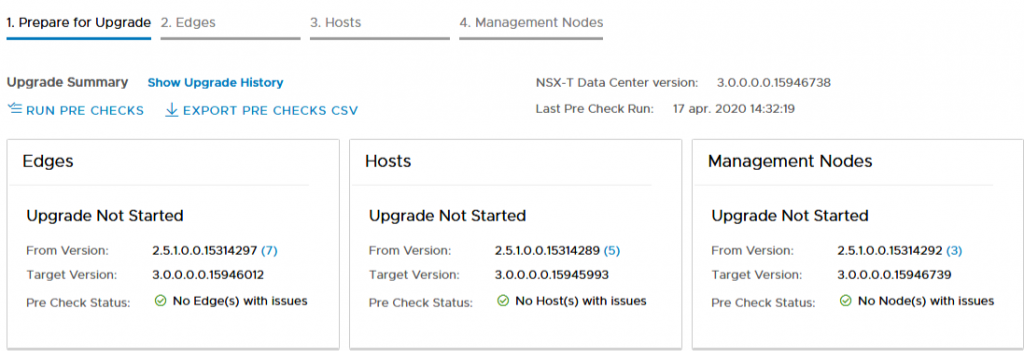
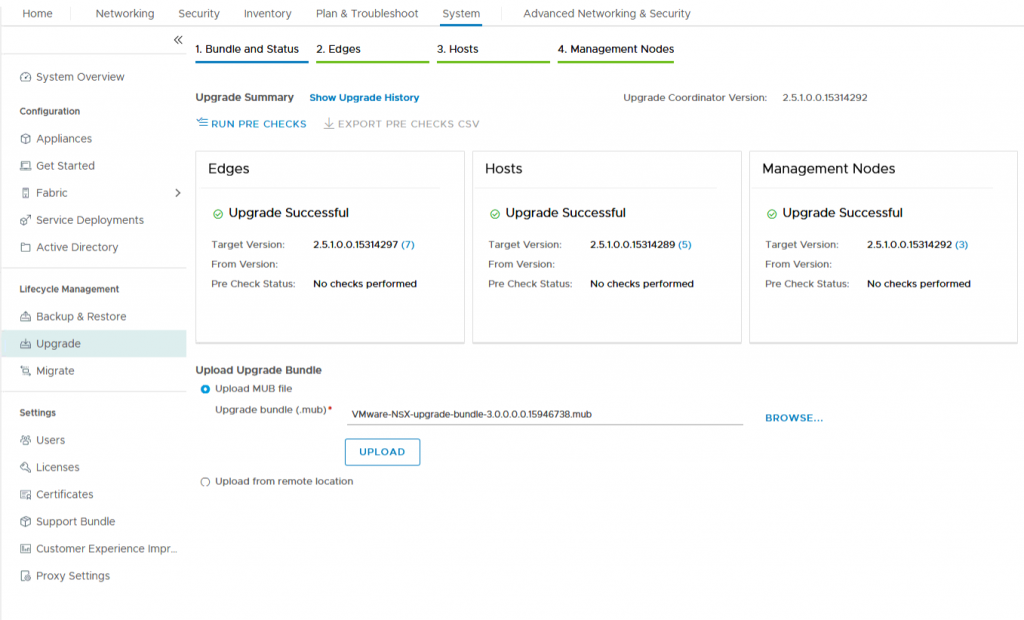
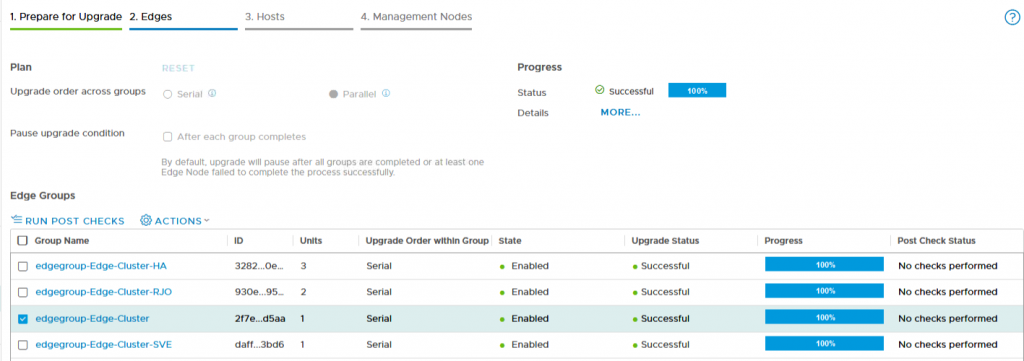
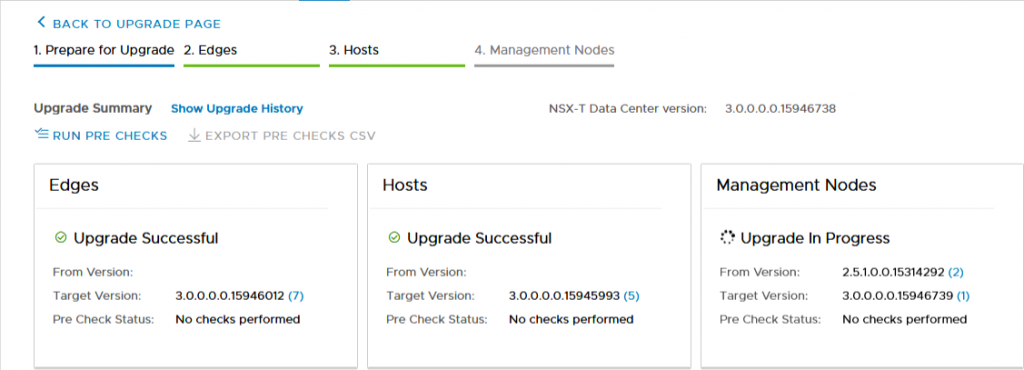
When all prechecks are successful, we can start with the actual upgrade. First up, the Edge Nodes:
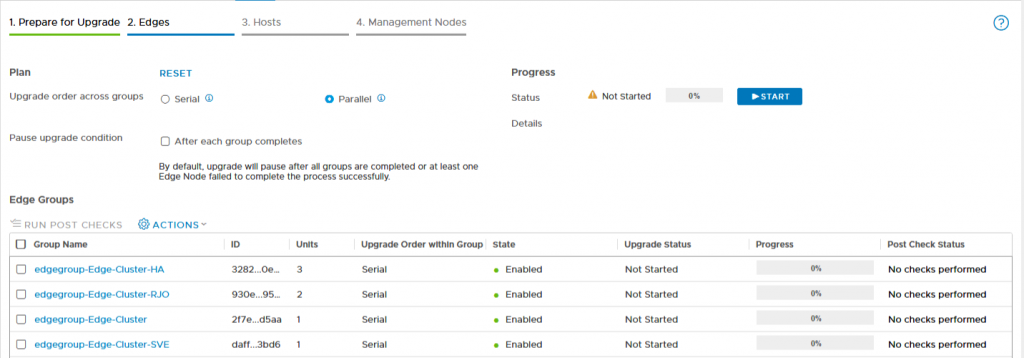
After pressing start, the upgrade commences. I have chosen to leave all options default, but you might consider changing some of the options. A parallel upgrade might be a little overly aggressive, for production I would probably prefer to do a serial upgrade, to get a little extra control over the process, but maybe that is my cautious disposition.
During the upgrade, you can click on the groups that are being upgraded, to get a little extra insight into the status of that group:

After all upgrades have been successfully finished:
we can move on to the next part, upgrading the hosts:
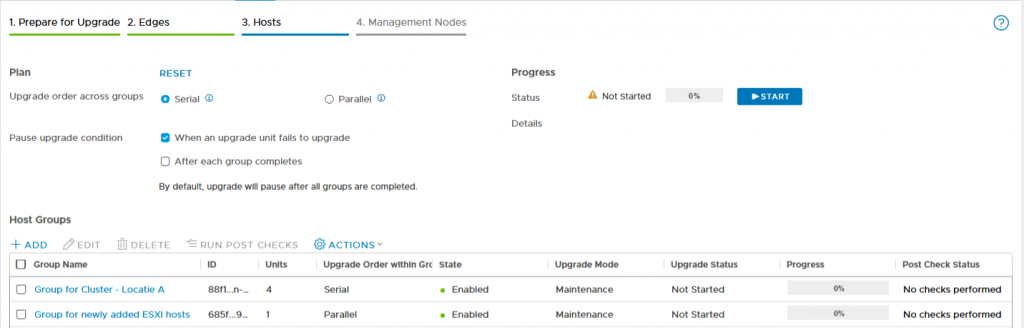
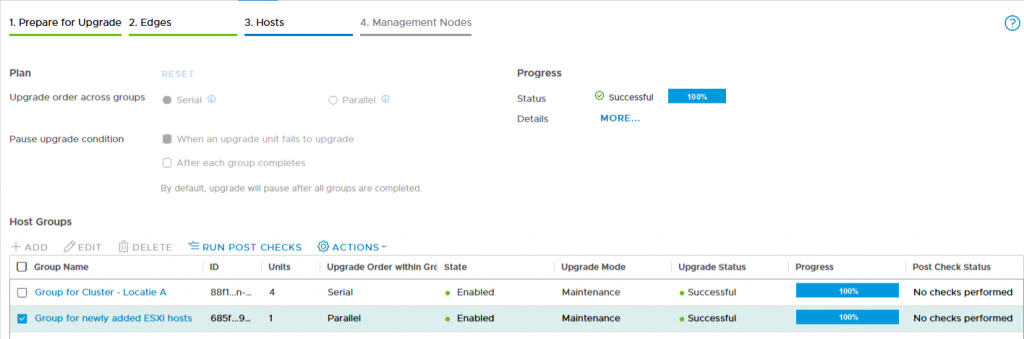
This goes in the same way, we can choose wether to do a parellal or a serial upgrade (with hosts, the default is serial) and when doing the upgrade we can get some insight into the process:
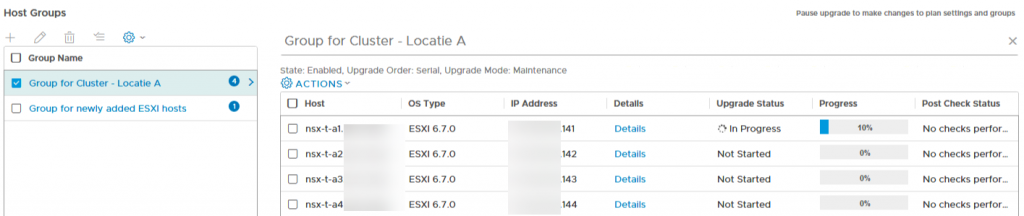
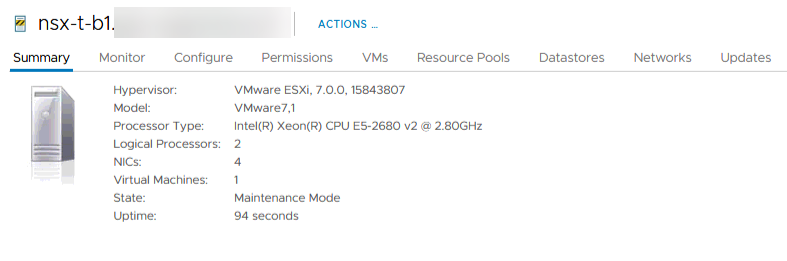
What will happen during the upgrade, is that the host will be placed into Maintenance Mode, so make sure that DRS is able to free up the hosts that are being upgraded:
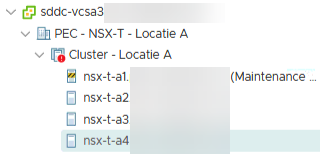
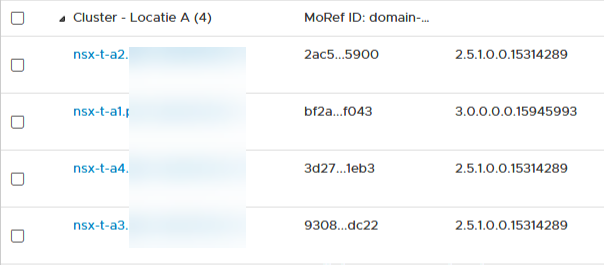
During the upgrade, we can have a quick peak at the status of the transport nodes, to see that the versions are different, within the same cluster:
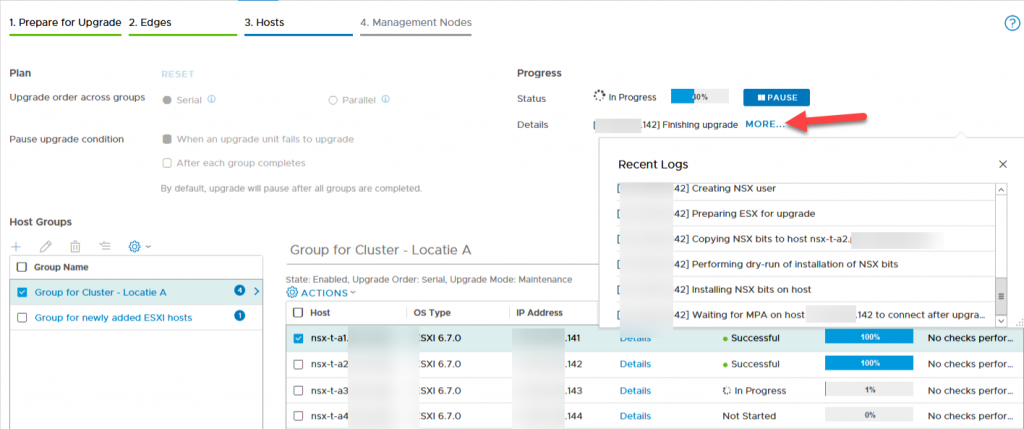
There is also some additional information to be found in the upgrade screen, when you click on “More” in the Progress part of the screen:
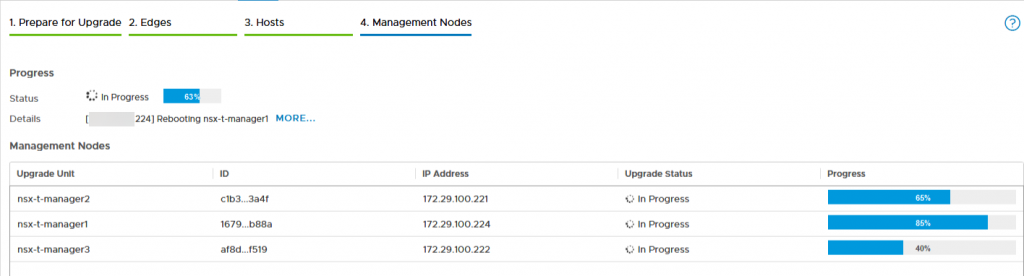
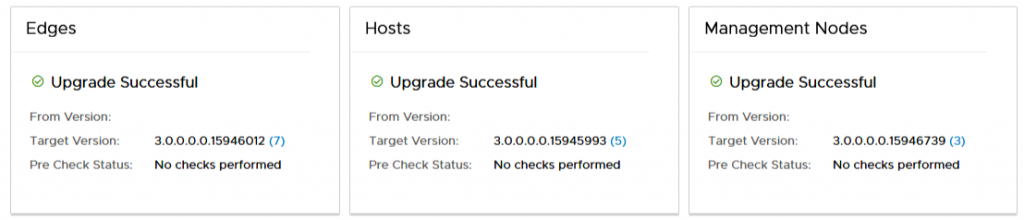
After all nodes have been upgraded:
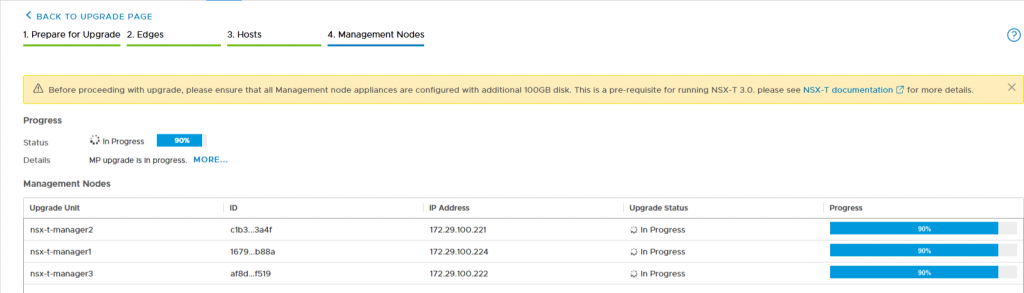
we can go on to the final step in the process, upgrading the unified appliances, both management and control plane of the virtual network.
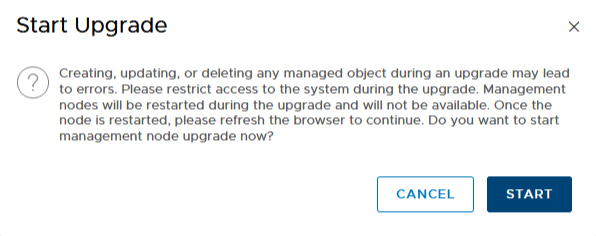
When starting this upgrade, we are warned that changes to the environment should be avoided, because they might lead to errors. So important to let everyone know that this is going on and that everyone should be aware. Also restrict access, so that no changes can be made, through automation or API-calls:
Upgrading of the unified appliances is a more or less parallel process, although restarting is off course not done concurrently:
During the reboot of the manager that we are connected to, we lose insight into the process, so we need to refresh the web-page until it has restarted (and this can take some time). To get some insight into the process, we can ssh into one of the managers and look for it:
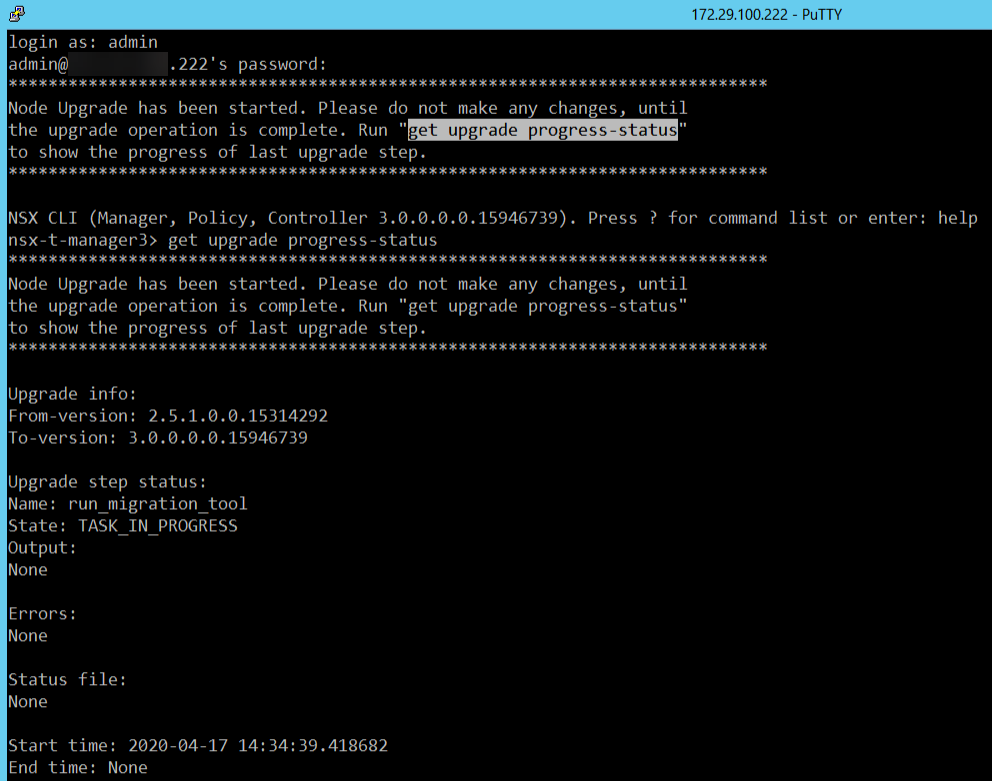
This is the manager that the upgrade was started on. On the other managers we get:
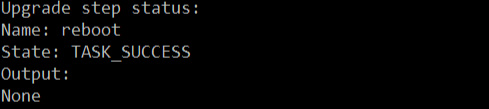
After some time, the manager that is performing the migration, gets started again:
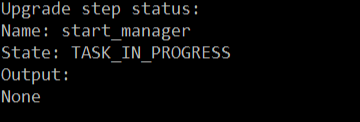
And shortly after that, we can log in again, but processes are still starting:

When all processes have started, we can log in again and see the status of the upgrade:
and:
and finally:
Next step: vCenter Server.
vCenter Server Upgrade
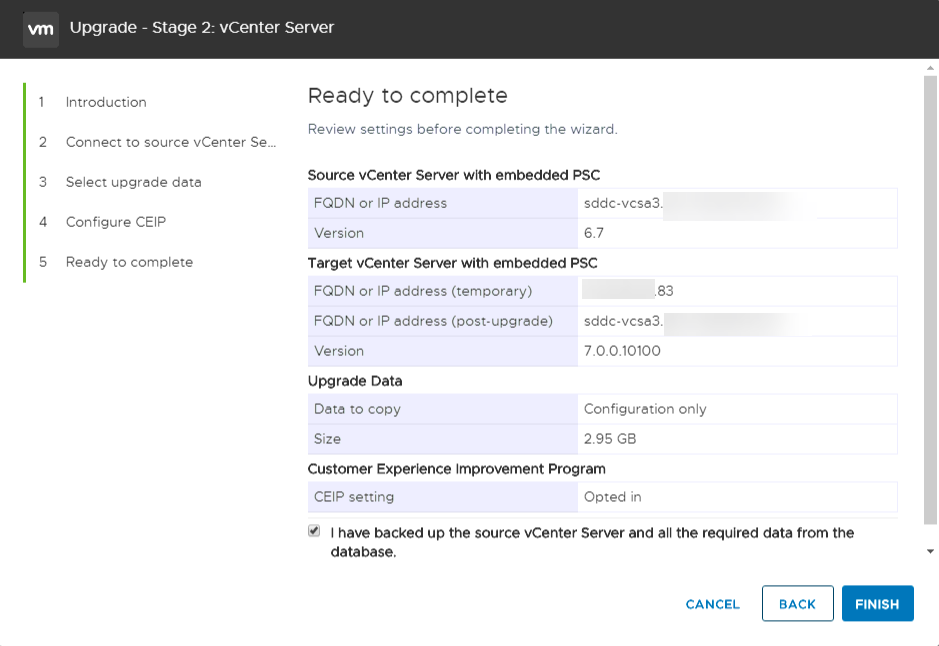
So we revert back to the started upgrade from the first step, the vCenter Server appliance is still waiting for us and we can pick it up again, at the stage in which the checks are done around compatibilities or other issues that might interfere with a succesfull upgrade.
The Pre-upgrade checks this time give the same warnings, so it still asks you to check the interoperabilities yourself. A little bit disappointed, but with the knowledge that NSX-T 3.0 is compatible with vSphere 7, we can continue with the upgrade:
And yes, we want to join CEIP, we get the licenses as a partner, so the least we can do is give something back:

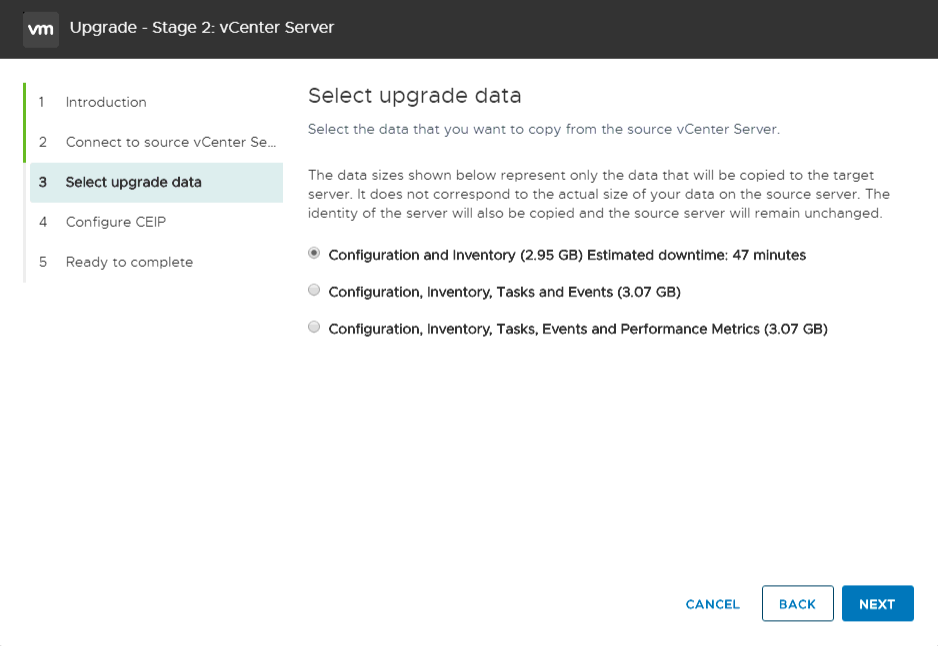
And after a final check on all information submitted, we can go ahead with the upgrade/migration:
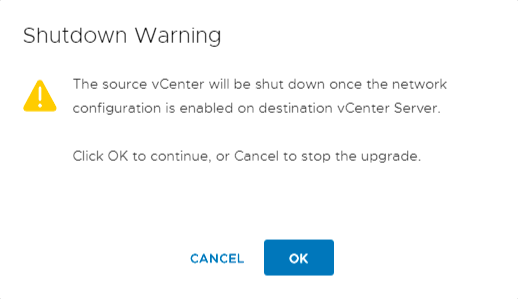
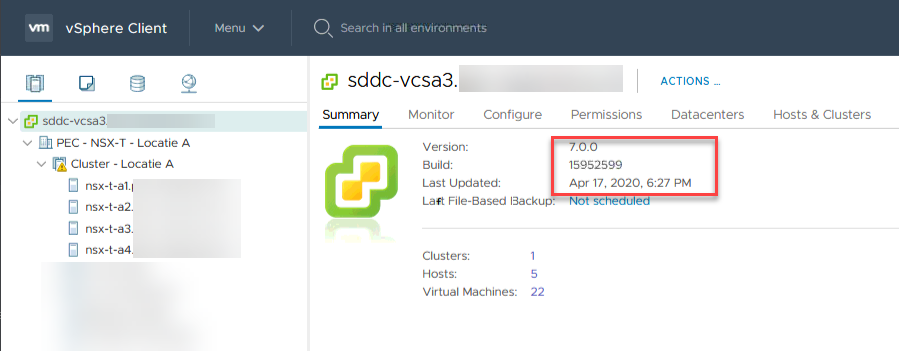
The rest of the process is pretty straightforward (as were the first steps, to be honest) and is very much like earlier upgrades. After it has completed (and the 47 minutes was a little more time than it actually took, which was around 35 minutes), we can logon to the fresh vCenter Server:
Next step, upgrading hosts.
Upgrading Hosts
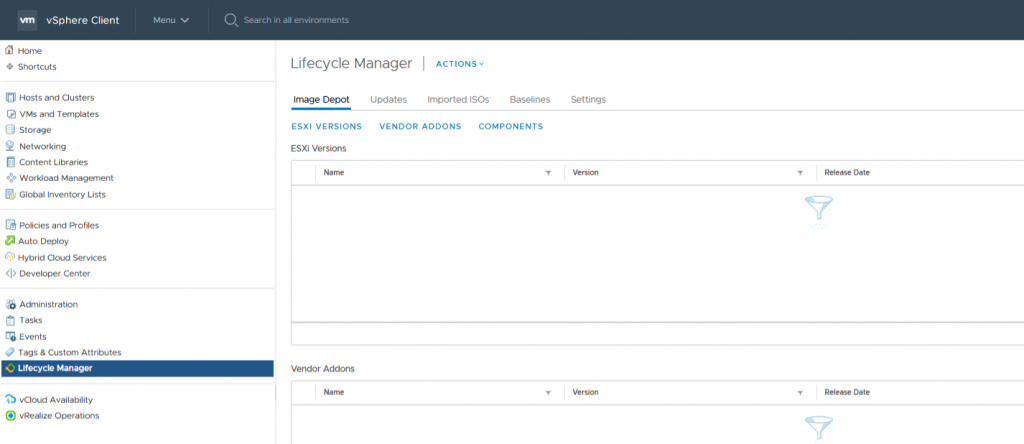
For this, we are going to utilize the new Lifecycle Manager. There might be some residual cached content that will give some errors or warnings on the Lifecycle Manager page:
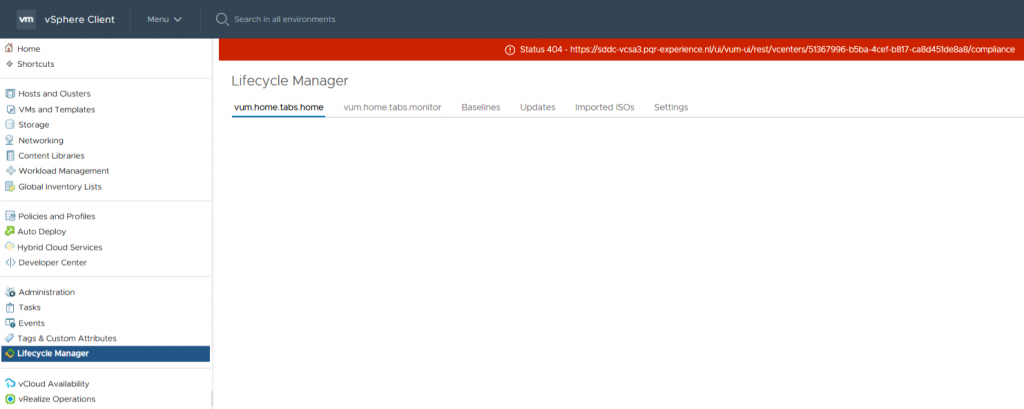
To get rid of that, make sure you clear the browser history and cached content. After doing that, the screen looks a lot better:
First we import the ISO that we have downloaded from www.vmware.com. This is very much like it was in Update Manager. And since I do not have hardware that is supported for the whole experience, basically upgrading the hosts is a pretty straightforward process.
Create a baseline, put the new ISO into that baseline and assign the baseline to a host or cluster. After that, check compliance for the host and remediate the hosts with the upgrade-baseline.
Unfortunately, my nested hosts were created with a boot disk too small for ESXi 7.0 (2 GB which needs to be around 4 GB), so I had to increase the boot disks before going ahead with the upgrade, but apart from that, everything went smoothly:
So I can go ahead and investigate all the good stuff of vSphere 7 and NSX-T 3. Lookout for more blogs :).
Addendum
So, a little addendum to this. Although everything looked good, in the console of NSX-T, apparently there were some communication issues going on.
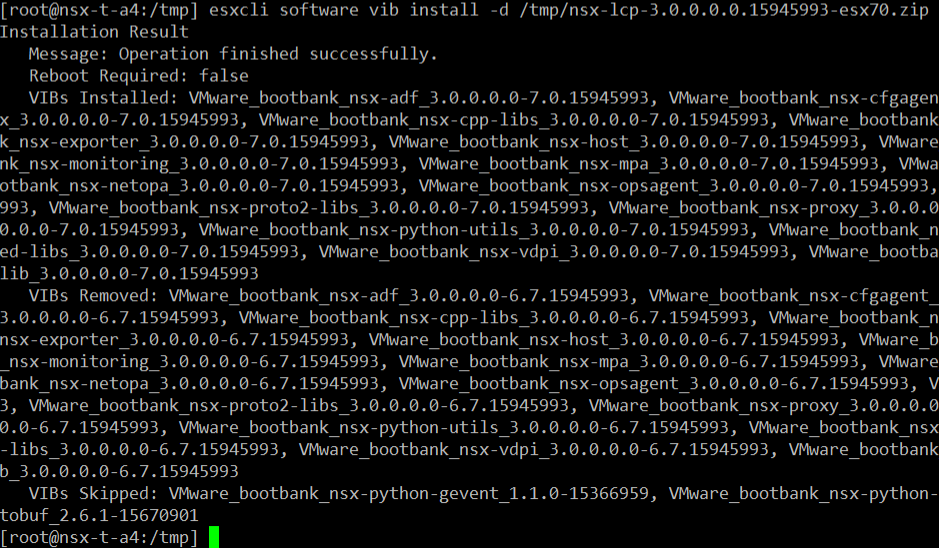
It looks like the VIBs didn’t get updated:

(screenshot is from during the reinstall, so only one host left on 6.7 VIBs).
Thanks to Wesley Geelhoed (https://wesleygeelhoed.nl/), I reinstalled the NSX VIBs, to correct the issues and after that all is fine.
I downloaded the VIBs from the vmware.com website (pick the right hypervisor) and upload them to the host you’re installing them to. Then simply install (after you put the host into maintenance mode, of course) and Bob’s your uncle:
3 thoughts on “Upgrading the demo environment, with vSphere 7 and NSX-T 3”
I see my upgrade manual is ready 😉
Nice job Ronald!
Hi Ronald, This is really helpful. Thanks for putting it together. I helped me alot to walk through the upgrade.
I do have to ask one question, someone in GSS told me you don’t have to select the node anymore. Once you login via VIP, you can be any node and start the upgrade cordinator. Can you please verify that would be great.
Second, after you upgrade the to 7.0 on the host, host will fail on the NSX-T UI as they need to update the new VIB. All you have to do is to click on the host and resolve and it will automatically download the VIB.
Second
Hi Irene,
I am not able to test again, but in I got that message when I started the upgrade. Don’t know it that is still the case with 3.0.1 though, will try that out, when I am able to (the hardware is currently being moved to another location and that might take a little while to complete).
As to your second question, it was my experience that a reboot was necessary before the hosts were able to communicate again. This was also experienced by one of my Dutch vCommunity friends. I am not sure if that was related to the fact that we are running nested, that could have been.