New Tech: Nutanix CE
After playing around with HPE VM Essentials (and a little bit of Morpheus), the next vendor I will be taking a closer look at, is Nutanix. They have been a long and strong partner for PQR and in the past (before I moved to VMware) I even held some Nutanix certifications. But that is a long time ago, so I am treating this as a completely new product.
I will be using an excellent blog that already partially describes the steps I am taking, but since this is also a documentation-site for myself, I will be doing more or less the same as the author of this blog: https://polarclouds.co.uk/nested-nutanix-ce-deployment/
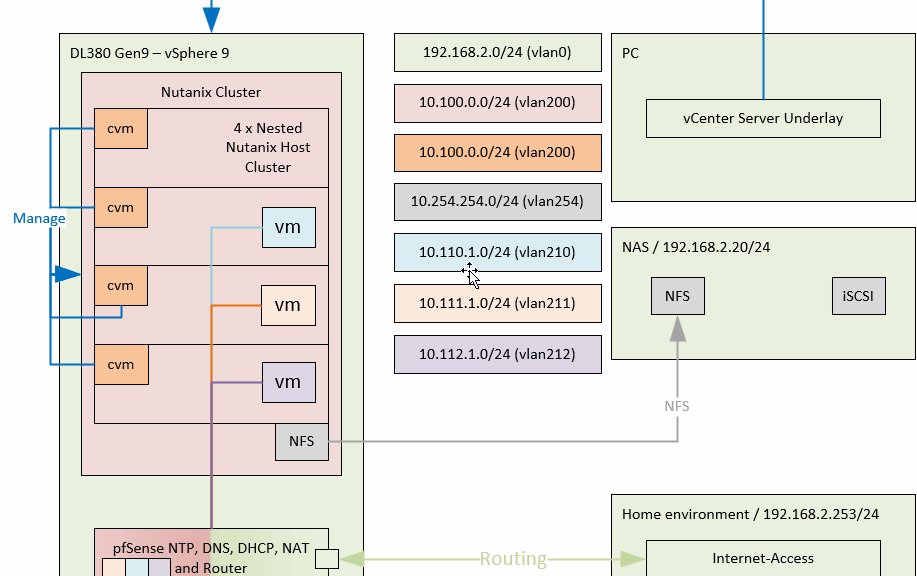
In this blog I will be creating the following environment:
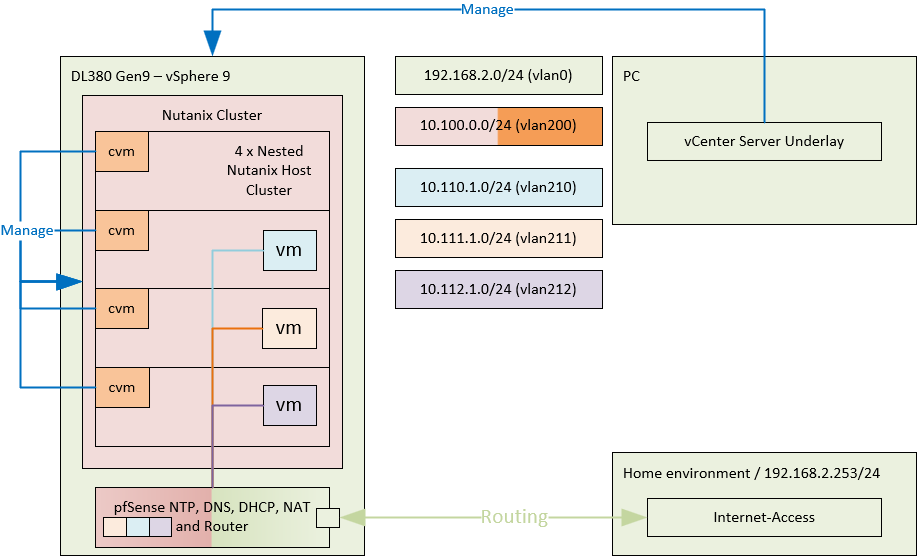
by following these steps:
- Create a Host-VM (times four)
- Create a cluster
- Change Netwerk Config
- Install VMware Tools
- Change Hostname and set DNS Server
- Create VMs
One remark to make, I will be making use of pfSense as an appliance to offer multiple functionalities. It will offer DHCP, DNS, Routing and NAT.
Create a Host-VM (times four)
For this exercise I will create 4 VM’s on my Gen9 host, with the following specifications. I will be using the first three VM’s for the first cluster and maybe later will do something with the fourth:
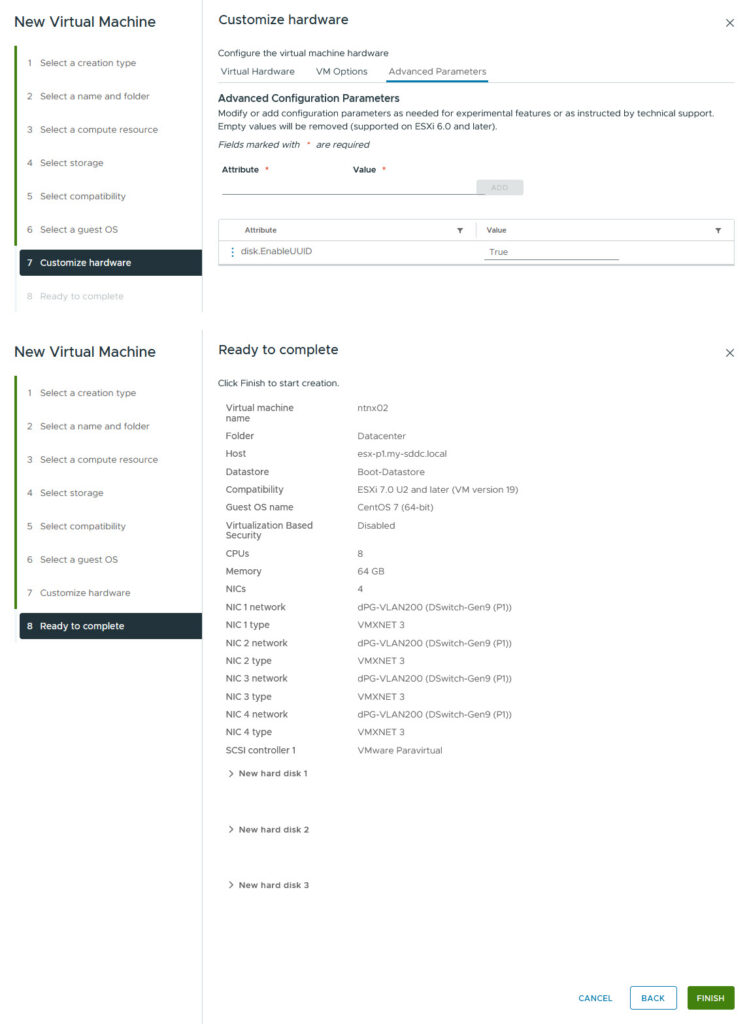
The storage is all “thin” provisioned and is using different datastores (16 GB for Hypervisor boot, 200 GB for CVM Data and 512 GB for CVM Boot). Also:

And:

This will make sure no swap is used on storage, and I have the memory to support this. After the configuration, I attached the ISO I downloaded from: https://next.nutanix.com/discussion-forum-14/download-community-edition-38417, which contains version 6.8.1.
I selected the right storage for the right function and filled in the IP-address information.
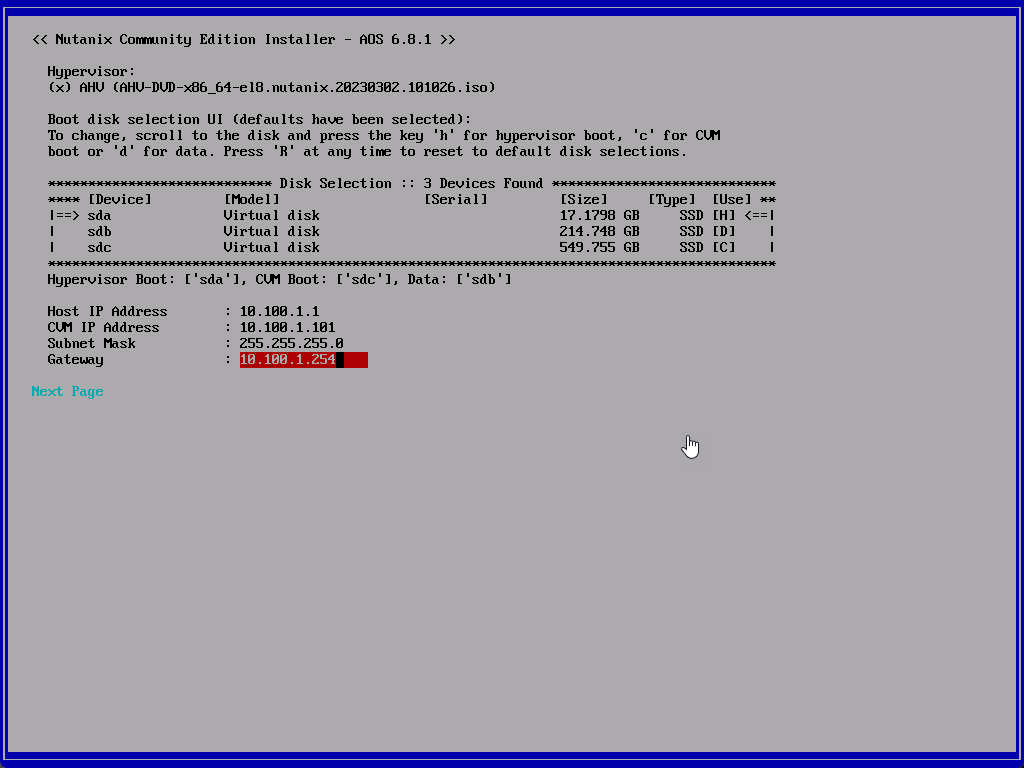
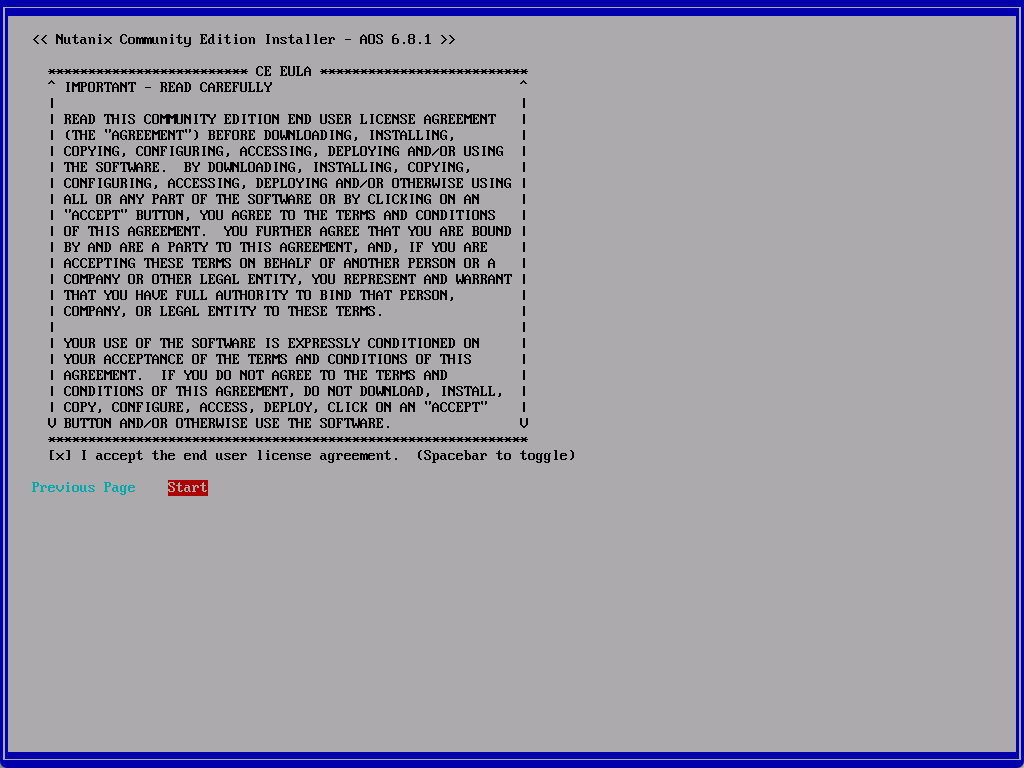
Accepted the EULA (you have to scroll down to the end, otherwise it won’t let you continue) and away we go.
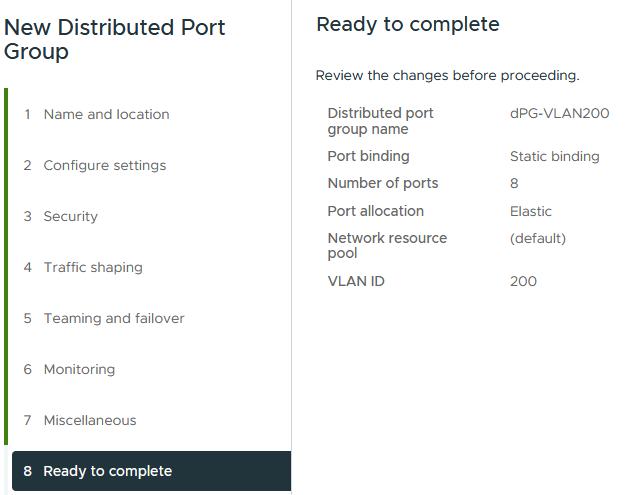
One thing to remark here, there is no option to set a VLAN-ID (at least, not from the UI). So the network should be directly connected and. In order to achieve this, I created a new dPG with VLAN-ID 200, for the Nutanix VM’s (this VLAN will be used for the Management-interface of both host and VM):
And create a VLAN-interface on the pfSense, for VLAN 200, which is attached to a trunked dPG and is using IP-address 10.101.1.254/24. Also created a static route on my pc, so I can communicate through the pfSense, with the 10.101.0.0/16 network.
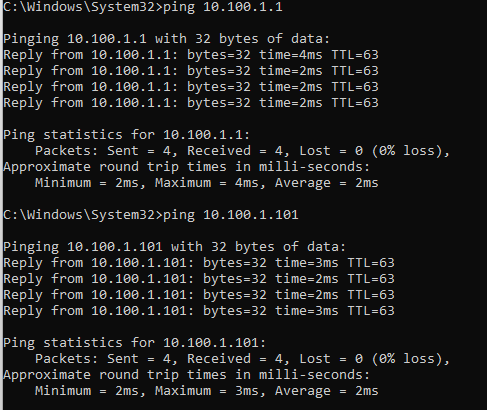
In the end, we can communicate with the Nutanix Node and with it’s CVM:
Logging in to the CVM, with the username “nutanix” and password “nutanix/4u” and we can get the cluster status:

So, we have to first create the cluster.
Create a cluster
After creating another three nodes, in the exact same manner as in the first step, we can create the cluster. For this we log onto one of the nodes and run the following command:
cluster -s 10.100.1.101,10.100.1.102,10.100.1.103 create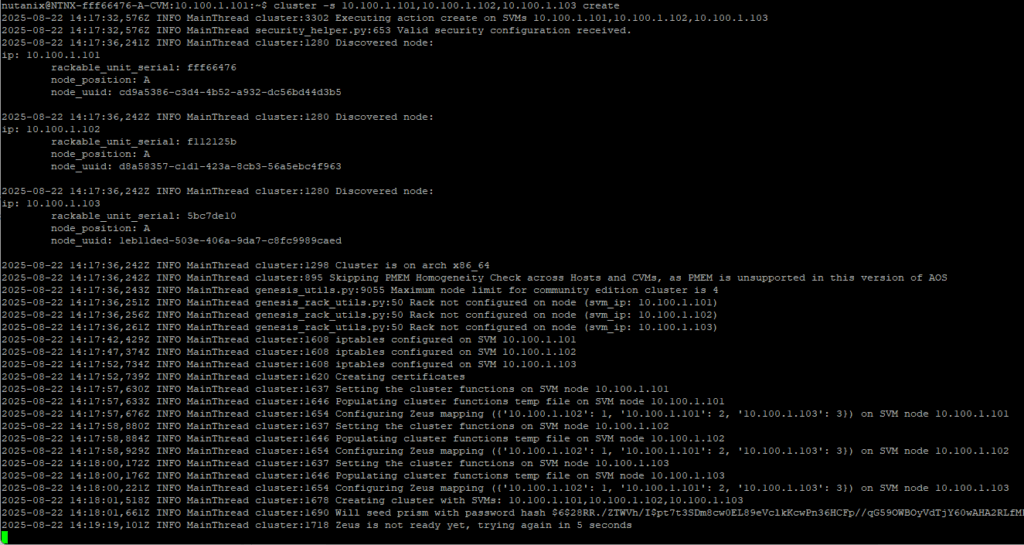
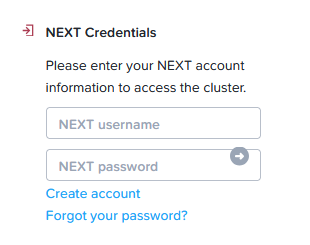
This will create the cluster consisting of the three CVM’s that are in the command. After this completes, the cluster is created. The fourth node will be added later on. After this cluster is created, we can log onto the GUI of one of the CVM’s (and change the default password). We then have to connect to our NEXT account and see the cluster:
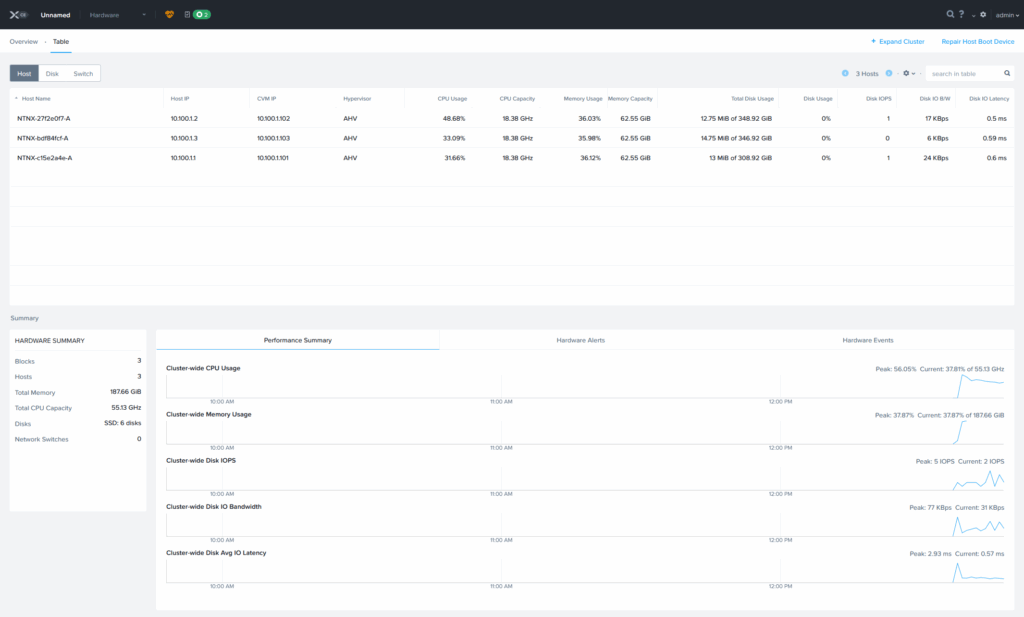
And after that, we see:
I set the “cluster IP-address” to 10.100.1.100 through the command-line:
ncli cluster set-external-ip-address external-ip-address=10.100.1.100
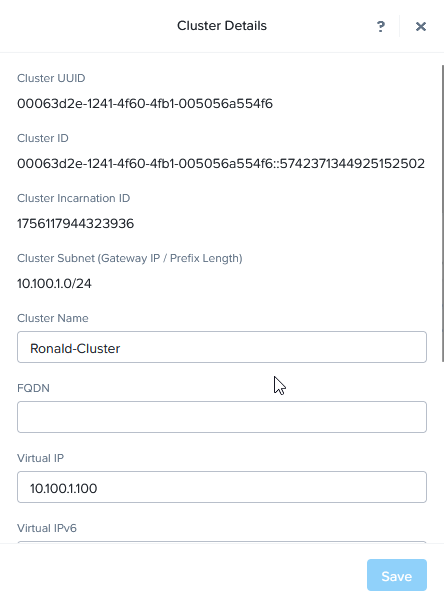
And now I can access the cluster through that IP-Address. This will allow me to open the admin page through a VIP. This can also be done in the GUI, where you can also change the Cluster Name:
Change Netwerk Config
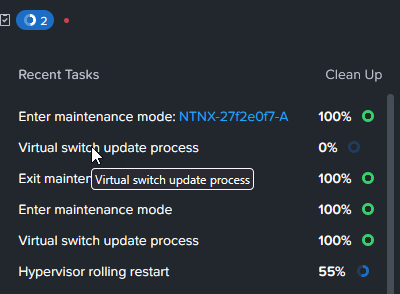
Next action I took was change the Network configuration. The installation has created one Virtual Switch “vs0”, and all the (four) nics where attached to it. I have removed nic2 and nic3 for all the three hosts and that triggers a “rolling restart”, to effectuate this change:
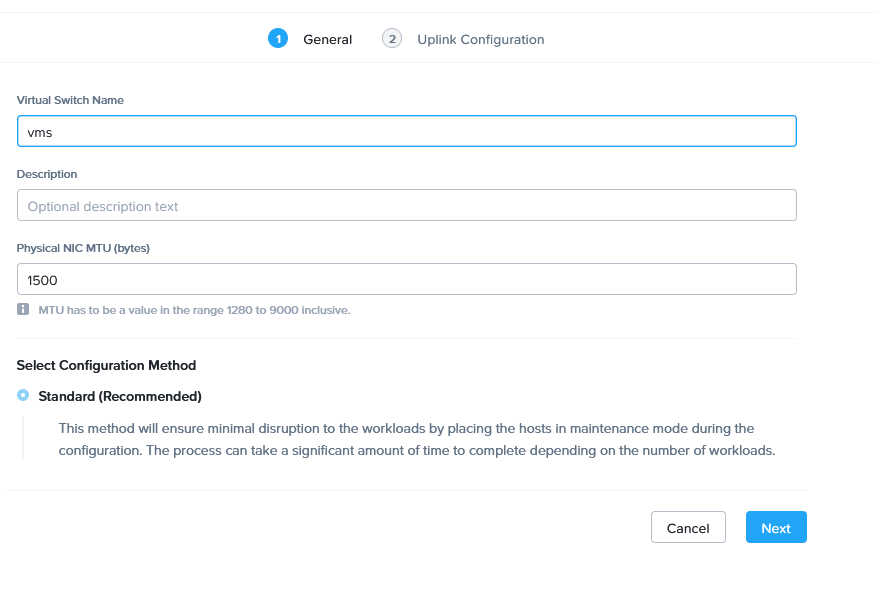
After completion of this rolling restart, I created a second Virtual Switch (vms):
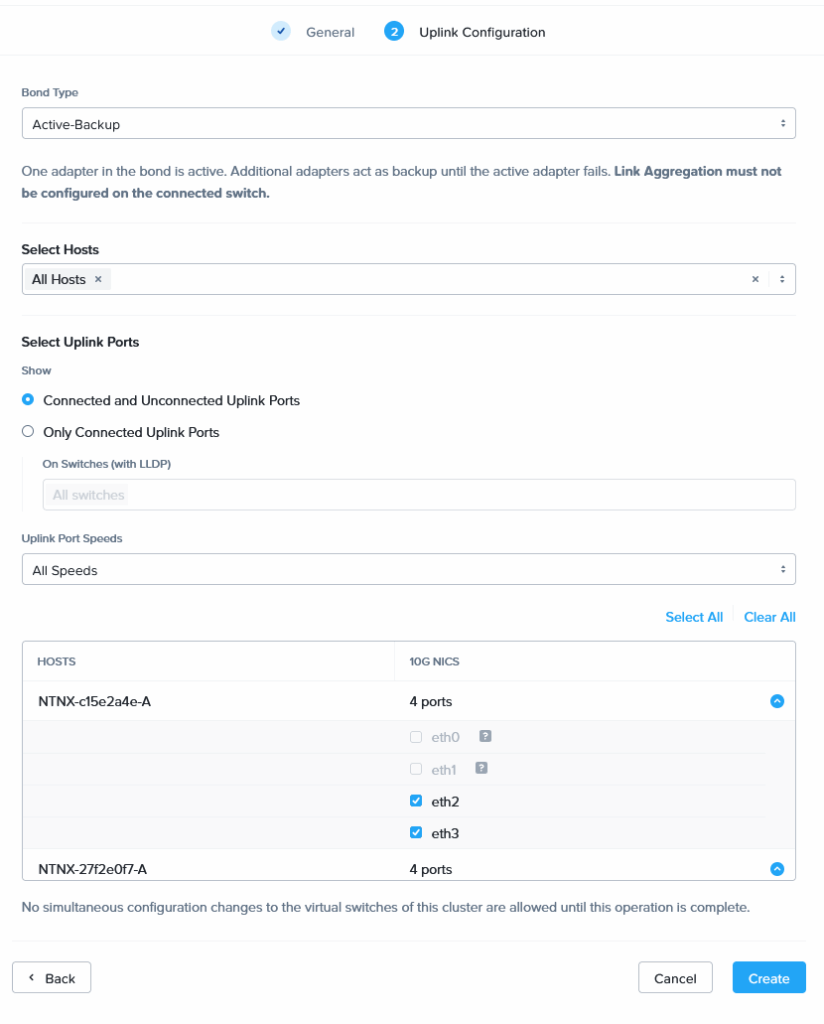
Connect the released eth-adapters:
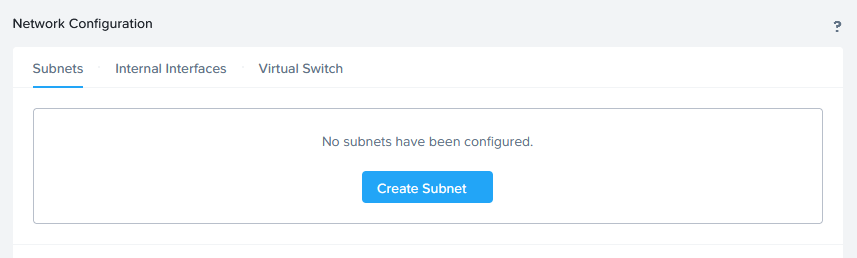
Then create a Subnet on this switch:
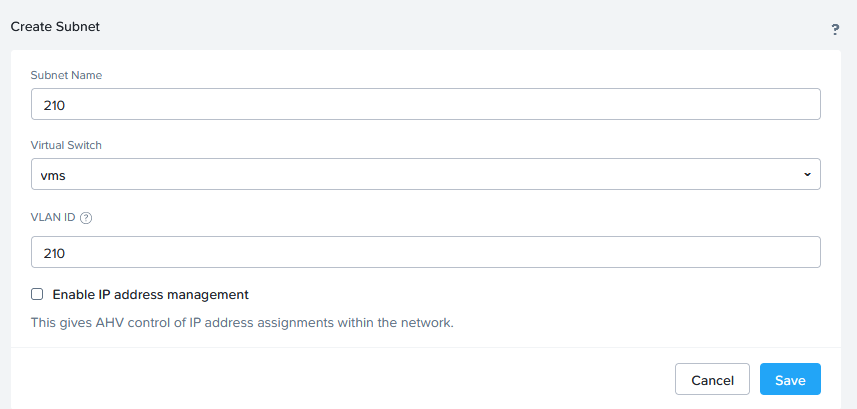
And attach the interfaces that this Virtual Switch uses to the “vlan-trunk” port group, to see if we can get a VM to communicate on a nested Nutanix cluster. I did the same for VLAN 211 and 212.
Note: One thing I did find is that the order in which the network adapters are created within vSphere does not correlate to the order in which they are discovered by the AHV host. There is a relation though, but it’s as follows:
nic0 – eth1
nic1 – eth2
nic2 – eth3
nic3 – eth0
So when connecting the nics to the right port groups, means nic0 en nic3 are connected to VLAN200, and nic1 and nic2 are connected to the Trunk port group (found this out when I moved nic2 and nic3 to another port group and losing 3 of the 4 hosts :)).
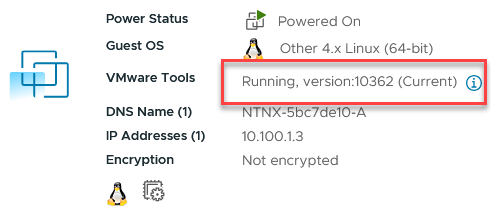
Install VMware Tools
To make management of the hosts a little easier, I am installing the VMware Tools version, that is part of ESXi.
I am using the method described here: https://polarclouds.co.uk/nested-nutanix-ce-deployment/. I did need to copy the right .iso from an older version of vSphere. On 9 it is no longer available, but it is on 8.
Basically using the following commands (version might change):
mkdir /media/iso
mount /dev/sr0 /media/iso
cp /media/iso/VMwareTools-10.3.26-21953278.tar.gz /root/
cd /root
tar -xf VMwareTools-10.3.26-21953278.tar.gz
cd vmware-tools-distrib
./vmware-install.pl
and accepting all the defaults.
And while we’re at it, also change the passwords for both the hypervisor and the CVM in order to get rid of the errors:
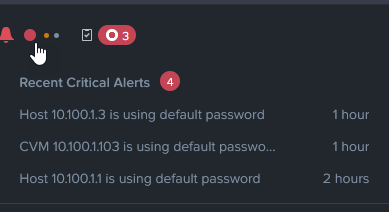
(changing the password on one of the CVM is sufficient to change it on all the CVM’s, I found when I got errors on the third and fourth :)).
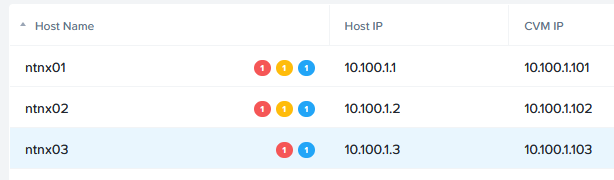
Change Hostname and set DNS Server
Because the name of the hosts are all auto-generated, I wanted to change them to a recognizable name. For this, I logged on to the CVM of the hosts and ran the following command:
change_ahv_hostname --host_ip=<host_ip_address> --host_name=ntnx0x

This is then automatically effectuated in Prism as well:
Create a VM
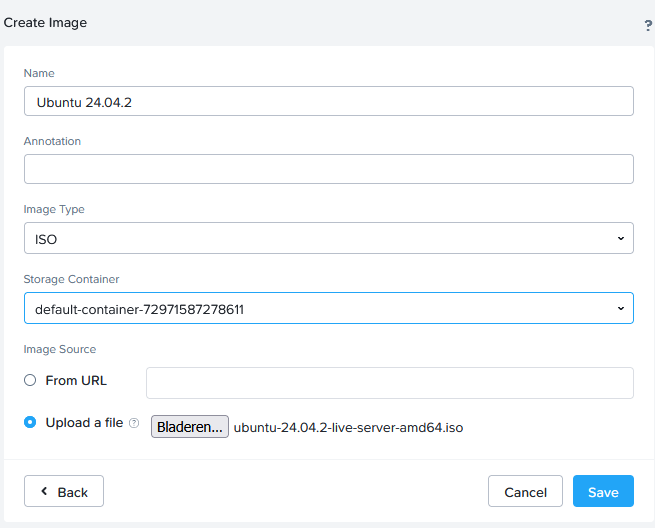
First we have to create an image to install. For this, we go to the Settings page and click on Image Configuration:
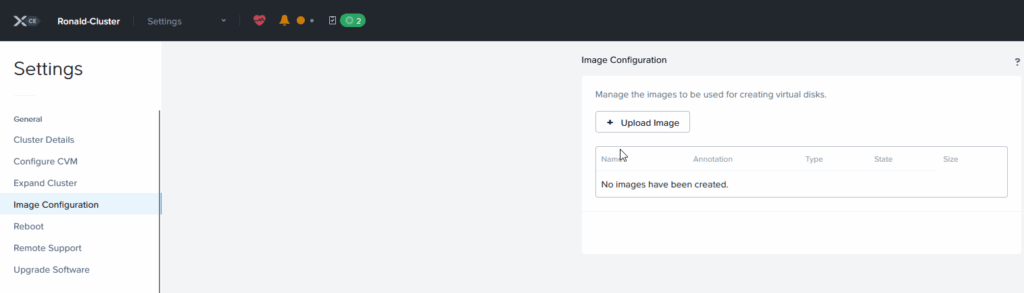
There we can upload an image:
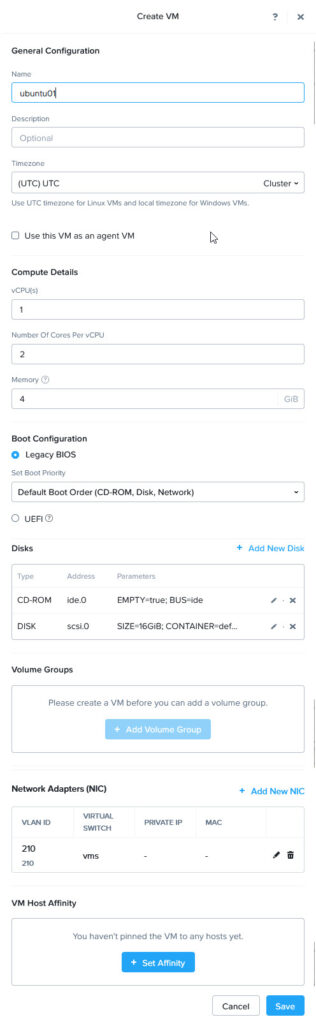
After the upload I can create three new VM’s and see if they can communicate with each other. This is the first VM I create (Ubuntu based), I create one for each of the VLAN’s (210, 211 and 212).
And turn the VM on and open the console:
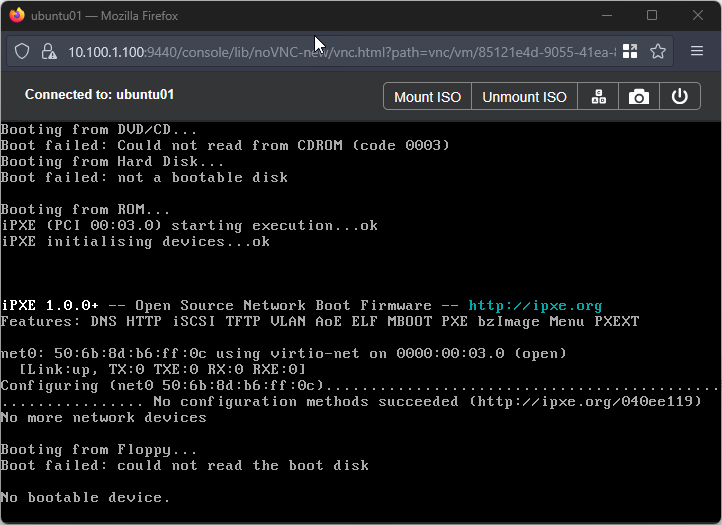
We attach the Ubuntu-ISO uploaded earlier, for installation:

and send a “Control-Alt-Delete”, to boot from it. I will not detail the installation of Ubuntu, just suffice it to say, the installation is successful and I am using DHCP to get an IP-Address (the pfSense is configured as a DHCP-server for all three subnets).
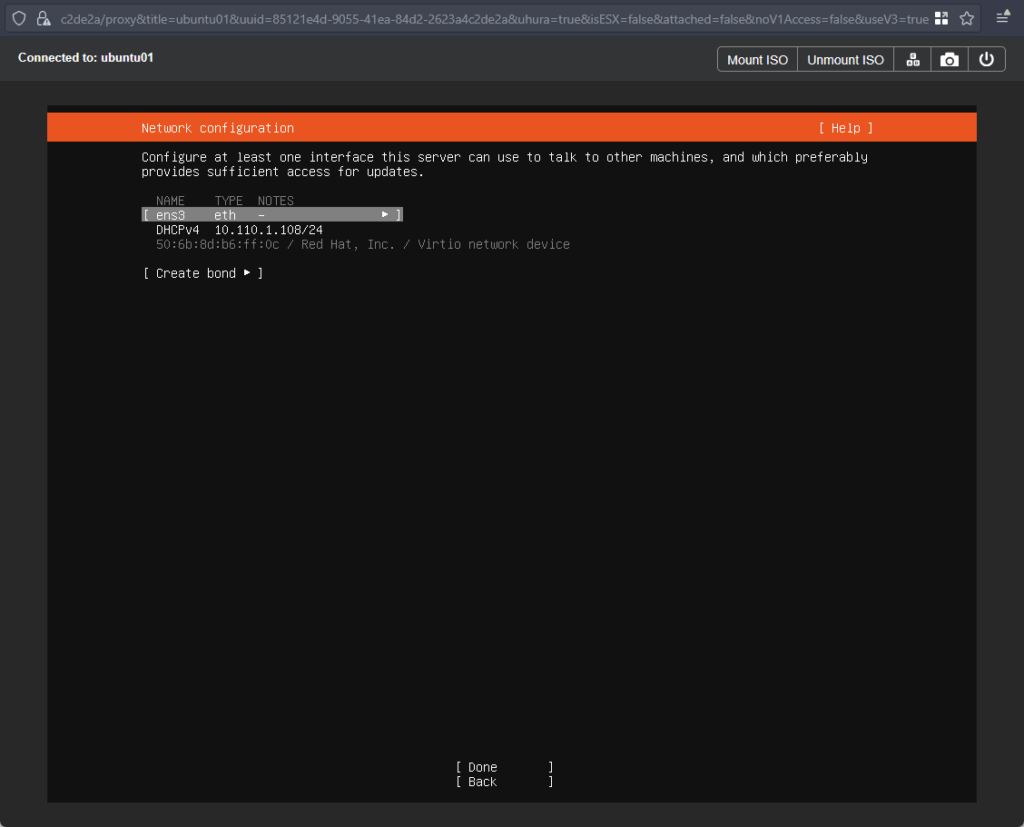
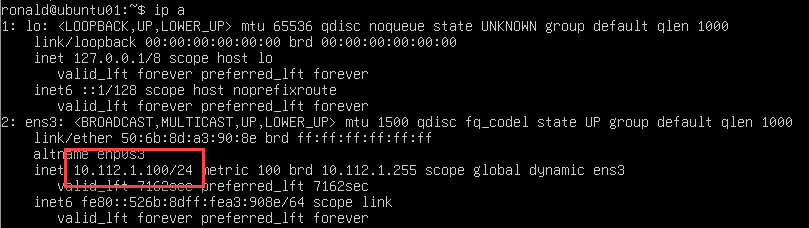
When configuring the network, I choose DHCP and get an address from my pfSense:
And after configuring the rest of the OS, I have a running VM with Ubuntu. This VM will be cloned twice, once for each additional VLAN and then we can see the VM’s being able to connect to each other:
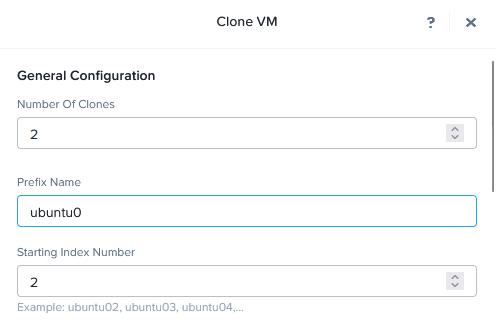
This cloning is actually a process I find very easy. Especially the fact that I can create multiple clones at the same time. As said, I make two clones, from ubuntu01, wanting to name them ubuntu02 and ubuntu03:
I do need to connect them to VLAN 210 for the cloning process, but that can be changed later. So, after the clone is complete and the network is connected to the appropriate subnet, I can power them on. They received an IP-address from the pfSense:
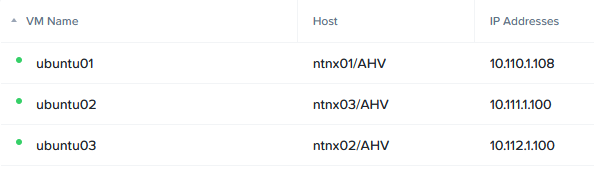
(Also notice the VM’s are all running on a different host.)
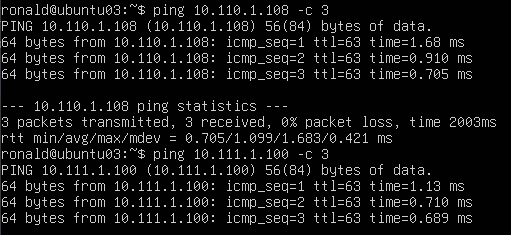
and are able to communicate with each other:
Install VM Guest Tools
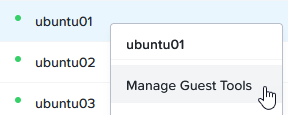
Last step in this blog, is to install the VM Guest Tools. For this, we right-click the VM and select “Manage VM Guest Tools”:
and check “Enable Nutanix Guest Tools” and “Mount Nutanix Guest Tools”:

Then, from the console of the VM, I run the following commands (after sudo mounting the cd to /mnt/cdrom):
python3 /mnt/cdrom/installer/linux/install_ngt.py --operation install
this installs the Nutanix Guest Tools. We can verify it’s installation with:
apt list|grep nutanix

This finishes the first part of the blog. Next blog I will be installing Prism Central and maybe try out some of its features.
3 thoughts on “New Tech: Nutanix CE”