New Lab – Part 2 – Setup and some small tips & tricks
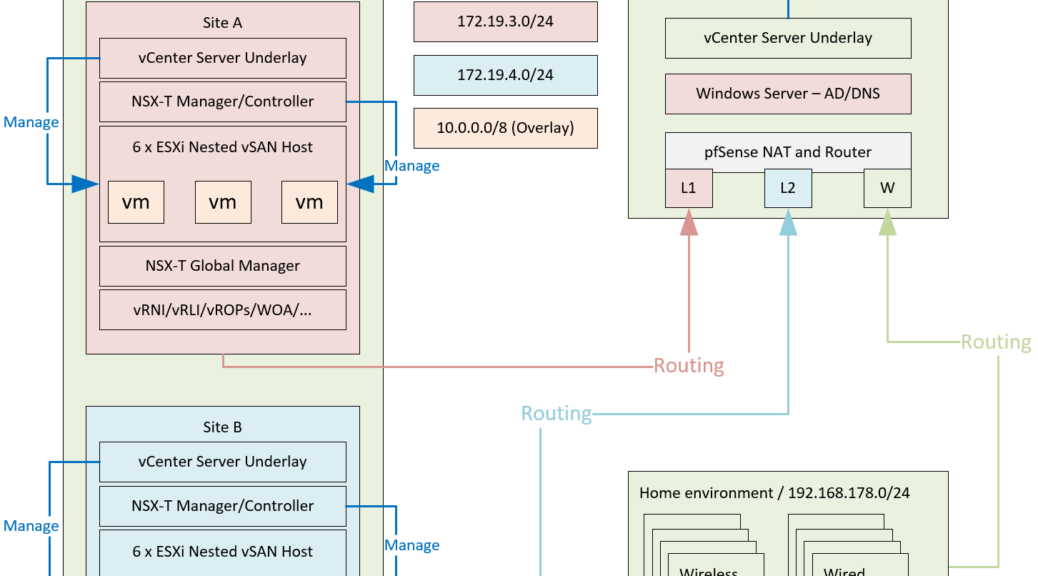
For my lab environment I am building on a combination of physical and virtual. I have one (massive, from home lab perspective) DL380 on which I will run multiple nested environments and I have one PC with a fair amount of memory, which will host some virtual machines, that will help me along.
Setup
Basically, I am working towards the following setup (for now):
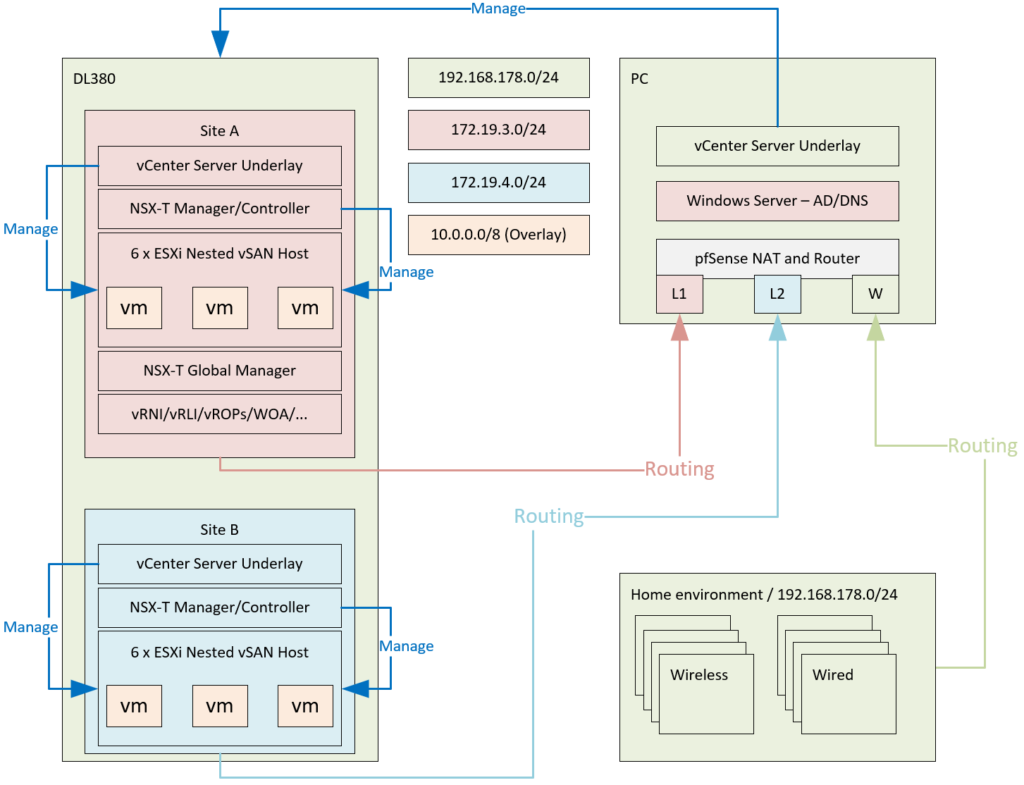
All of this is connected to a NetGear switch (not to fancy, but support for VLAN’s and Jumbo frames are the most important features and it supports that.
I want to create multiple VLAN’s. Multiple networks per site:
- “Regular” (management and other VLAN-based entities)
- vSAN
- Overlay
- Edge Node Overlay
- Transit networks for BGP routing
Some of this traffic needs to be able to route, for that, I have the pfSense box (and I might need a couple more, to emulate something like VRF’s, but that’s for a later date).
Content Library
Couple of things I need to do. First is deploy multiple virtual machines. A couple of vCenter Servers, couple of NSX Managers and a sh*tload of nested hosts (12 for now). Luckily one of the enhancements within vSphere 7, is the Content Library. I connected my content library to the one from William Lam (read about it here: https://www.virtuallyghetto.com/nested-virtualization/nested-esxi-virtual-appliance, and with that, I get the ability to deploy nested hosts. The process is very simple, just add a new content library, select the correct link:
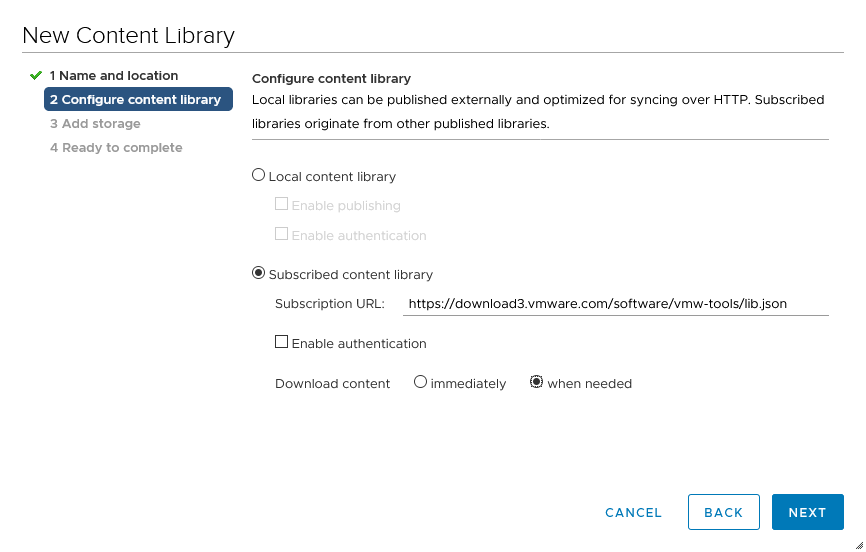
Select a datastore:
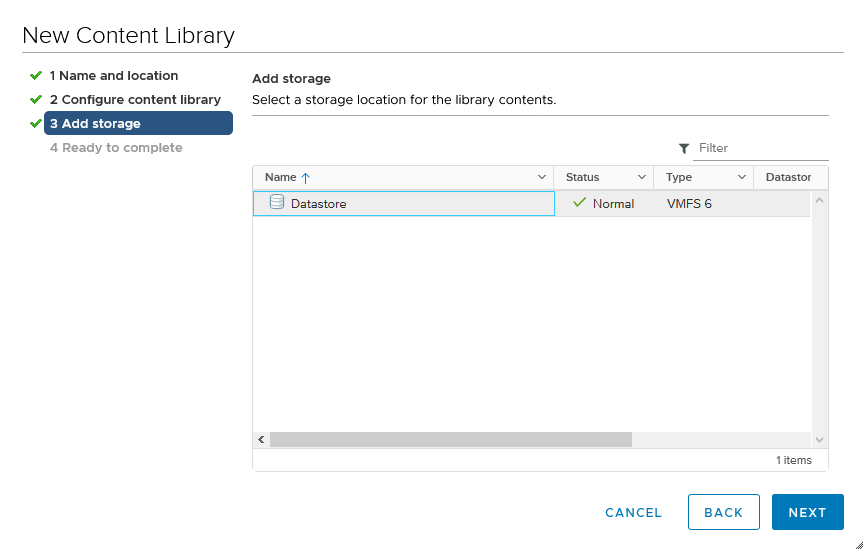
and your good to go (the path is: https://download3.vmware.com/software/vmw-tools/lib.json).
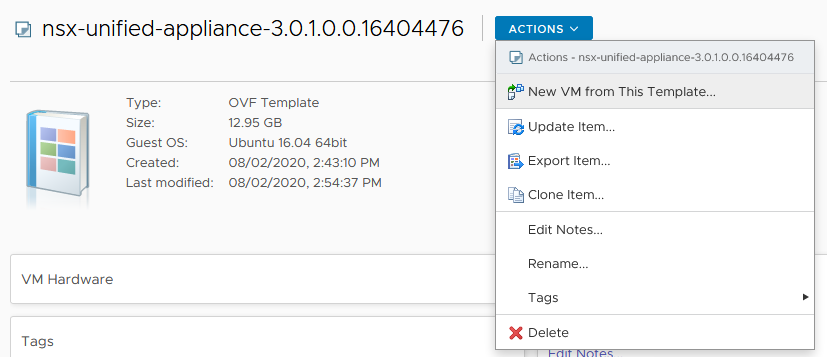
I also created my own content library, in which to upload the OVA’s for vCenter Server and NSX Manager (the process is identical, you just select a local library in the first screen).
From there, it is easy to deploy new VM’s. Select the OVA you want to deploy, click “Actions” and go!
(I am not showing the deployment, that is following a wizard, very easy).
VLAN tagging in VMware Workstation
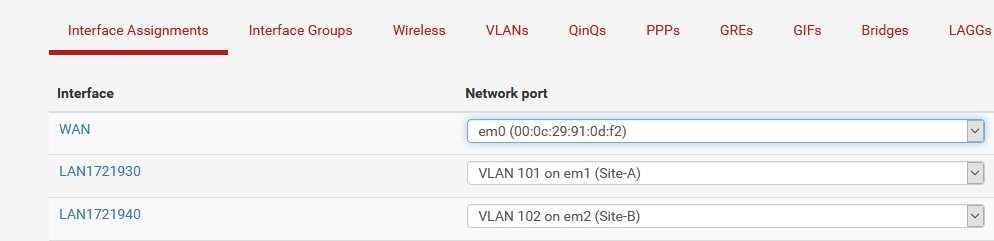
Because some of my virtual machines run on my PC, because I chose different VLAN’s, ánd because I still want to be able to connect everything to each other and to the outside world, I needed routing (pfSense), but also the ability to get different VLAN’s into my virtual machines, that run within VMware Workstation. Since this product does not have the VLAN-capabilities that vSphere has, I needed a little trickery to get this to work. pfSense had no problem using VLAN’s, the OS apparantly knows what to do, so I was able to create (for now) two virtual LAN interfaces, based on VLAN’s and route between them (and NAT towards the internet):
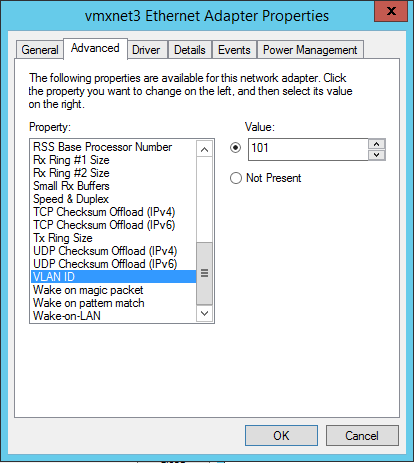
The larger problem was my Windows Server. This was a virtual machine that has been with me for a long time, it contains AD, DNS and more functionality that I want to use. Because I wanted the server to reside in Site A (for some reason), I had to be able to put the server in VLAN 101. This cannot be done with the basic E1000 emulated NIC that is deployed as the standard within Workstation, but this can pretty easily be changed. What you need to do is unregister the virtual machine in VMware Workstation and after that, edit the .vmx file. Where it says
ethernet0.virtualDev = "e1000"
change it to:
"ethernet0.virtualDev = "vmxnet3"
and then it becomes possible to change the VLAN on which the virtual machine needs to live:
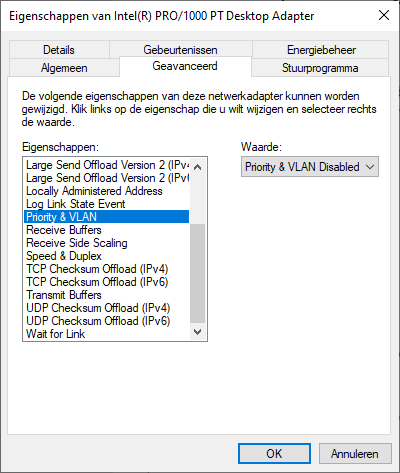
One additional thing to do, is change the “Priority & VLAN” setting on the LAN adapter that you are using within VMware Workstation:
Pi-hole conditional forwarding and static routing
I use multiple DNS entities in my home environment, so I need to make sure that I get the hierarchy correct. For my home environment I use pi-hole (a Raspberry Pi based DNS-filter, to avoid ads and malware). This points directly to the internet (Google DNS-servers), but pi-hole also gives the opportunity to do some home networking, by giving the opportunity to create a (one and only one, in the GUI) conditional forwarder for an internal network. So I had that setup to go to my Synology (which runs 24/7) and there I have some small, internal home addresses to be resolved. Since I was creating a new lab environment, I chose a new zone for that (my-sddc.local), which differs from my own internal home network (dejongsmit.local).
If I want to use óne DNS server, and be able to resolve everything through that server, I needed additional conditional forwarders ánd the ability for the DNS server (Pi-hole) to reach that server (which, as you saw earlier, resides on a different subnet).
So I needed two things:
- Routing from pi-hole to AD/DNS server (dc.my-sddc.local)
- Conditional forwarding from pi-hole to dc.my-sddc.local for the my-sddc.local domain.
Since the pfSense is not something that will run 24/7, I couldn’t use that as a default gateway for the pi-hole and be done with it. I needed a static route. Within pi-hole, this is done through the file “/lib/dhcpcd/dhcpcd-hooks/40-route” (if it doesn’t exist, create it and fill it). Content of the file is:
ip route add 172.19.0.0/16 via 192.168.178.254
This will create a (persistent) static route on the pi-hole to the whole 172.19.0.0/16 network (so I can add new subnets when needed ;)).
Second thing I needed was the second conditional forwarder. This is done in the folder: /etc/dnsmasq.d. In there, you will find one file (normally) called 01-pihole.conf. You can copy that and give it your own name (for instance 02-my-sddc-local.conf and fill that with the correct syntax, like:
server=/my-sddc.local/172.19.3.2
server=/3.19.172.in-addr.arpa/172.19.3.2
server=/4.19.172.in-addr.arpa/172.19.3.2
server=/5.19.172.in-addr.arpa/172.19.3.2
So I have both the forward lookup zone my-sddc.local and the reverse lookup zones (three of them for now) that can be resolved as well.
All pretty easy, but it took me some time to look all this up. Thanks a bunch to all the places I used to find this out:
https://dev.to/stjohnjohnson/internal-domains-with-dnsmasq-and-pi-hole-4cof
https://communities.vmware.com/message/2667304#2667304 (Workstation trick to use VLAN’s).