Flow Virtual Networking – Basic VPC
After I build my Nutanix lab environment (New Tech: Nutanix CE and New Tech: Deploy Nutanix Prism Central), the next step I wanted to take was create the virtual networking components to be able to communicate internally and externally. For this, I am going to start of by building the following:
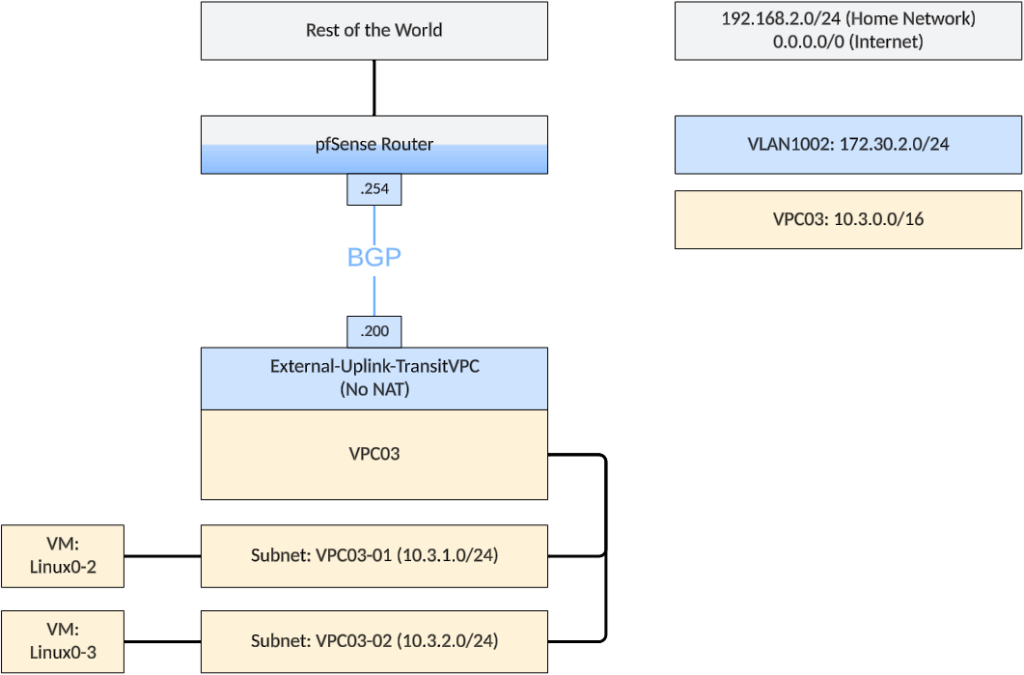
I made a choice to use “No NAT” as opposed to NAT, because that will make all of the internal IP addresses directly reachable through “plain” routing. That also gives me the opportunity to play with BGP, without taking NAT into account. I will also dive into the NAT setup, but for now I am using No NAT.
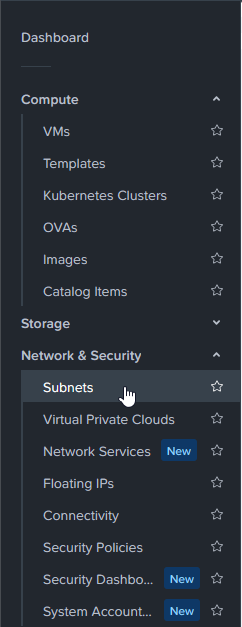
First step of this, is to build the “External-Uplink-TransitVPC (No NAT)” subnet. For this, we go into Prism Central, to:
There, we create a new Subnet, with the following specifications:

Couple of things to note here:
- External Connectivity for VPCs is enabled. This makes sure I can connect a VPC to it, and have it connect to my pfSense through this subnet/vlan.
- NAT is disabled. This is in line with the No NAT choice I made.
- Gateway IP Address is the address that has already been created on the pfSense. Basically the external connection for this VLAN and the address that will be handed out to all components that will be made active in this subnet.
- IP Pools. I created an IP Pool that can be used for creating components in the VPC’s that I will connect to this subnet.
After this has been created, we can create the VPC. In the same menu as we created the Subnet (one below), we create a VPC:
The reason for the name (VPC03) has to do with another blog I am working on, where I will create VPC01 and VPC02 and connect that to a Transit VPC, but this was (in hindsight) a better first blog :).
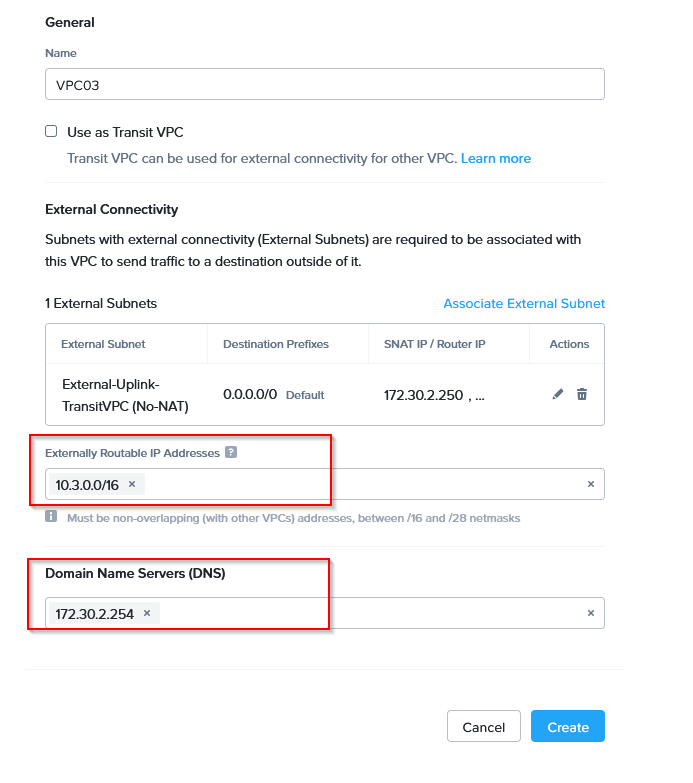
When creating a VPC, I had to connect it to an external Subnet (in the middle of the screen), that opens up another menu:
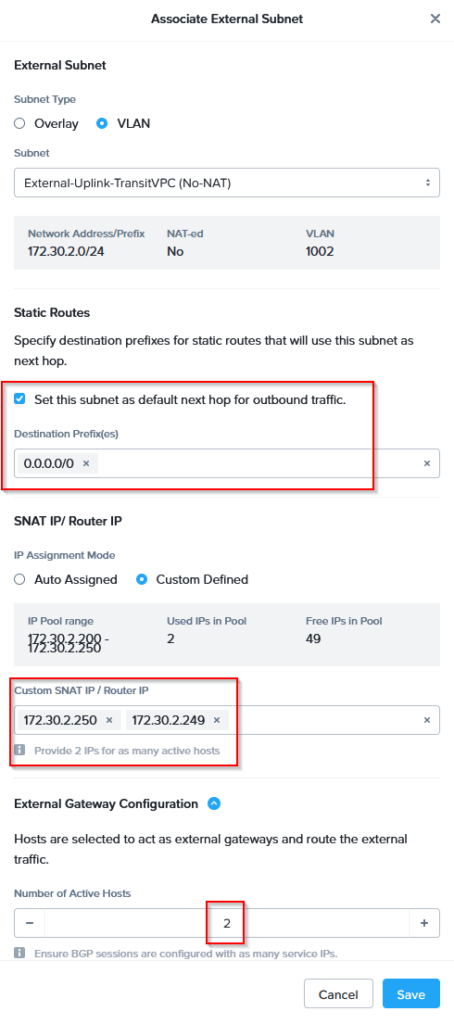
Here it is good to point out that I am defining that this is my default gateway, so everything that is to be reached outside of the VPC itself, will be sent to the default gateway of the subnet that I created in the previous step and that I am connecting here.
Also, I have manually chosen two IP Addresses (inside of the IP Pool) to be assigned to as many hosts. The number of hosts is configurable. These hosts (and IP Addresses) are used for forwarding traffic. If I had chosen three or four hosts, I would have to fill in three or four addresses (or chose to have that be assigned from the IP Pool). Since I am planning to use BGP, I thought knowing the addresses that will be used, will have it’s benefits…
When all is filled out, I can create the VPC. This will take a little bit of time. When it is done, we can create subnets, that are connected to the VPC. I am going to create two:
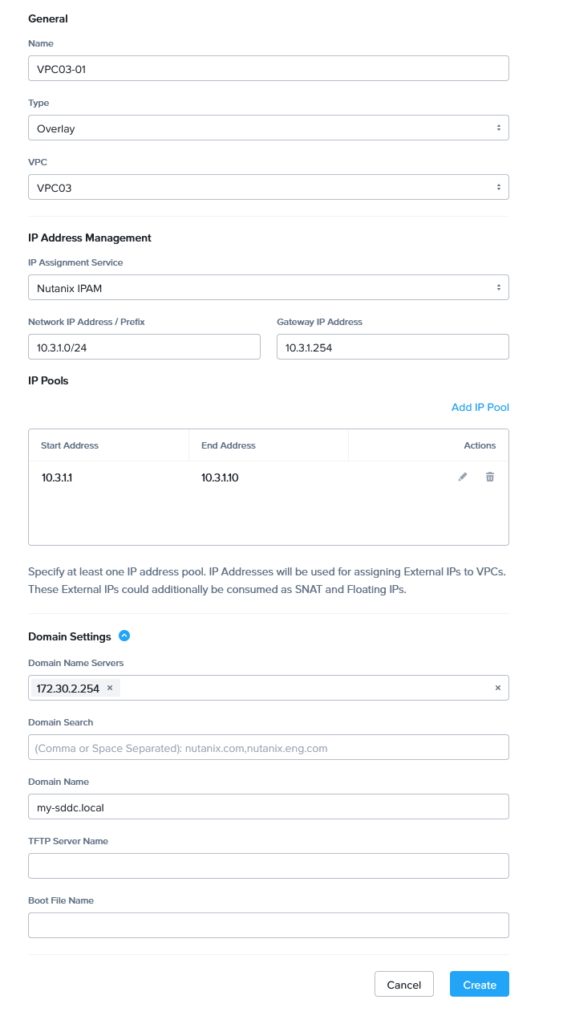
The type of subnet, is Overlay and if that is selected, I have to select the VPC I am connecting to (VPC03). I also define the IP-address settings, so the subnet and gateway and I define a pool of addresses to be handed out (this can be expanded later, if needed).
Finally I set some of the DHCP settings, like the DNS server and the Domain Name. The DNS Server is active on the pfSense.
After this is done, I do the same for subnet VPC03-02, with similar settings.
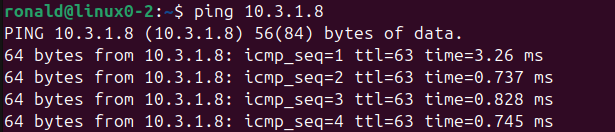
After that is done, I can connect two of my VM’s to the different subnets and see that they can communicate with each other (so, within the VPC):
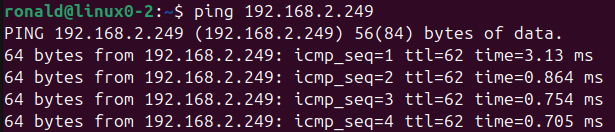
And with the pfSense:
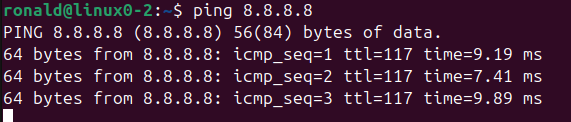
I can even connect to the outside world (if NAT is configured correctly on the pfSense :)).
This is now all done with static routes (both on the pfSense and on Flow), but now I want to change that and move to BGP. But that will be the next blog :).
2 thoughts on “Flow Virtual Networking – Basic VPC”