VCF on VCD: 3a – Second VCF environment – Infra preparation
Edit (January 6th, 2023). Because I used some VLANs and subnets I had already used for the WLD of the original deployment, I have changed this article to reflect the ultimate target environment.
Okay, I said I would go on and configure NSX-T and create some applications on top of the WLD, but in the meantime, I had another idea that I first want to pursue. I want to evolve the environment I have into an enterprise-like platform and include a second data center, based on a separate vApp from within VCD. So “physically” that would look like this:
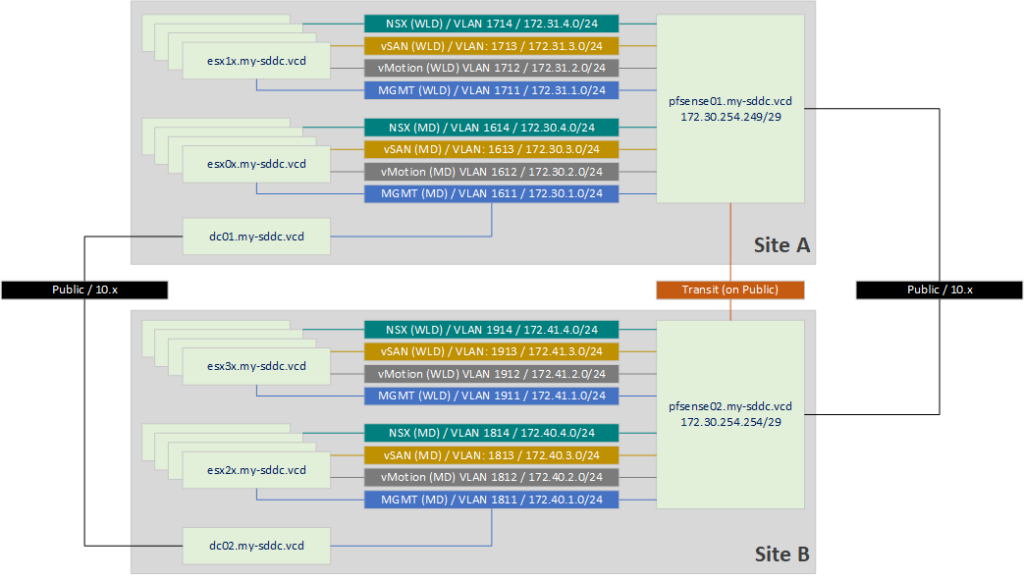
I will start with preparing the infrastructure. That means, creating the routing and Windows AD components that are in the picture.
For this, I start with creating a second vApp, with the same networking configuration as I used in https://my-sddc.net/creating-a-vcf-lab-on-top-of-vcd-part-1/ (only adjusted for a new subnet):
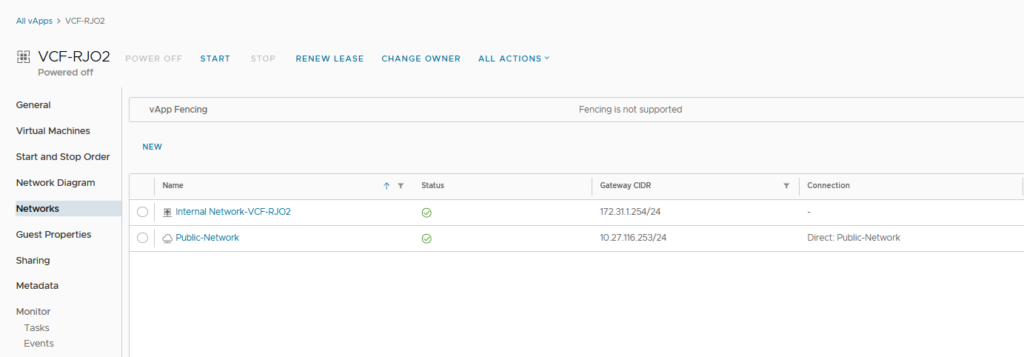
In there, I create a second pfSense VM, that will have both an external address and will route between VCF-RJO2 and the pfsense that is active in VCF-RJO (the original vApp). This will allow me to route between both vApps.
What I did do was change the IP addresses on the WAN interfaces. This is because during the build of the lab, I found out that if I used DHCP for the WAN interface, the routing between the sites would be impossible to do because somehow, the pfSenses would try to go out the WAN interface, even though they would be aware of the routes to the other site. I tried disabling the Gateway configuration, even creating static routes did not solve this. I would always find that the second hop would lead to the gateway of the WAN interface, instead of the address of the neighbor pfSense.
So I used the transit addresses 172.30.254.254/29 and 172.30.254.249/29, connected to the Public Network (so I can connect between the vApps).
After installing the pfSense appliance and configuring its interfaces (VLAN1811-1814), I installed the FRR package on the appliances, to be able to use BGP routing. It would also work with static routes (172.30.0.0/16 and 172.40.0.0/16), but I would like to find out if I can get BGP to work, because it will most likely also be something I want to be using with the configuration of NSX-T (possibly a separate pfSense, but I haven’t thought that out yet).
So I install the FRR package, which contains BGP routing (among others):
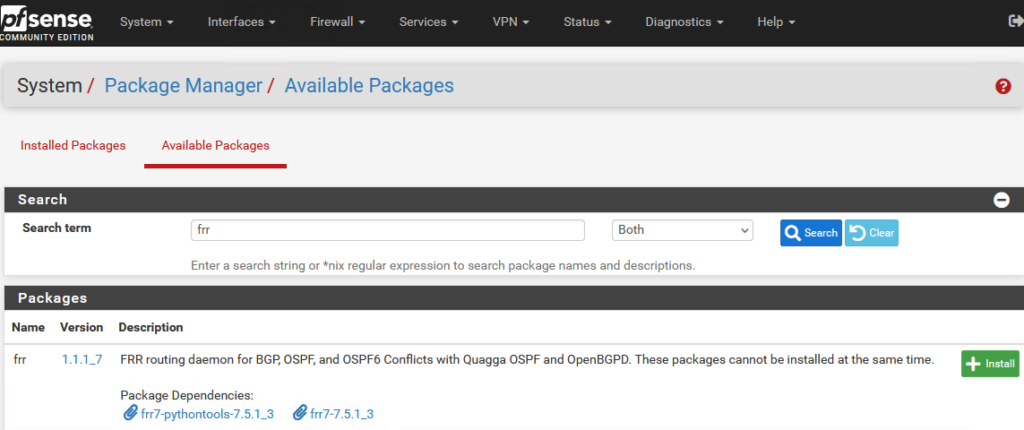
And click on “Confirm” on the next page (this was all done in the time I still had the WAN-interface set to DHCP, so it could reach the internet).
After the installation is completed (on both appliances), I can see the option to configure BGP:

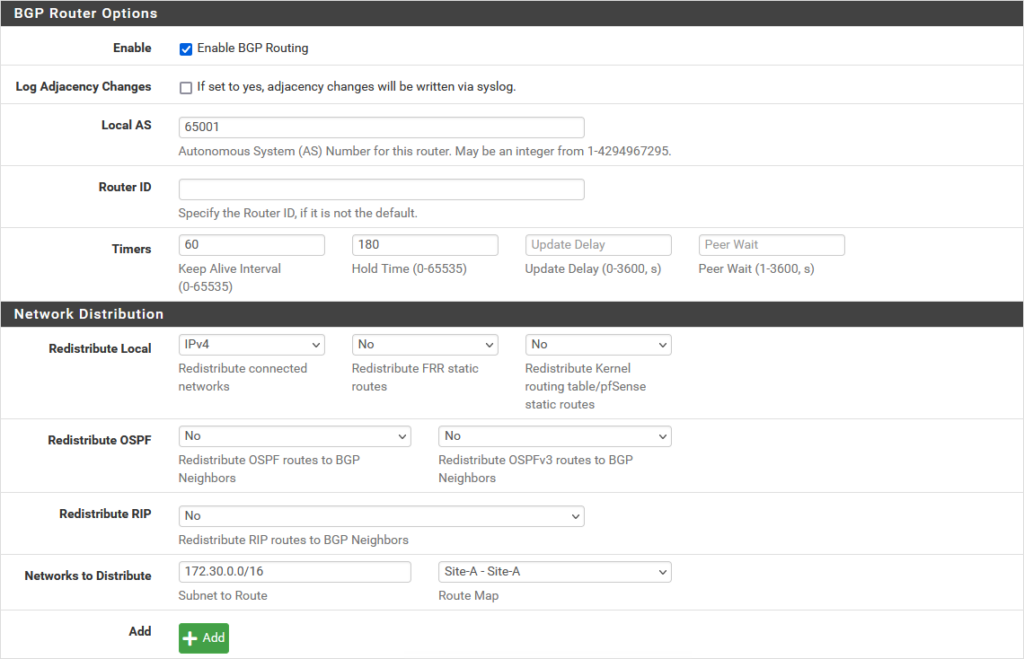
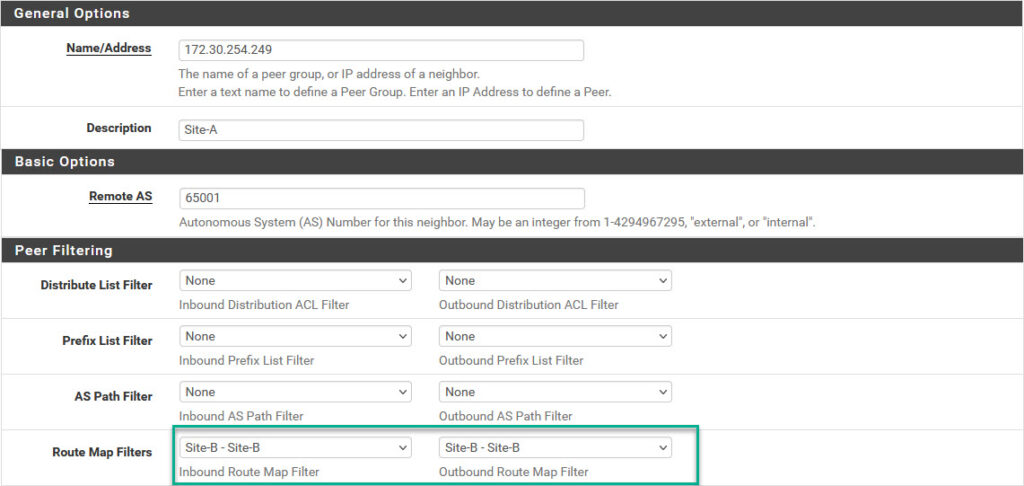
I enable and configure BGP routing as follows (again, on both appliances, with the difference being the AS (65001 and 65011) and the peer configuration (pointing to each other).
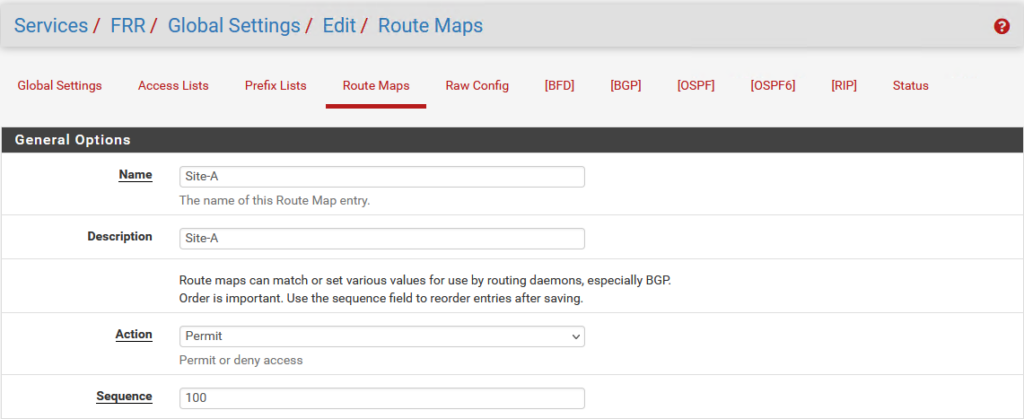
First we have to create a “route-map” to determine which routes are to be advertised:
Then, on the BGP tab on the first pfSense (and also on the second):
And in the Tab “Neighbors” (on the second pfSense, and also on the first):
And after having configured all this, I need to enable “FRR” (and set a Master Password):

After all the configurations have been completed, we can see that the BGP neighbors are peering and the routes are advertised across the sites:

and we can connect to “the other site” from the DC:

Later on, I added another interface, connected to the same Public Network, but I set that to DHCP and also set that interfaces gateway, as the Default Gateway for the appliance. That way I can also connect to “the outside world”.
Next step is to create a second DC, that is to be added to the my-sddc.vcd domain, with the same specs as the first DC:
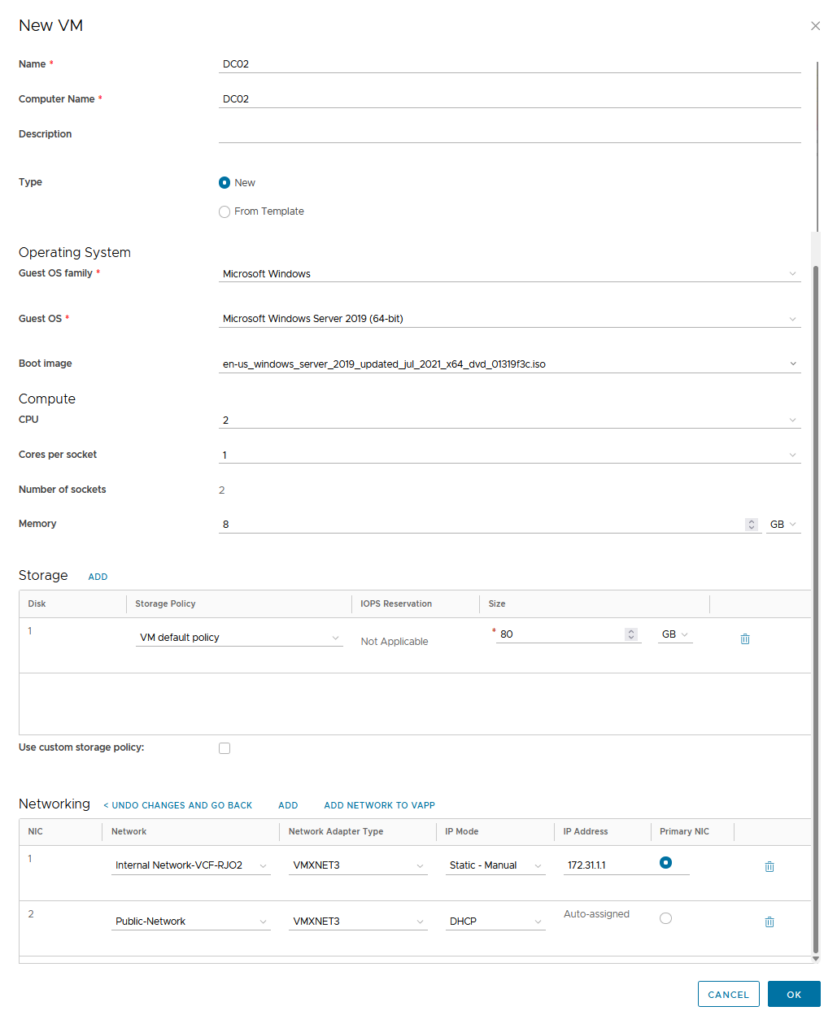
Then install Windows on it and make sure it gets configured to be able to reach the other DC (for that, the routing in the previous activity was performed). And configure DC01 as the DNS server.
Then we can “DCPromo” the second DC (add the role, but I am from the Windows 2000 era, so for me, it’s still DCPromo :)):

Configure it to become a second DC in the already existing domain my-sddc.vcd:

(the rest is all default)
and we have the infrastructure ready to start deploying some hosts:

But that will be another blog.