Adding NICs and to nested hosts on AHV and building a shared Virtual Switch.
I am back at labbing, with some help of an internal project, that allows us to deploy nested clusters on top of Nutanix CE. So I now have the ability to deploy the latest and greatest AOS/AHV clusters, within the hour, on top of my (already installed) HPE Proliant Gen9.
So, to recap, this is the environment I am building towards:
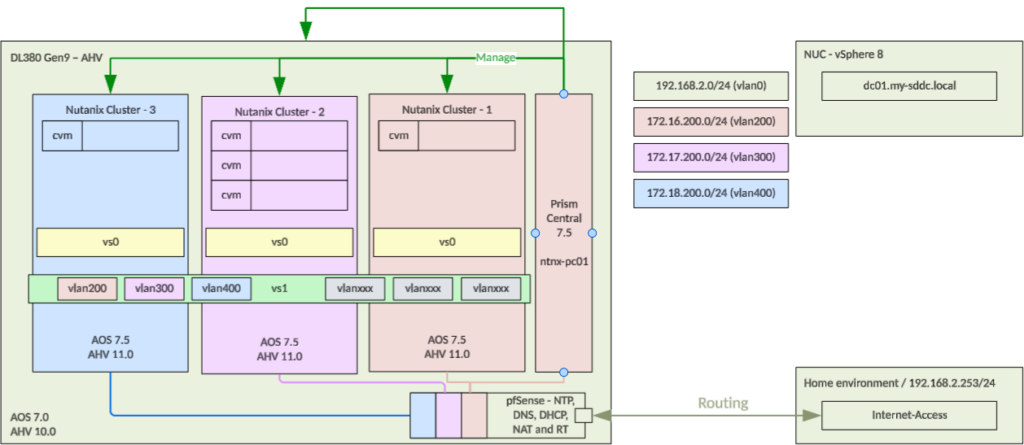
So in essence, I want to leave the current vs0 as it has been created by the automatic cluster deployer (only available to internal Nutanix unfortunately), and create a new vs1 that will stretch my three nested clusters (one three-node cluster and two one-node clusters).
For both switches on all clusters, I will use single-interfaces.
Because the cluster is created with a single interface, I have to add one interfaces per node connected to the “Native” network, that will be “trunked”.
First step is to add the nics to the host-vms. This is the example configuration for ntnx01 (the single node in cluster 1):

This is then done on all hosts, in all clusters, so they have the right interfaces (with their own “native” VLAN).
The second step is to make sure the nics are available to be used. This is an extra step because of the nested configuration, which isn’t needed on a physical setup. The nics are not showing a valid speed and are not automatically picked up by the “NetworkManager”, so if nothing is done about that, they will not be allowed to be used to add to or create a virtual switch. So on each of the hosts, we need to set the speed to 10.000, dhcp to disabled, mtu to 1500 (for now), duplex to full and add all the nics to the Network Manager, with the following commands:
# 1. Update eth0 (Speed and MTU) hostssh "nmcli con modify eth0 802-3-ethernet.speed 10000 802-3-ethernet.auto-negotiate no 802-3-ethernet.duplex full 802-3-ethernet.mtu 1500" hostssh "nmcli connection up eth0"# 2. Add eth1 (Disable IP routing, set Speed, and set MTU) hostssh "nmcli con add type ethernet ifname eth1 con-name eth1 ipv4.method disabled ipv6.method disabled 802-3-ethernet.speed 10000 802-3-ethernet.auto-negotiate no 802-3-ethernet.duplex full 802-3-ethernet.mtu 1600" hostssh "nmcli connection up eth1"
What I also ran into (when I was developing the exact syntax to use), was that my connection to my host was intermittently disconnected, after about half a minute. In the end this was due to the fact that the newly added interface was getting an IP-address in the same subnet as it’s management address. To get rid of this issue, I had to modify the interface to disable dhcp on the interface eth1 (the part in the above command that disabled both ipv4method and ipv6.method).
(this will execute the command on all the nodes in the cluster, so this only needs to be done on one of the CVM’s per cluster). Note that I also included eth0, since I will be changing the existing virtual switch, and eth0 is currently not configured with 10K speed, so if I don’t change eth0 as well, changing vs0 will fail.
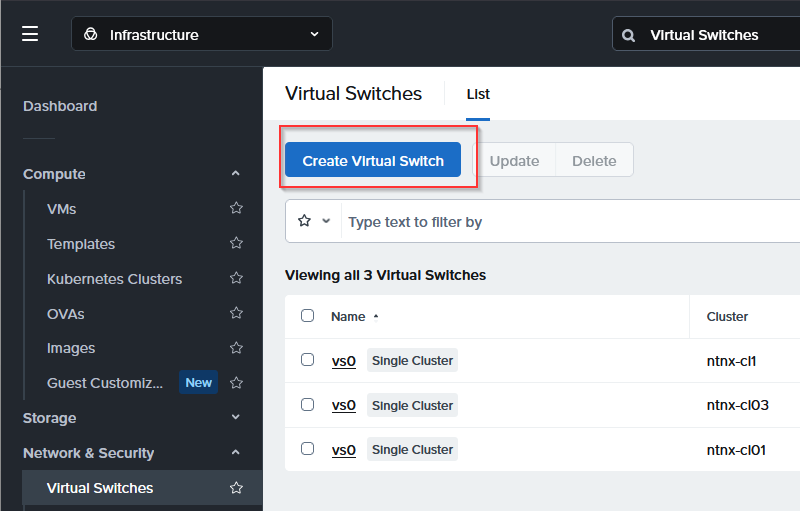
When done on all nodes, I can create a new virtual switch, calls “vs1” that will span all three clusters. I have added the clusters to Prism Central, and from there I create a new virtual switch, like so:
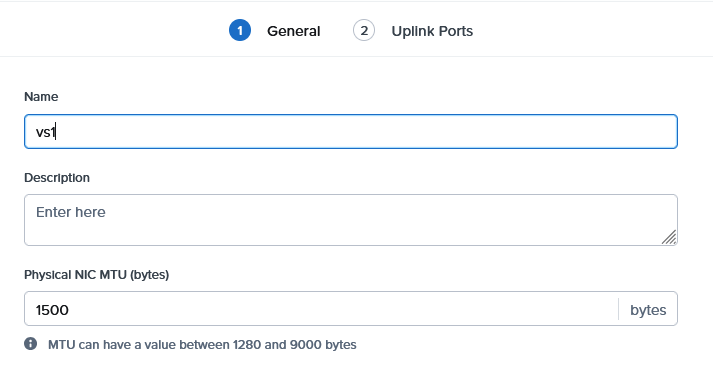
I go to Virtual Switches, under Network & Security and create a new Virtual Switch:
For now, I am just creating it for the single-node clusters, but I will later extend it to also include the three-node cluster (this is not yet connected to Prism Centra):
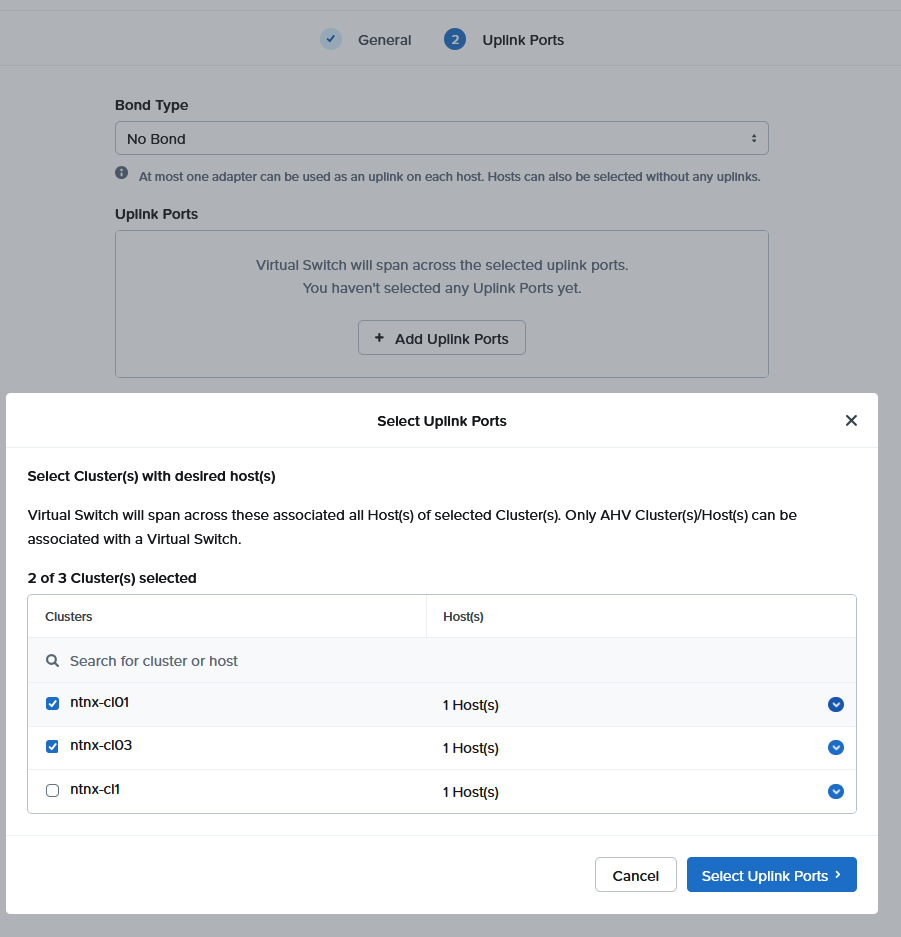
First I select the hosts and when I click on “Select Uplink Ports”, I can choose eth1 for all (2) hosts:
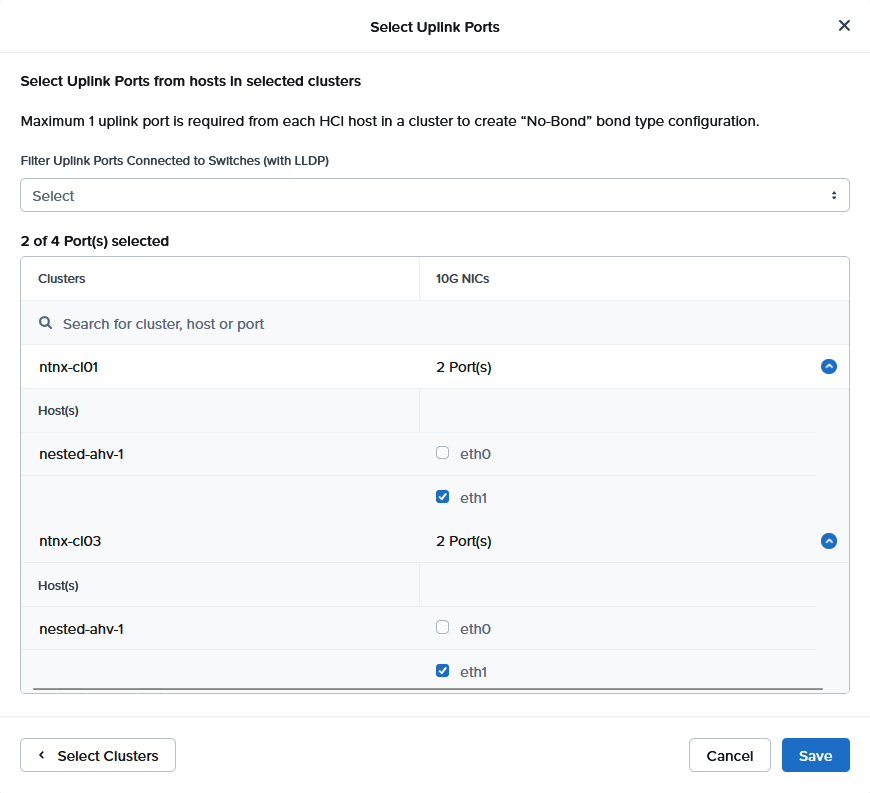
and click “Save” and, in the screen after, “Create”, and see it complete:
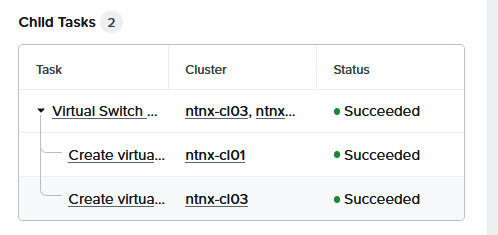
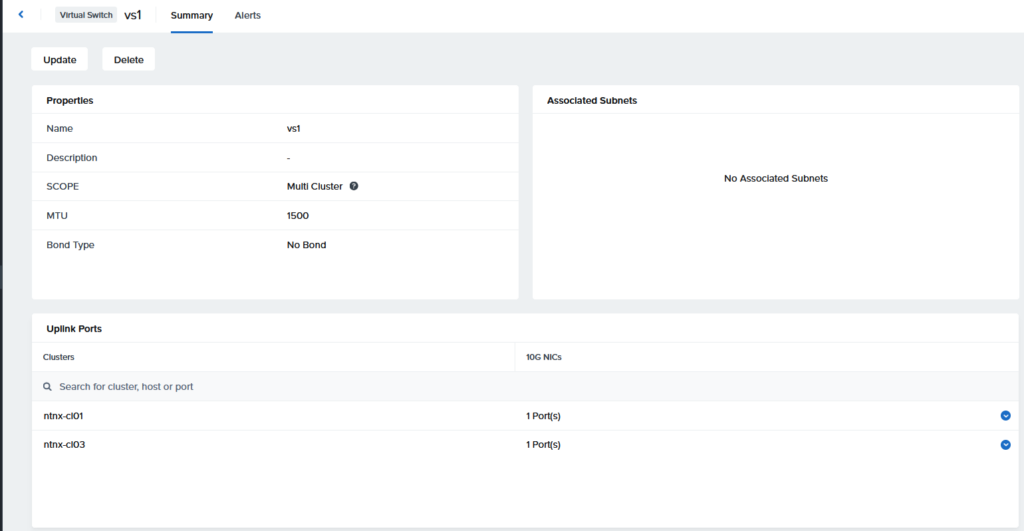
And the result:
Next step is to create a new subnet, on this new virtual switch:
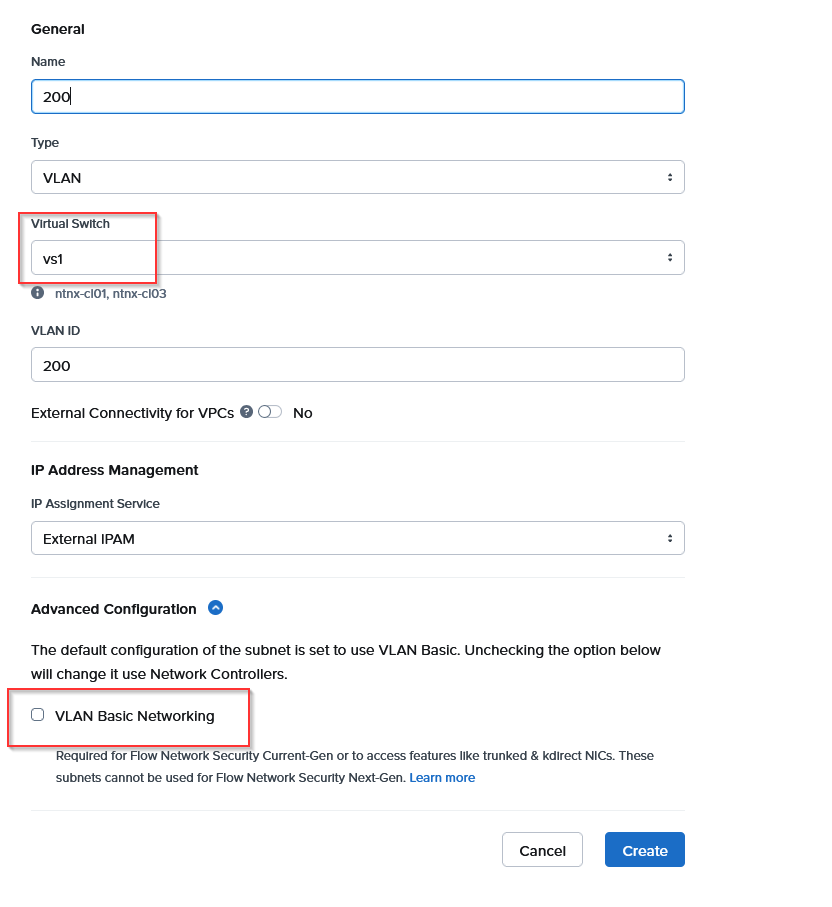
I have to deselect the VLAN Basic Networking checkbox, to be able to select vs1 as the virtual switch. When I have done that, I can create it.

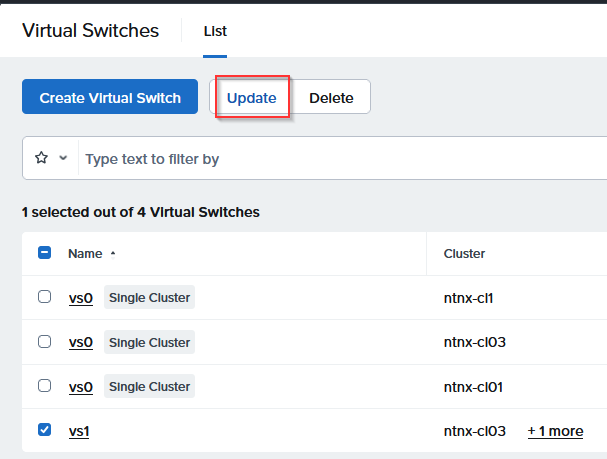
After this has completed, I will add the last cluster to the virtual switch. We “update” the created Virtual Switch:
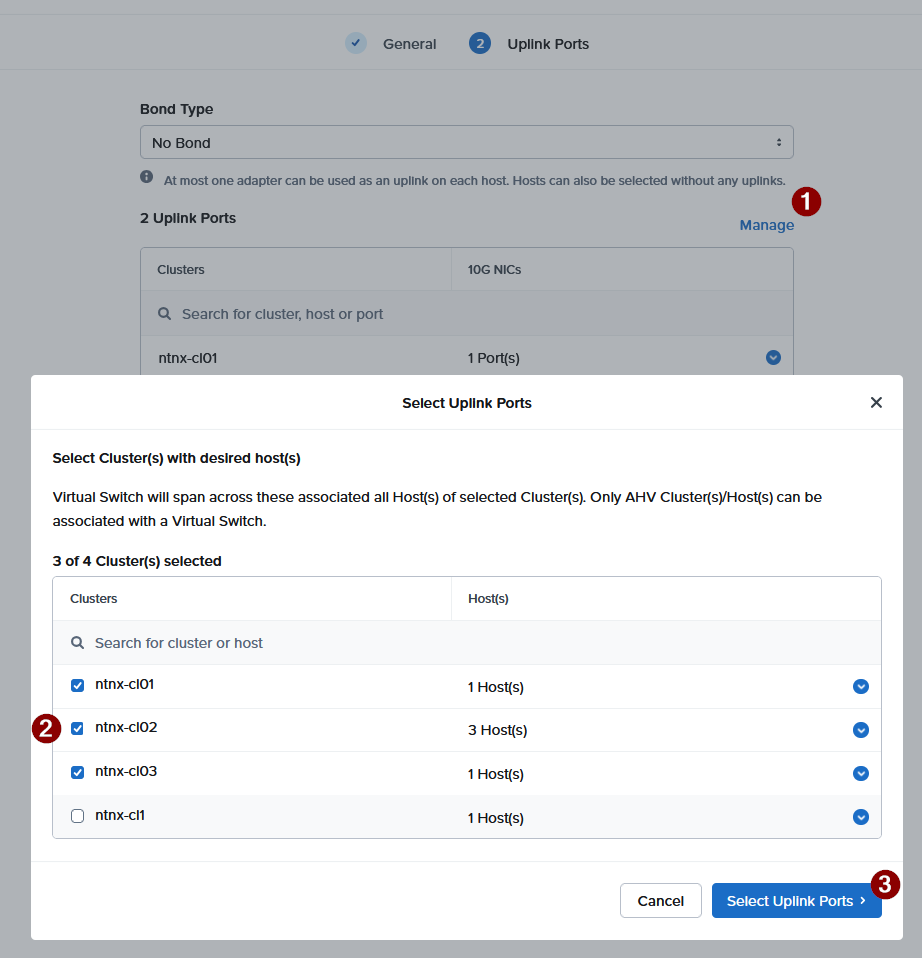
And selecting the Uplink Ports is basically the same as when creating the VS:

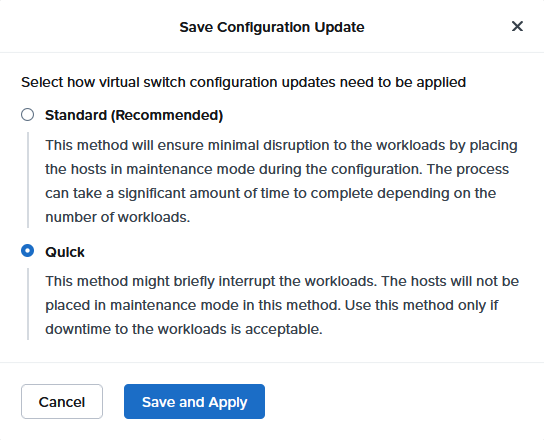
Then, Save and Save and it will ask me if I want to do this “Standard” or “Quick”. In this case, I chose Quick, since there is nothing running on the clusters (yet):
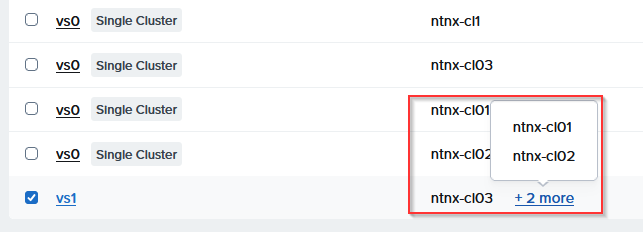
Click “Save and Apply” and the switch gets updated and added to my cluster ntnx-cl02.
That’s it for now. Later I will (again) build some Virtual Networking components, with Flow Virtual Networking, but this was building the basis to get to that. This will also mean increasing the MTU size on the eth1 interfaces I have used here.