New Tech: Deploy (delete and redeploy) Nutanix Prism Central (and start all over again)
After building my Nutanix CE cluster (https://my-sddc.net/new-tech-nutanix-ce/), it is time to start looking at the Enterprise capabilities. For this, we will be leveraging Prism Central. Installation of Prism Central is very easy, but there are some requirements. They are detailed in: https://portal.nutanix.com/page/documents/details?targetId=Prism-Central-Guide-vpc_2024_3_1:mul-cmsp-overview-pc-c.html.
I am aiming for this setup:
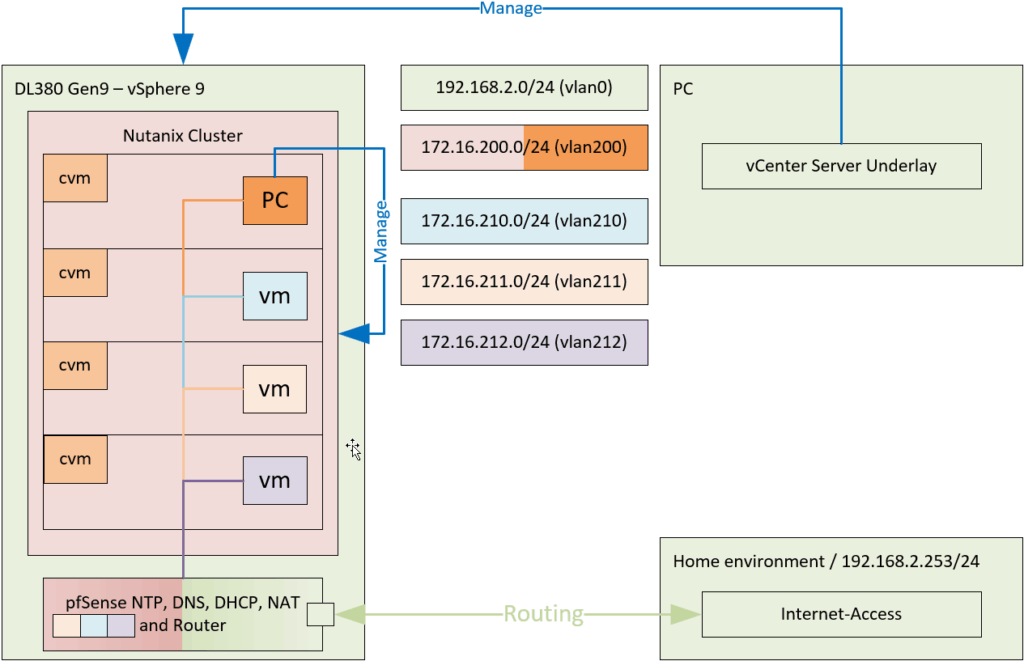
Just a heads up, I deliberately chose to document all the things I did to get to the end result. In my case, that meant:
- Deploy Prism Central: X-Small
- Delete Prism Central
- Redeploy Prism Central: Small
- Destroy Cluster
- Recreate Cluster
- Redeploy Prism Central again: Small
- Join Cluster to Prism Central
- Enable Network Controller
But in the end, it brought me where I wanted to be.
Deploy Prism Central
First we have to create a cluster address (we had already done that in the previous blog) and a “iSCSI data services IP address” to be able to deploy Prism Central. This is because it uses a “Microservices Infrastructure”. Details on the requirement for the address can be found here: https://portal.nutanix.com/page/documents/details?targetId=Web-Console-Guide-Prism-v7_3:wc-volumes-external-ip-address-c.html. But in short it requires:
- Must be in the same subnet as the cluster Controller VM IP
eth0network interface addresses
We go to:

and fill out the address (I chose 172.16.200.51, which is a free address, in the right subnet). Please note (and I found out the hard way, using address in the 10.100.0.0/16 or 10.200.0.0/16 subnet is not supported, read more here: https://www.nutanixbible.com/pdf/3d-book-of-prism-microservices-infrastructure.pdf
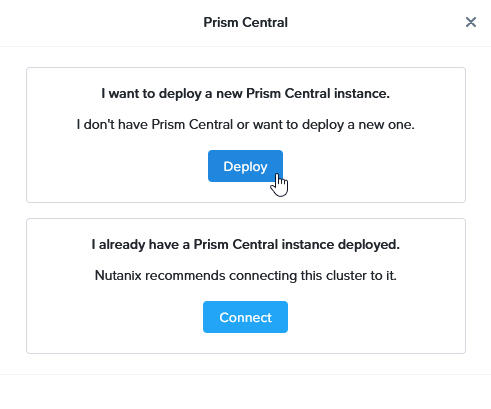
After that is done, we can move forward with the installation of Prism Central:
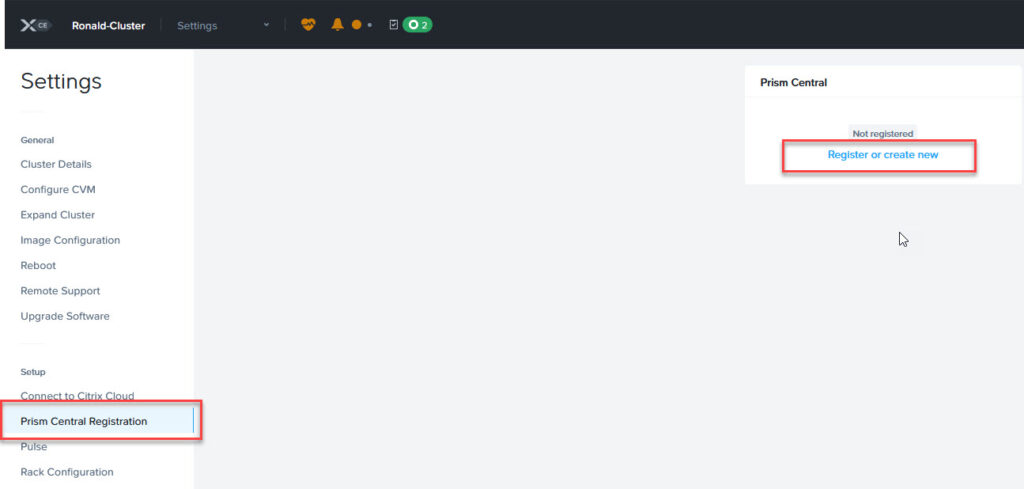
And click on “Register or create new”:
I will be deploying a new Prism Central instance. I will select the latest (available) version, which took some investigation, because it is not ordered in a way that that is automatically the one that is listed first. Also it doesn’t seem that the version is related to

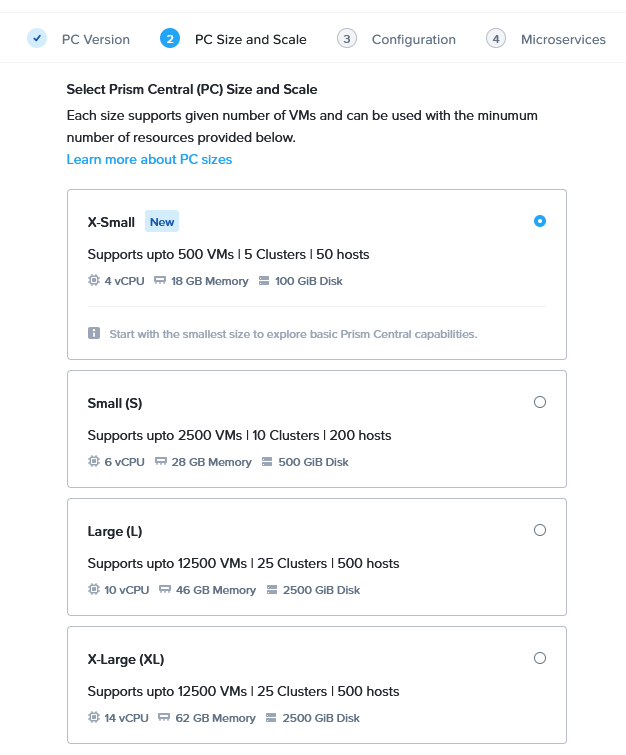
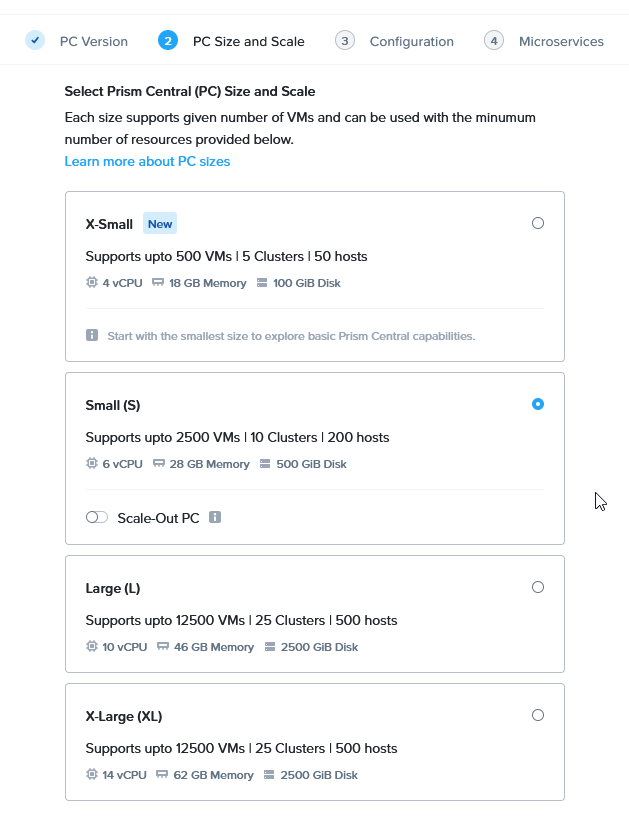
I’ll use the smallest of the options, I don’t expect to grow beyond this:
(Please note, this is not large enough for some functions, in the remainder of the blog, I will redeploy using “Small”).
Will put it in a (newly created) network within the same VLAN as the Management addresses for both hypervisors and CVM’s:
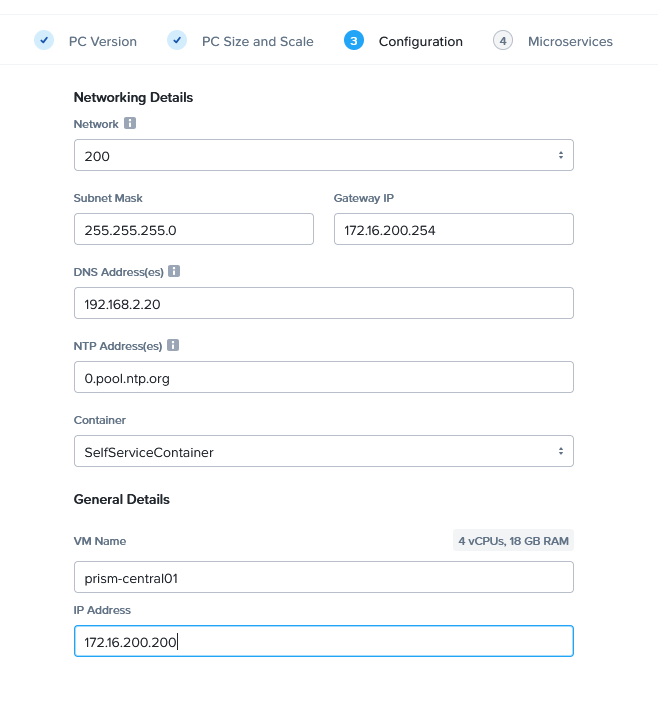
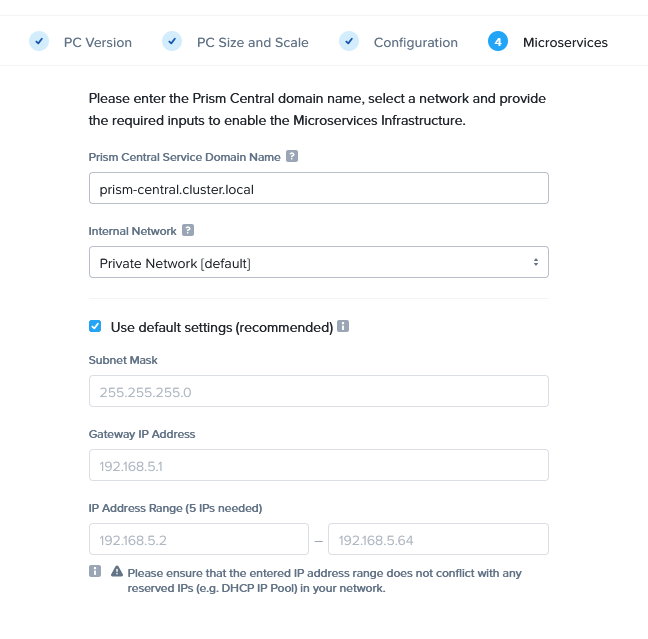
Keeping this as default:
And click “Deploy”:

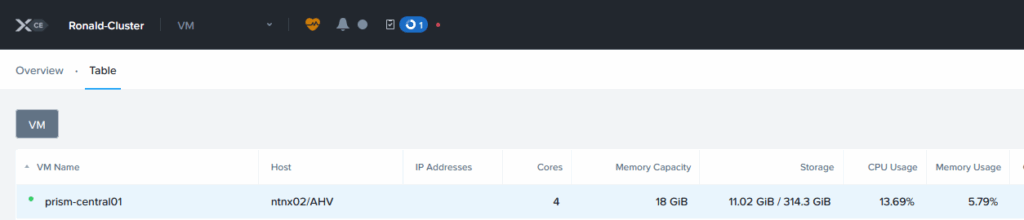
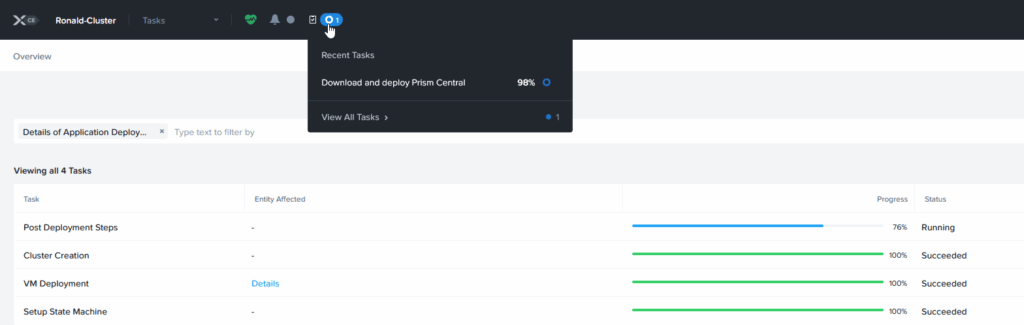
After a while (downloading and deploying), the VM appears in the list:
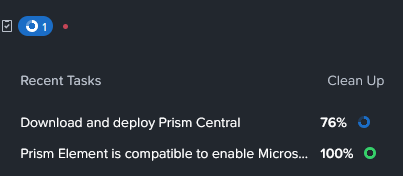
It is still at 76% of the process, so there is likely some follow-up activity needed:
If I open the Console, I can see that it has just rebooted after the initial stages:
All in all it took quite some time to complete. Especially the “Post Deployment Steps”, took a long time. In total the whole process took about an hour and a half.
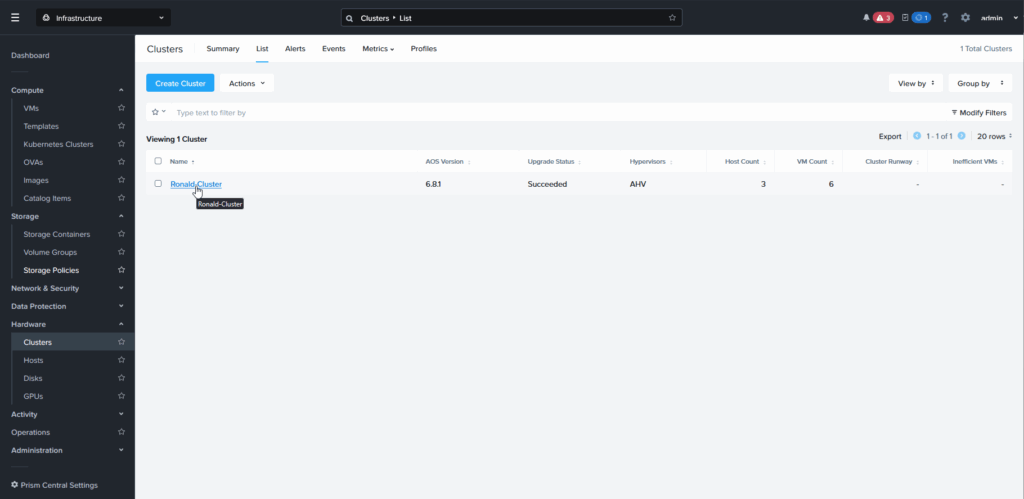
After this, Prism Central has been deployed. It does not automatically register the Prism Elements cluster to Prism Central, but that was easily done, through the same step as where you deploy the appliance.
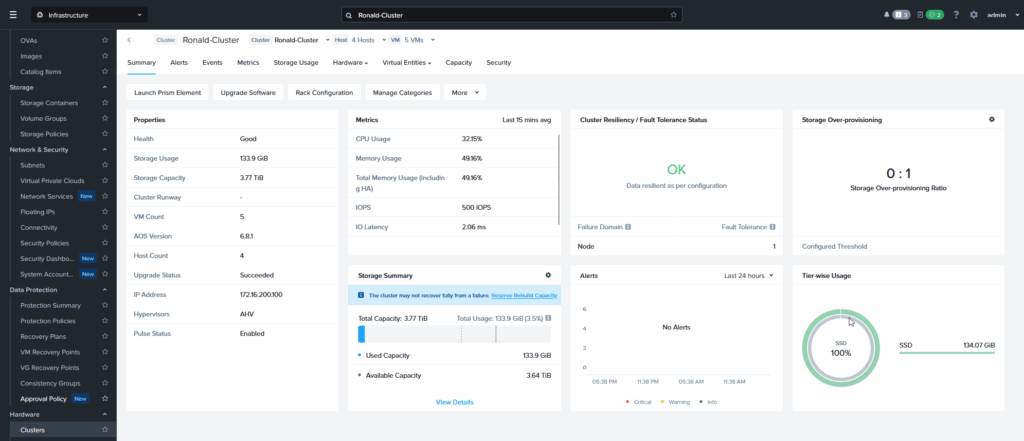
And after I registered the cluster, it is available within Prism Central:
And then I found out the Prism Central instance I created was too small to use for some features I plan to test out. So I have to do this again, but only larger. And, before I can do that, I have to unregister the cluster from the Prism Central instance.
For this, I followed: https://portal.nutanix.com/page/documents/kbs/details?targetId=kA00e000000XeZjCAK.
Please note, this is not a supported process. For a lab that I can rebuild again, that is not a problem, but for a production environment, always get in touch with Nutanix Support when doing something like this.
I logged onto one of the CVM’s. Then I performed the following command to get the cluster ID:
multicluster get-cluster-state

and with the Cluster ID, remove the cluster from Prism Central, like this:

Command used:
multicluster remove-from-multicluster cluster-id=f45f8be9-07a6-4fa8-888f-83df6a9c4f3f username=admin password=[XXXXX] external-ip-address-or-svm-ips=172.16.200.101 skip_prechecks=yes
As you can see, the “normal” process didn’t work, because there is data stored on Prism Elements, as I can see in: https://portal.nutanix.com/page/documents/kbs/details?targetId=kA0VO0000003PgD0AU, but since the only solution there is to contact Nutanix Support, I tried to skip the pre-check with the last command in the window above. This ultimately succeeded and left me with:

I cleaned up the VM: https://portal.nutanix.com/page/documents/kbs/details?targetId=kA00e000000LKnuCAG:

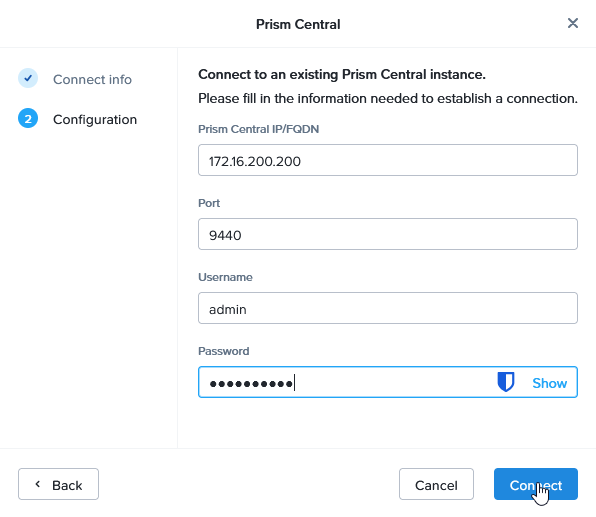
And started the same process again, but this time I chose the “Small” appliance:
The rest of the process is identical, although the first part went a lot quicker, since the software is already on the cluster (and it detects that). But again, the registration of the Prism Elements cluster was not done automatically, so from this I gather it is intended as a two-step process. So I added the cluster to this Prism Central installation (again):
This time, I get:
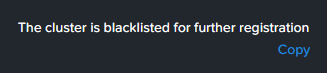
Which is based on the fact that the removal of the cluster from the previous instance was not enough to be able to connect to a new Prism Central appliance. Again, for this te be remediated, it is advised to contact support which, for a production environment is just fine and dandy, but for my lab, I learn from doing things again…
So, back to the beginning… I destroy and recreate the cluster and do it all over again :).
This time, (again) with a “small” appliance. And I am also including the fourth node, this time. When the times comes to expand, I’ll create a fifth node.
This time I ran into the following error message:
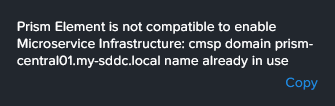
I think this has something to do with some of the remains of the first deployment, so I changed the name to prism-central02.my-sddc.local and through that, got past this error.
And then I (again) add the cluster to Prism Central:
Last step for this blog, is to add the Network Controller function to Prism Central. I am planning on exploring the network virtualization part of Nutanix. For this, I go to the Network & Security part and “Enable Network Controller”:
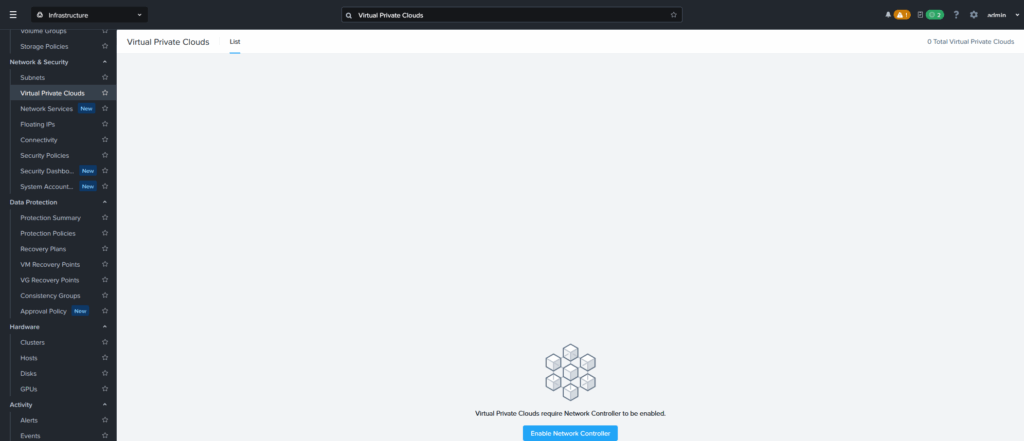
And click: Enable:
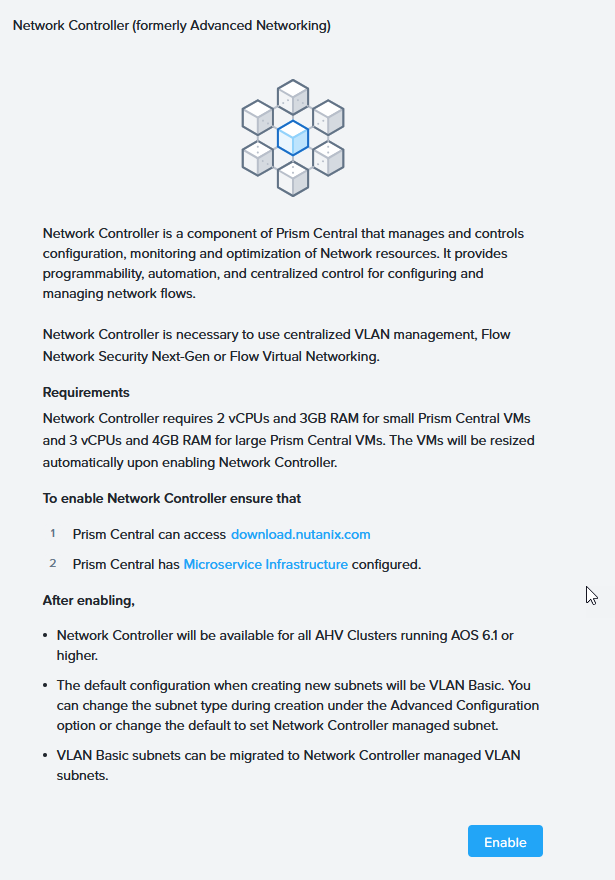
This will change the size of the Prism Central appliance, from 6 vCPU’s and 28 GB memory, to 8 vCPU’s and 31 GB memory (as is shown in the picture above). During the process of enabling the network controller, I occasionally received a message that the Network Controller was not functioning (duh), so wait it out a bit and I was logged out and had to login again, likely due to the changes to the Prism Central appliance.
That’s it for now. Look out for the next one, that will most likely be related to network virtualization (I love network virtualization :)).
2 thoughts on “New Tech: Deploy (delete and redeploy) Nutanix Prism Central (and start all over again)”