Load Balancing with NSX-T 3.0
I was triggered by a question on an older post, to revisit the configuration and setup of load balancing. The setup we are working towards is:
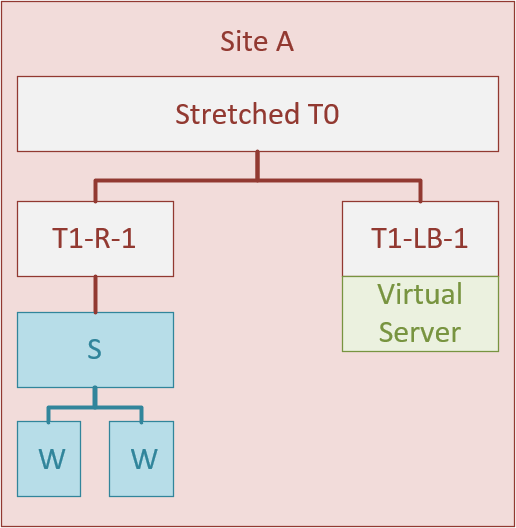
We start with creating the T1-R-1 and connecting it to the Stretched T0, that was created in an earlier activity (https://my-sddc.net/creating-stretched-networks-with-nsx-t-federation/):
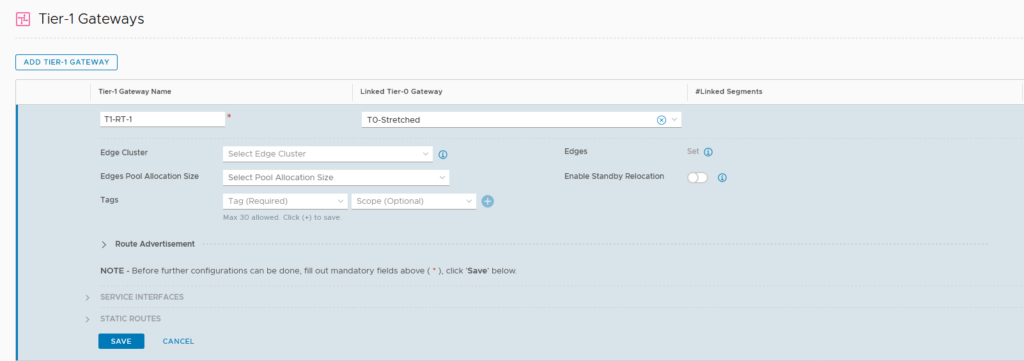
Not connected to an edge node cluster, to make sure we can still do multi-tier distributed routing (see https://my-sddc.net/distributed-multi-tier-routing-in-nsx-t/).
We do advertise the connected segments to the T0 (and the T0 already knows to advertise them upstream to the physical environment).
After creating the T1, we can create a segment and attach it to the T1:
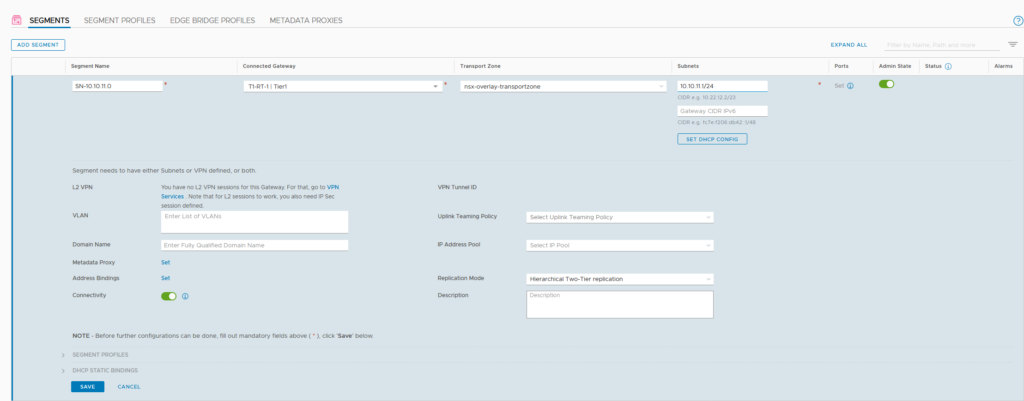
Create our load-balanced virtual machines and attach them to the just created segment, and see if functionality of the separate virtual machines works as required:


Then we create a new T1, for load balancing:
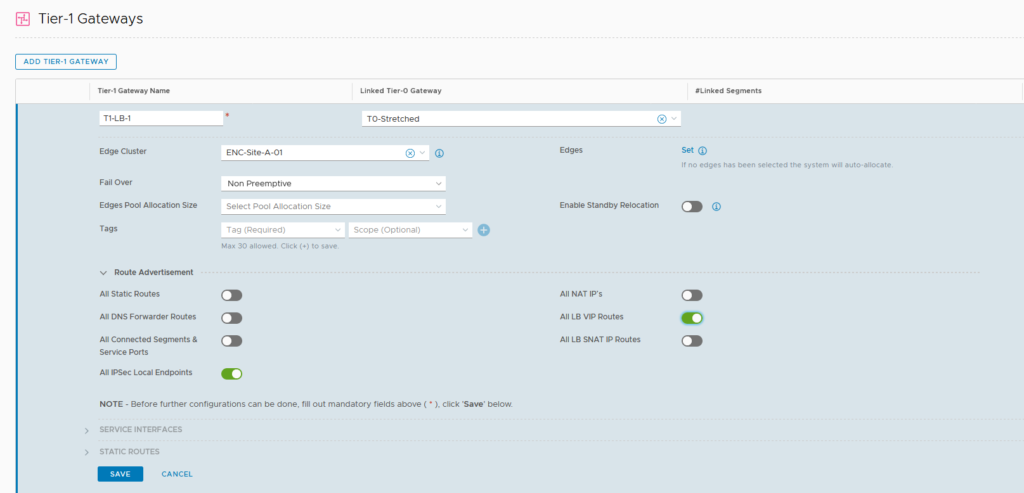
Here, we select the correct route advertisement, being the VIP addresses, used for load balancing. We also select an edge node cluster, because we are deploying a stateful service, which has to run on an edge node.
It is connected to the same T0, so routing to and from the rest of the world is taken care of.
Now that we have our T1, we can create our load balancer:
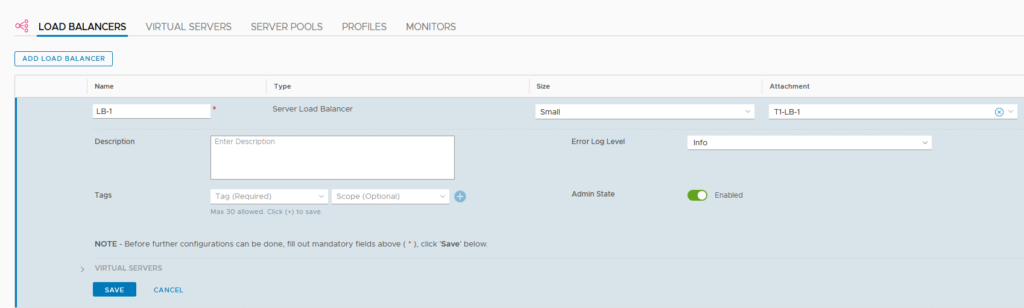
Attaching it to the T1, that was just created, which ensures it will run on the edge node cluster to which the T1 is assigned.
We deploy a small load balancer. For more information on sizing load balancers, please refer to: load balancer sizing.
After creating the load balancers, we are going to create a virtual server to run on it, but before that, we are going to create the server pool for our virtual server:
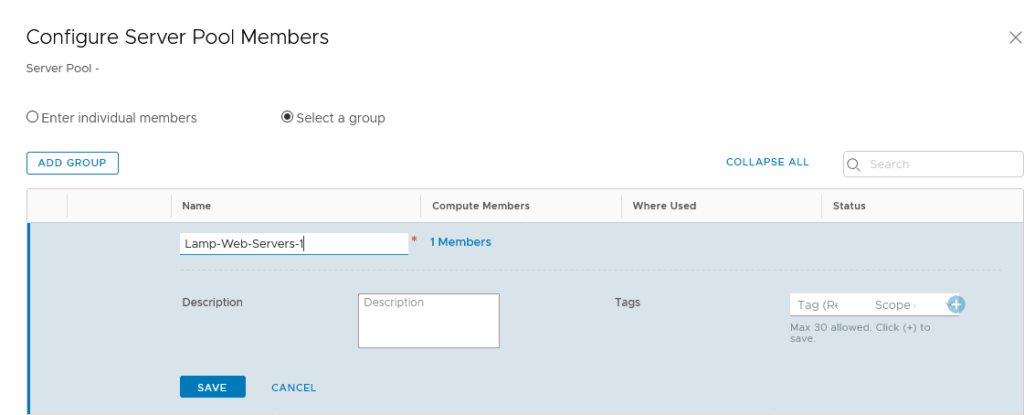
and add the pool members:

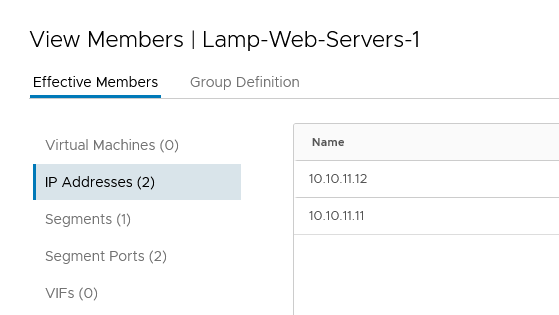
It can be very useful to leverage the “Select a group” option, because that will give us a flexible method of expanding (or reducing) members, dynamically. So we are going for a group, based on the segment to which the virtual machines are connected:
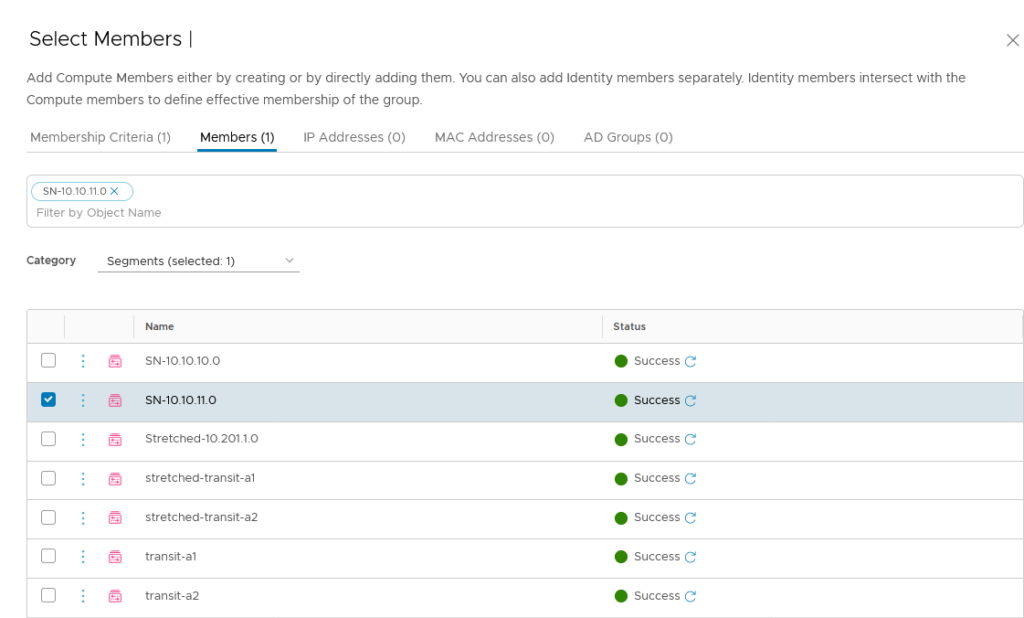
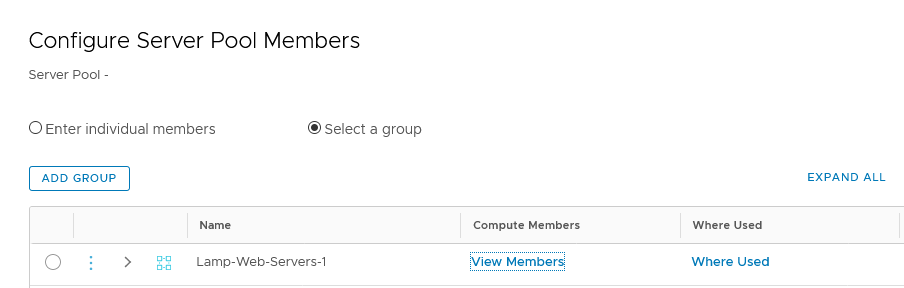
When we look at the members, it has filled that based on the connected virtual machines:
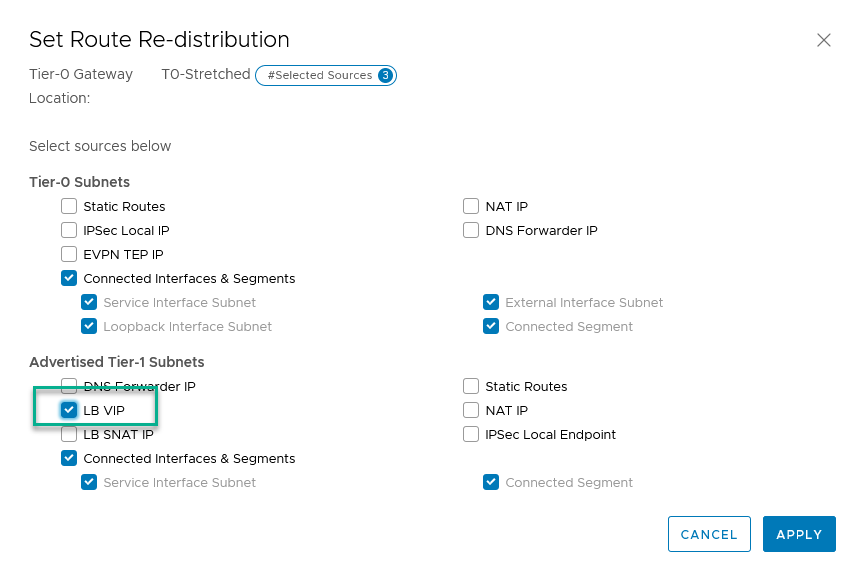
For our virtual server, we can choose a completely unrelated IP-Address, since we are using BGP. However, we need to adjust the advertising on the T0, since we did not include VPI addresses to be advertised yet. After we have changed this (on the global manager):
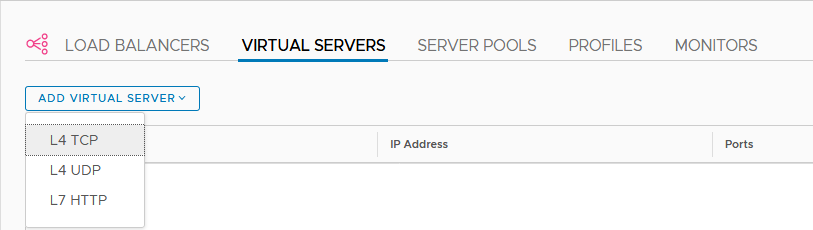
After all this is created and configured, we can create our virtual server:
all is configured to reach this address from the outside world ánd NAT traffic that comes in. So for the purpose of this blog, we are using something totally different, in the 172.88.88.0 range:
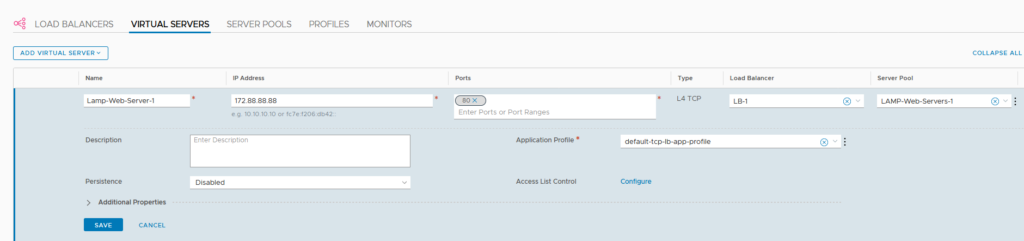
We connect the virtual server to the correct load balancer (LB-1) and server pool, and we should be good to go.
(Through the magic of BGP we see it come up on the routing table on the physical router):

And when we go to the web-page and use Control-F5 to refresh a couple of times, we see everyting working as it should:

Then, we add another server to the segment and, while we’re at it and without any further configuration withing NSX, it is added as a pool member:

After this, we also add a web-server to Site-B, which we add as a static IP-address to the server pool and, just because we can, add one to the physical host.
However, they are not going to be automatically active on this virtual server and this has to do with the route advertisements. The monitoring and load balancing within the T1, is done from the uplink IP-Address of the load balancer. This is (as we can see) in the 100.64.0.0/16 segment:
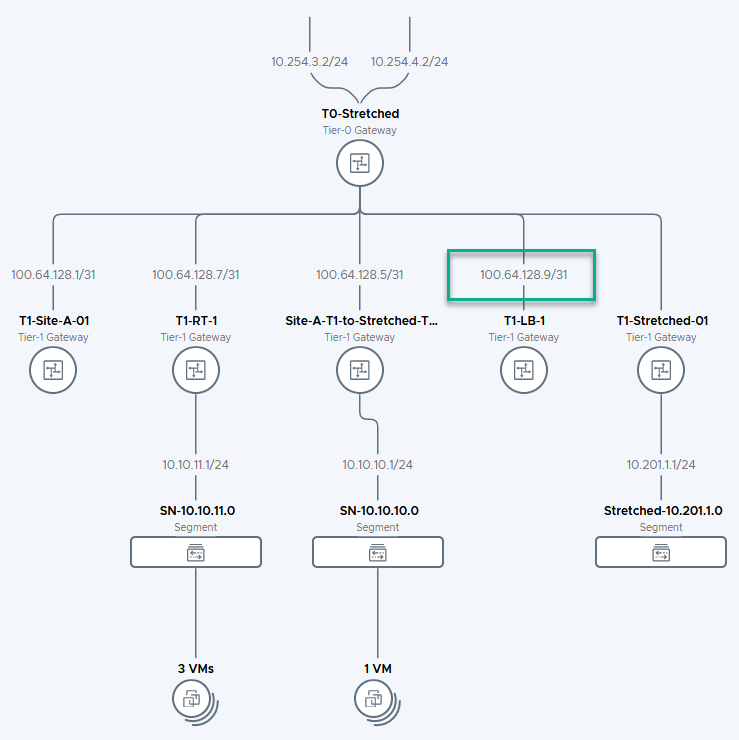
These are automatically created (auto-plumbed) and if I remember correctly, these subnets were advertised to upstream routers, in NSX-T 2.x. But in 3.0 they are not advertised, so the added pool members that are not part of this virtual network, don’t have the route back to the T1, to be regarded as healthy.
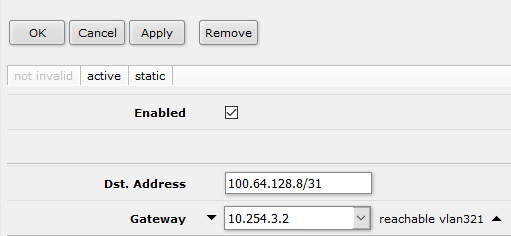
What I did in this case (but that is not something that will hold in a production environment) is add a static route on my physical router:
ánd I changed the BGP-peering to the NSX-environment. I added “Default Originate” to “Always”:

which will make my physical router tell the NSX environment that all unknown networks can be reached through the physical layer.
This will enable the web-server in the physical network, but not the web-server in Site B. I do not know why this doesn’t work, the routing looks to be in order, but somehow the web-server is not able to reach the uplink interface of the T1 on which the load balancer is running.
When we go to the website, we see:

If anyone can tell me what I need to do to get the web-server in Site B working, please let me know :).
2 thoughts on “Load Balancing with NSX-T 3.0”
Hi Ronald,
Which NSX-T LB topology have you used here? It looks like one-arm, but you are not using a service interface to connect your LB to the specific segment.
So to me it looks more like a hybrid topology? Client and server are not on the same segment, but you place your LB on a different T1 and configure SNAT I suppose? So that the returning traffic is again going via your LB?
Regards,
Arnaud
Good spot, it’s a one-arm without having it sit on the same gateway as the logical router. It works but is not an officially supported config.