Building a Windows Cluster on Nutanix
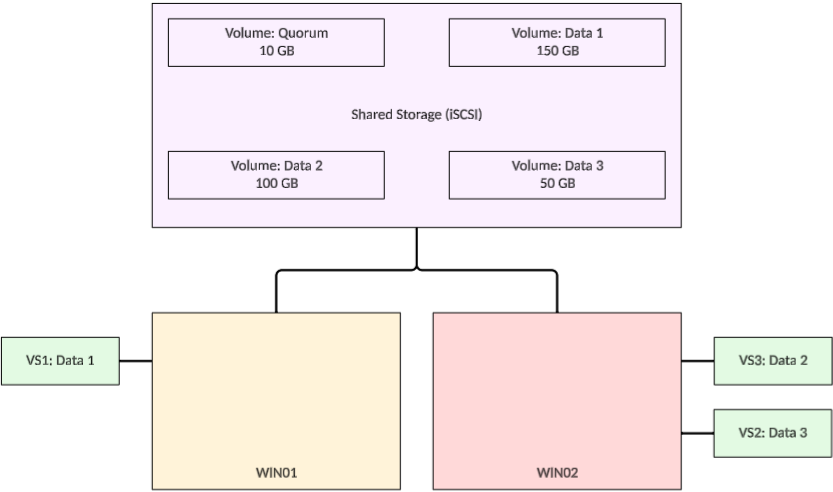
Next topic of studying for me, is around Nutanix Unified Storage. I like storage and so that is the topic I wanted to learn more about, but not by just studying, I want to see how this will behave in a real-life scenario. So I decided to build something like this:
This brings back some memories as well, since in the “old days” (around the start of the century, before I dove head first into virtualization), I deployed many Windows based clusters (still bare metal back then), so I’ll dust off some memories and see if the concepts of those days still apply today… I found out, most of the knowledge still was there :).
We are achieving this by following these steps:
- Preperations
- Create Volume Groups on Nutanix, with iSCSI enabled
- Install WSFC feature on the Windows Servers
- Create iSCSI clients on the Windows Server VM’s WIN01 and WIN02 (already deployed)
- Connect the VG’s from the Windows Servers
- Create a cluster based on Windows Server Failover Clustering (WSFC).
- Create File Servers
Preperations
Couple of things we have to do first, before we can continue. First I have to move my Windows VMs to a “VLAN”. The same VLAN where the iSCSI address of the Nutanix environment lives. This way, we don’t have to traverse Flow Networks to get from the iSCSI-client to the server, which would be a more real scenario than using all kinds of virtual connections to connect to the storage. So we move the Windows VM’s to VLAN 200 (172.16.200.0/24) and give them semi Static IP-Addresses in that network (DHCP reservation).
To do this, the VM needs to be powered down. Removing and adding a NIC to a running VM is not allowed.
I am using the following IP Addresses (through a DHCP reservation):
Win01: 172.16.200.11
Win02: 172.16.200.12
For the rest of the clustering, I am using static addresses:
WC01: 172.16.200.20
VS01: 172.16.200.21
VS02: 172.16.200.22
VS03: 172.16.200.23
Next, we’ll join both VM’s to the domain my-sddc.local (WSFC requires domain membership).
Create Volume Groups on Nutanix, with iSCSI enabled
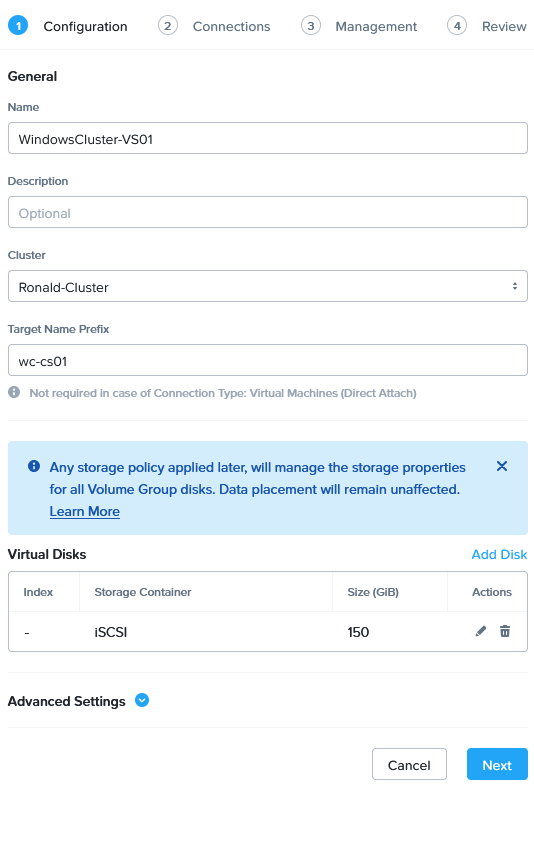
We are now going to create the Volume Groups on the Nutanix platform, to connect our Windows Servers to. We go to “Storage | Volume Groups” and click “Create Volume Group”.
We then give the Volume Group a name and a description and add Virtual Disks to it. I am using a 10 GB vDisk for the Quorum and one disk for each of the Virtual Servers.
Creating, as an example, the first Virtual Server Volume Group:

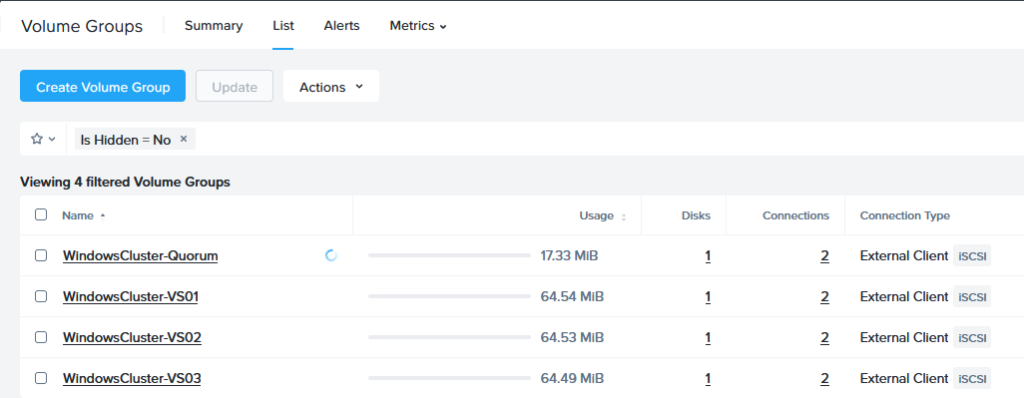
The other 3 volumes are created in a similar way, other screens are left default. Only differences between the Volume Groups, are the names and the amount and size of the virtual disks.
I could use multiple vDisks per Volume Group. That would automatically create load balancing across the CVM’s, but it would display as several iSCSI disks within Windows. Those would then need to be combined to a single volume (which is very possible). For the purpose of this build, I chose to use a single vDisk per Virtual Server, but know that there are several possibilities here.
All this results in:
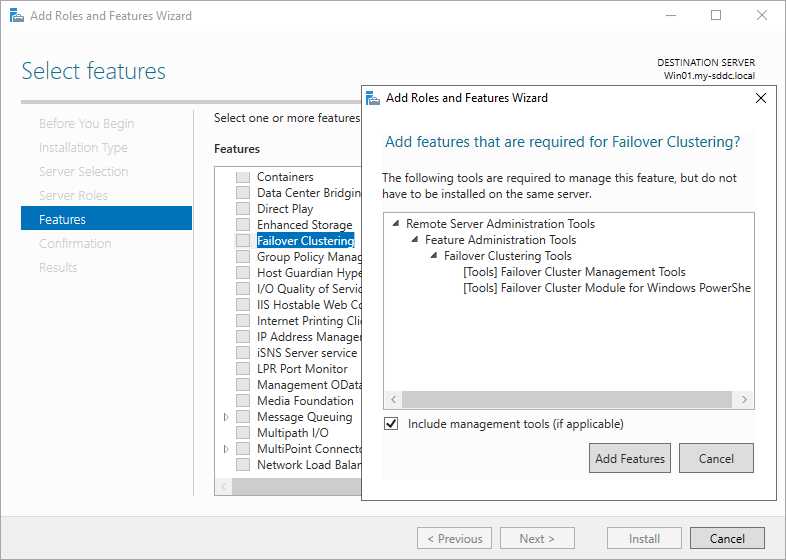
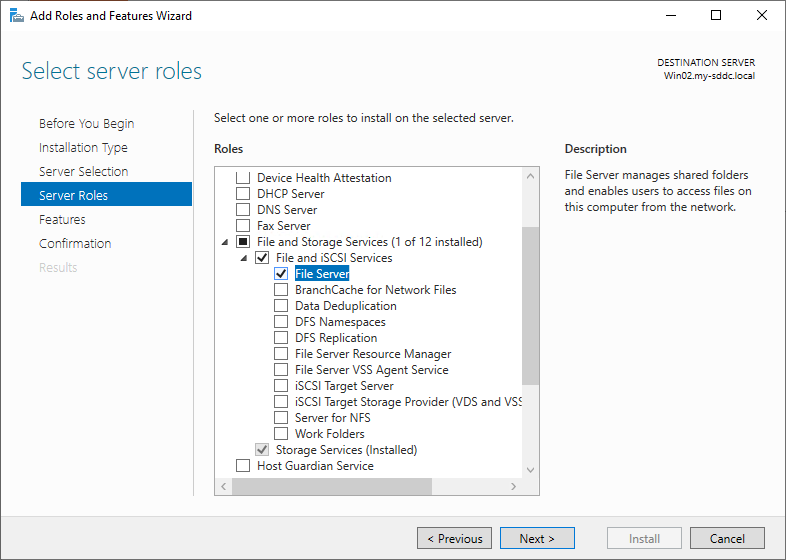
Install WSFC feature on the Windows Servers
After this is done, we install the WSFC feature on both Windows Servers. This is done with Server Manager:
Create iSCSI clients on the Windows Server VM’s
Then we create the iSCSI client config on the Windows Servers. For this we start “iscsicpl” from the “run”menu. This will give us the following box:
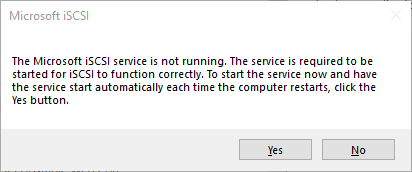
We click Yes, to enable the iSCSI functionality. Do this on both Win01 and Win02.
Then we fill in the target address (we have already created this earlier, within the Prism Elements interface, where we have created the “Data Services IP”:

This can be found in the Cluster Details part of the Prism Elements settings screen.
So this address is used in the Windows Server, to connect to. When we connect to this, we see all the available targets:
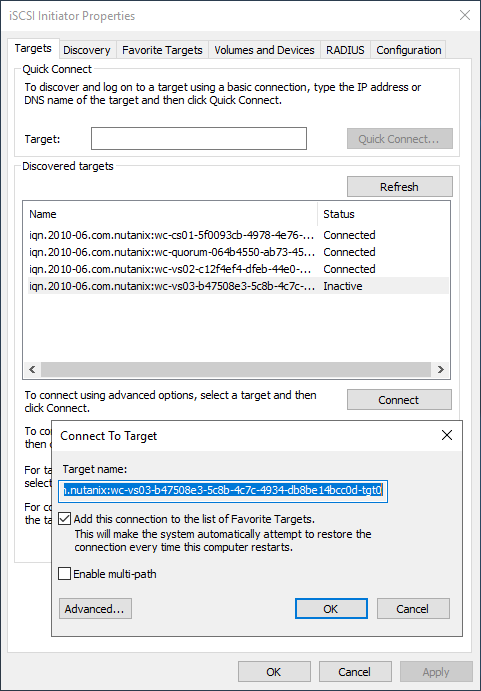
Connect the VG’s from the Windows Servers
We can connect to each of the targets, by clicking “Connect” and then “OK” in the next screen. We could use multi-pathing, but for that we would need multiple network connections (and fabrics), which I currently don’t have running, so for now, we leave that blank.
After all targets have been connected, we can see them in Disk Manager in both Windows Servers:
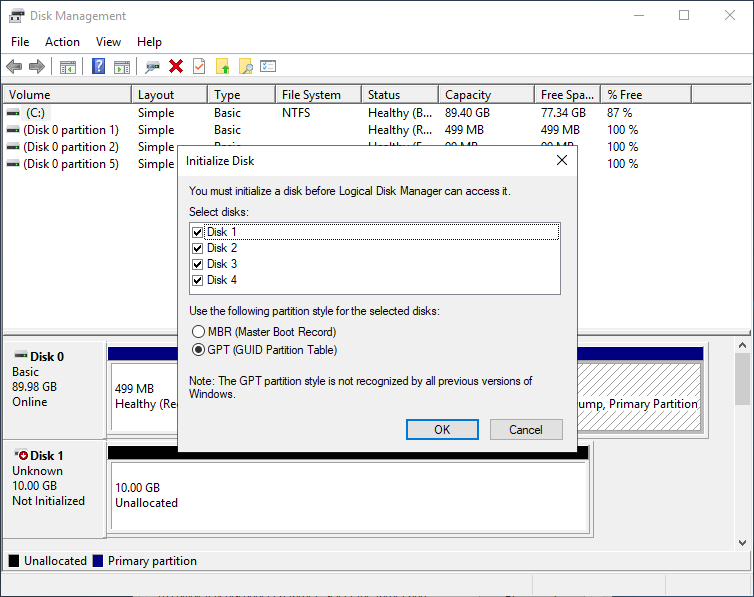
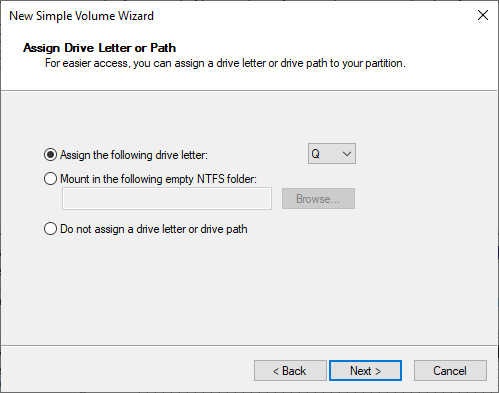
The initialization is done on one server. We also create a volume on each of the disks, also from one server:
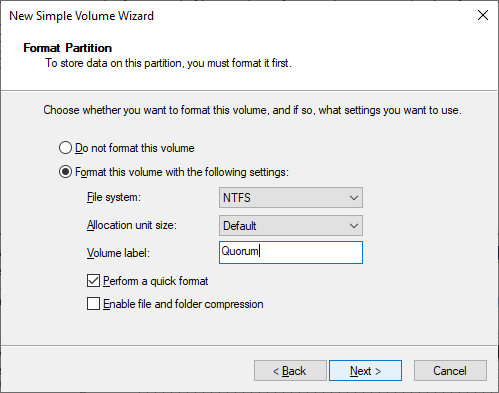
(This will be the Quorum). This needs to be done before creating the Cluster.
Create a File Server based on Windows Server Failover Clustering (WSFC).
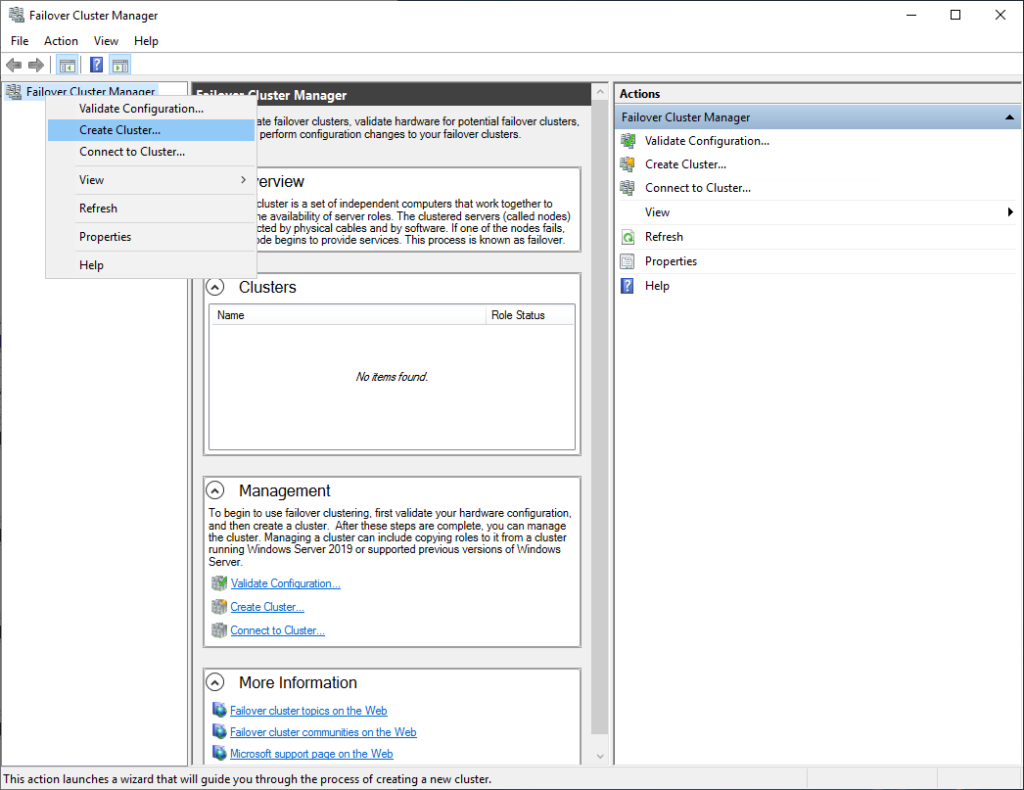
We head over to “Failover Cluster Manager”, although Windows advices us to use “Admin Center”, but for this one I am sticking with the original tool.
We create a cluster:
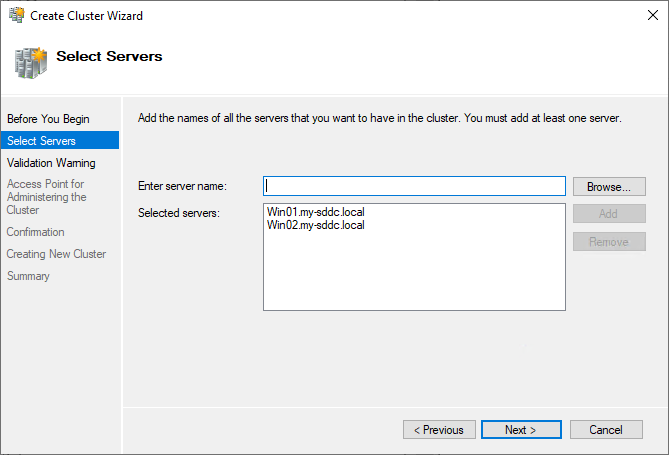
Select the two servers:
Accept the Validation Warning and run the validation:
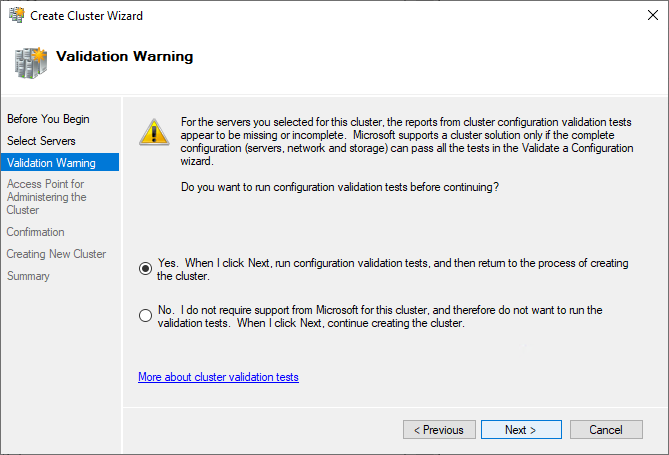
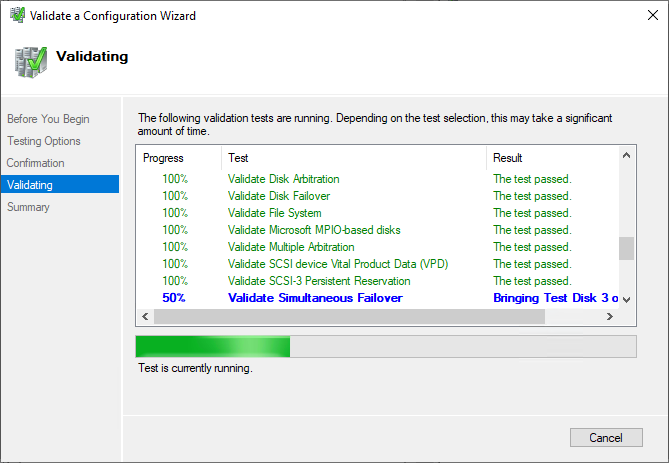
In my case, this will give one warning, on the network connection:
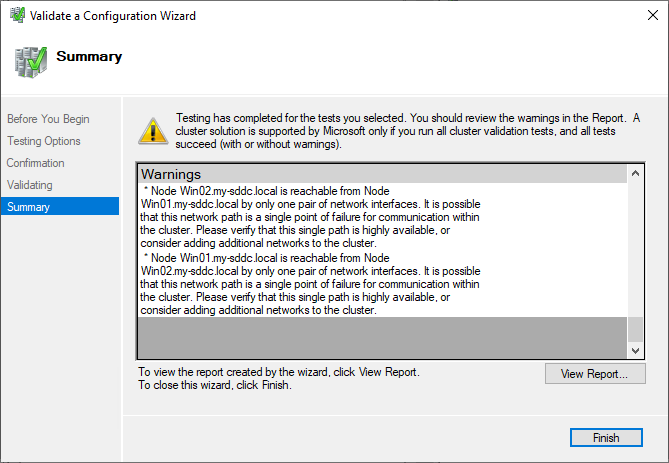
WSFC prefers several interfaces, for both Virtual Server traffic and Cluster traffic. For now I am ignoring this, but in a production environment you would definitely want a separate network for cluster traffic (on it’s own VLAN).
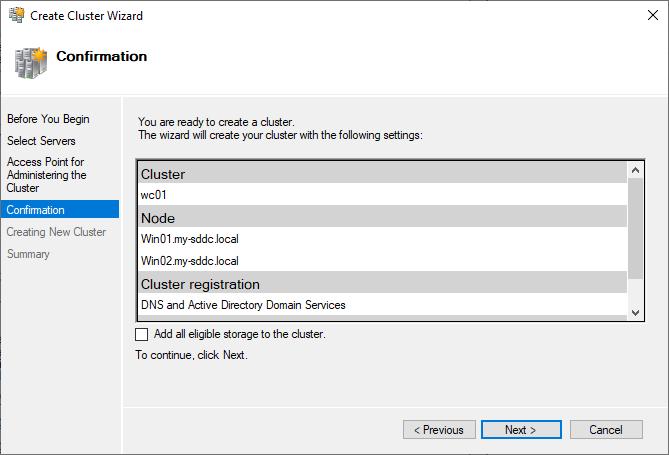
After accepting this, we create the cluster:

On the next screen, I deselected “Add akk eligble storage to the cluster”. This allows me to do this later and create several Virtual Servers. This way I can make the cluster “Active/Active” instead of having all virtual disks assigned to one Virtual Server.
The end result is succesful:

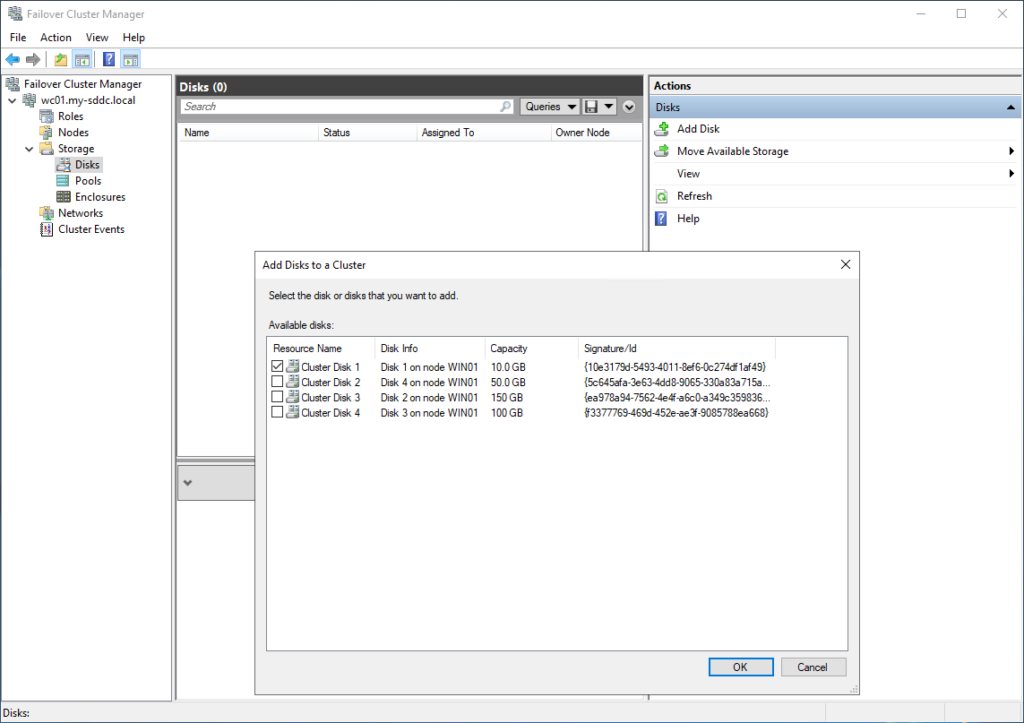
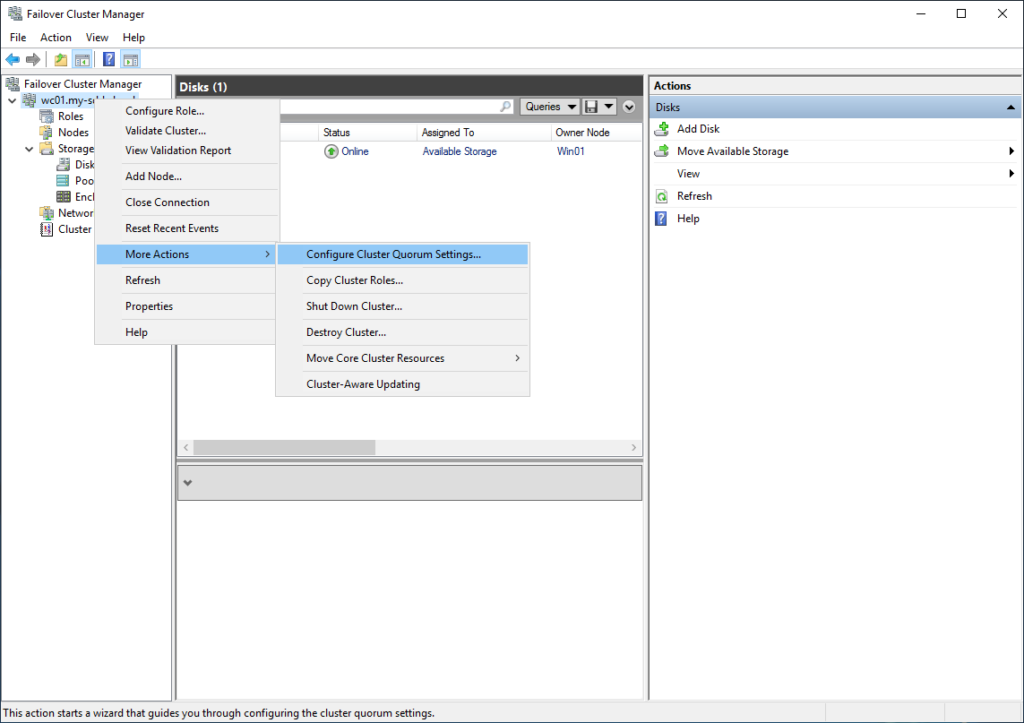
We then configure the Quorum disk and attach it to the cluster. In contrast to this picture, I selected all disks, since we need them added to create the File Servers (at the moment that this picture was taken, I was under the assumption that this could be done at the moment of creating the File Server, but this was mistaken (I told you, I am a little rusty ;))):
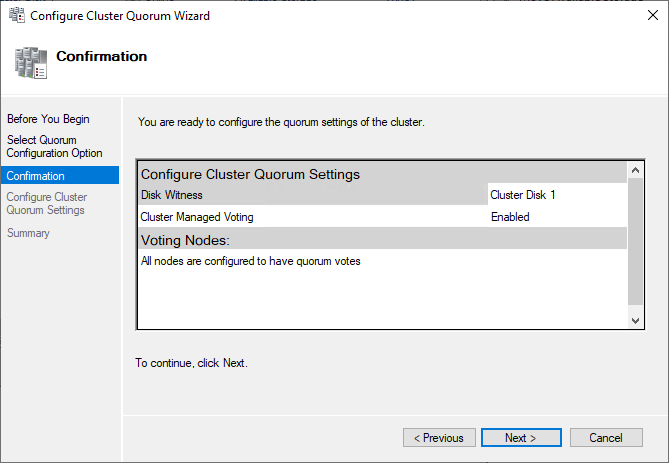
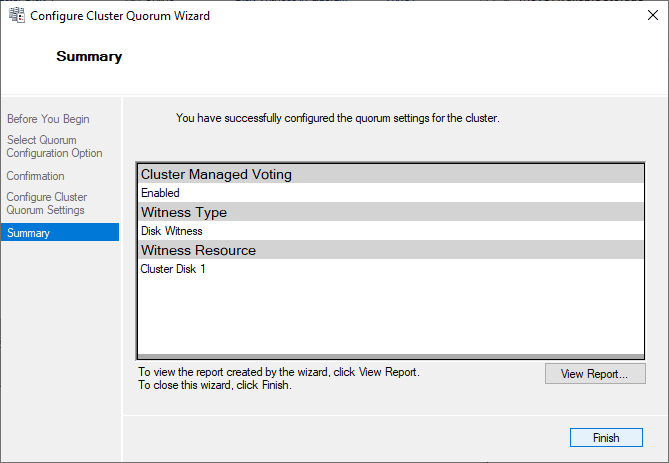
And configure the Quorum:
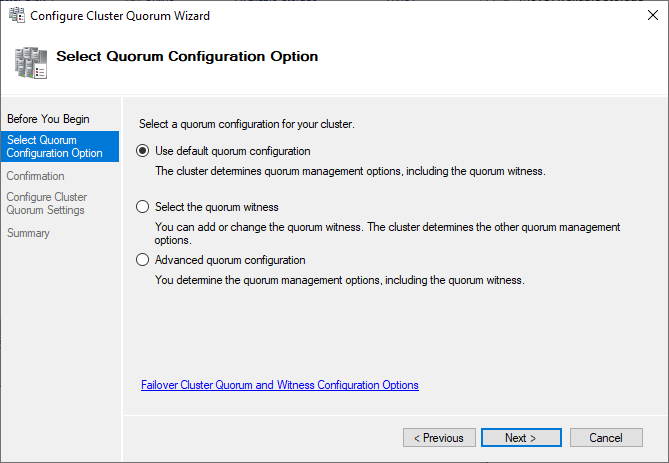
We can use the default, that will select the available disk as the Quorum disk. We could also choose one of the other options and select it ourselves. The rest of the screens are left as they are:
Create File Servers
We now have a running cluster, but no functionality yet. For this we have to configure the File Server role on both servers. We do this from Server Manager:
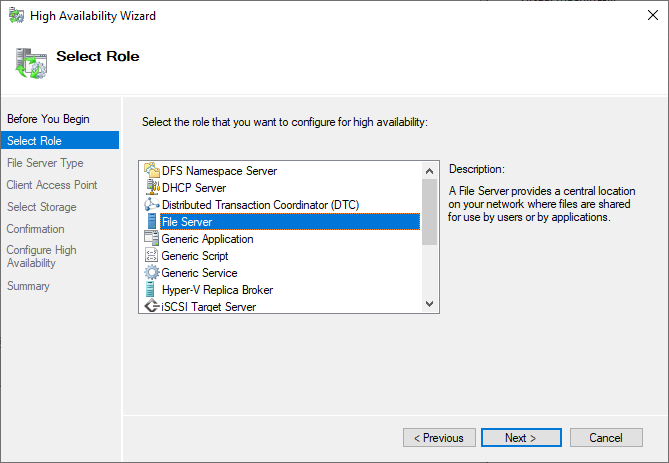
When this is done, we can go back to our Failover Cluster Manager and add the first File Server:

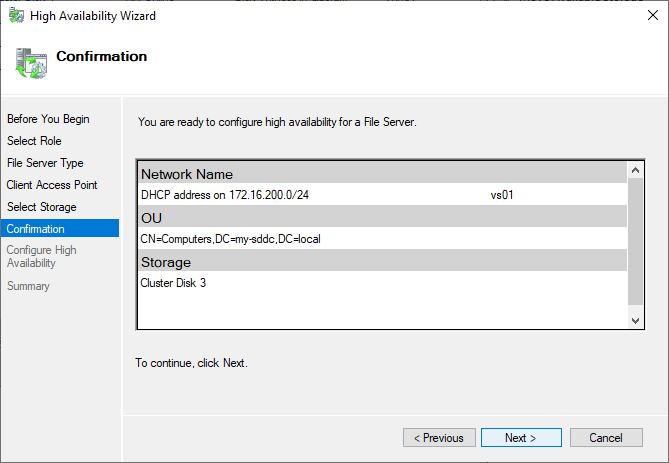
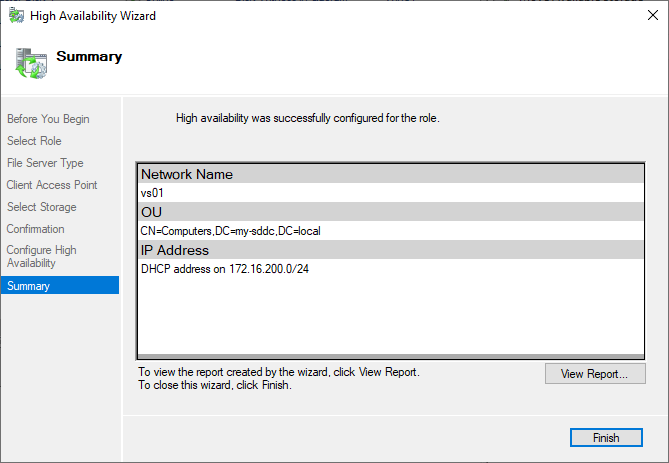
We select the role we want to configure:
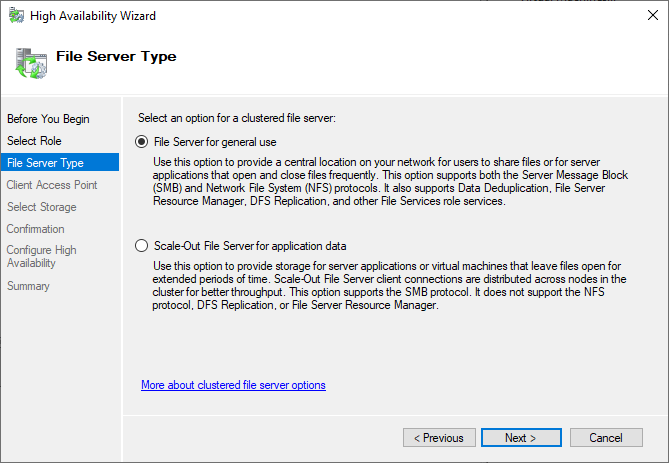
And follow the wizard:
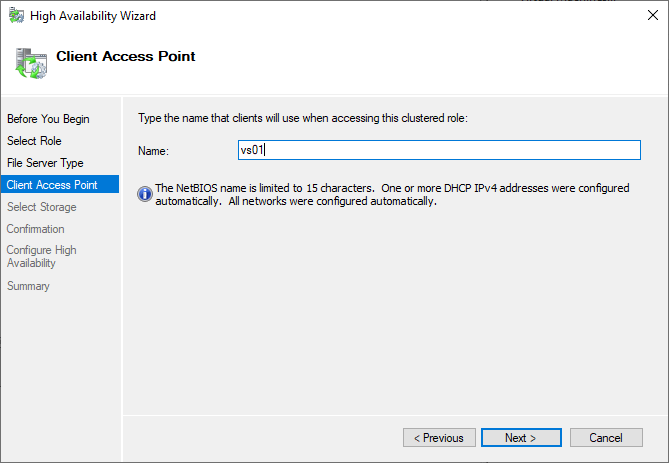
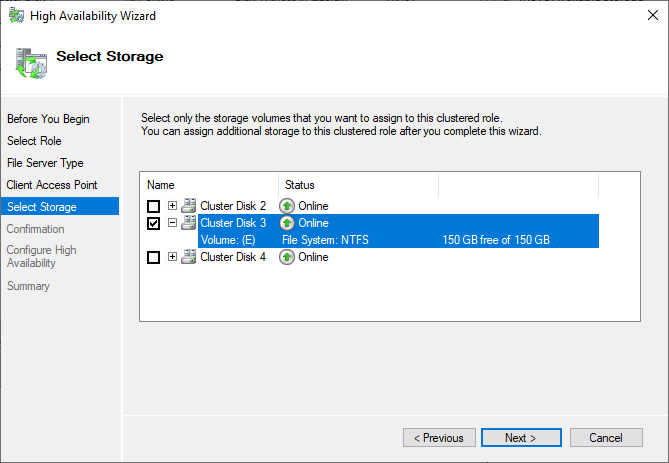
(I looked at the size, to select the right disk)
And do this two more times (VS02 and VS03).
Last step to do, is change the IP Addresses. They are configured through DHCP, but we can change that through the GUI:
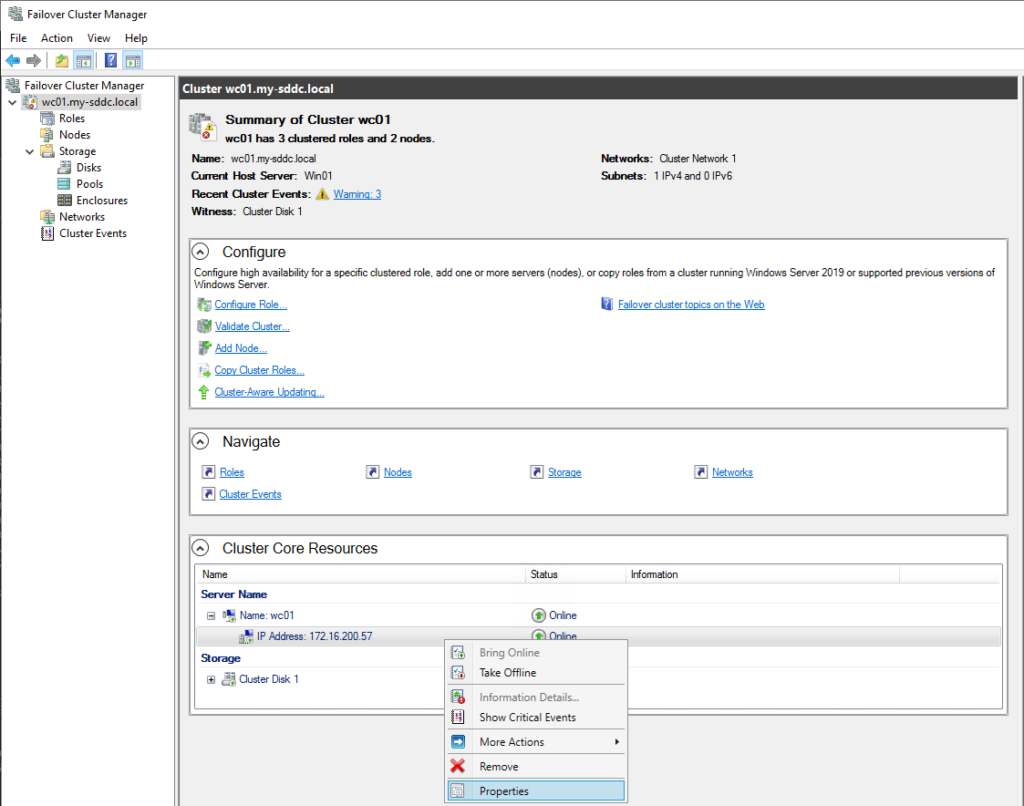
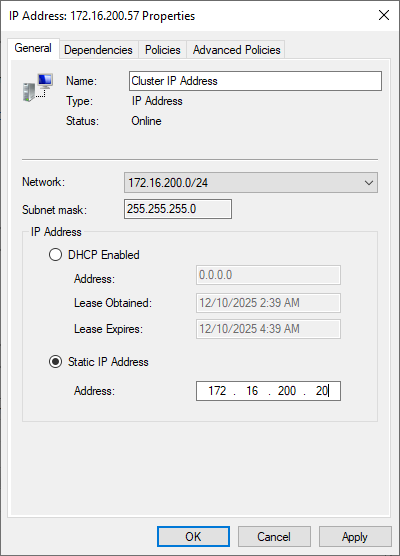
And do the same for the three Virtual Servers. For the Virtual Servers, we can do this here:
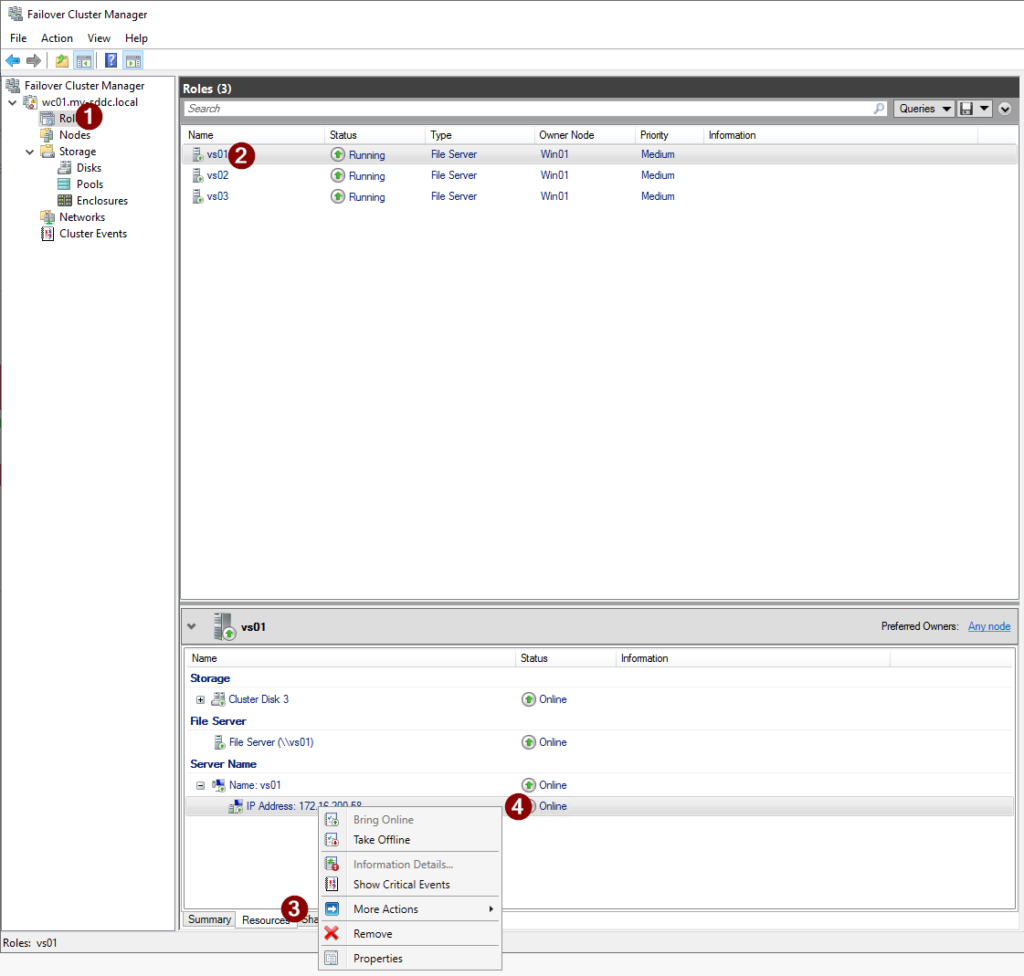
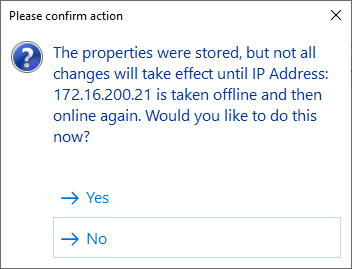
(the last step is a right-click). After changing the IP Address, the question is asked if the resource should be brought offline and back online. We choose to do this, because noone is using the File Server yet. But be carefull in Production environment, when choosing yes.
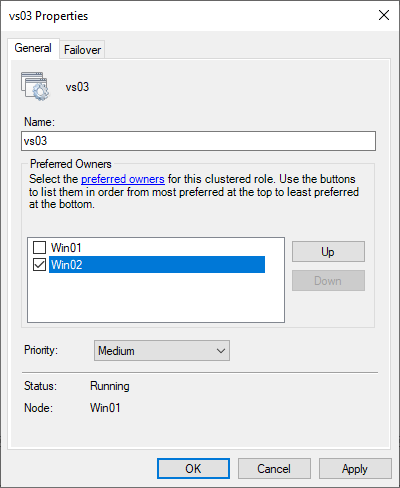
Very last step we take in this part, is dividing the functionality between the two cluster nodes. So we will (preferably) run the VS01 on Win01 and VS02 and VS03 on Win02. For this, we set a “preferred owner”, in the properties of the Virtual Server:
Now we can create shares and start using the File Server.