Nutanix on Nutanix
(Or more precisely AOS+AHV on AOS+AHV).
I received a question from a customer about the possibilities of running a nested Nutanix based lab based on what I had described in earlier posts. But it also got me thinking about the next phase of my lab-journey, namely, running the nested lab on AHV instead on vSphere.
I have a long history with vSphere of course (and it’s predecessor VI) and I still am fond of it, but I wanted to find out if I could move (rebuild) my environment on top of AHV. And let’s not forget, if you want to run vSphere, you can very well do this in combination with Nutanix AOS.
So it’s time to build this lab. For this I am (first) using my “old” server, so still keeping my current lab available, but I do intend to also do this to the “new” server (which is 10 years old, but still…).
How did I go about doing this? I took the following steps:
- Prepare hardware
- Install Nutanix CE on the physical host
- Configure the Cluster
- Migrate my pfSense (including, adding a VLAN-trunk NIC)
- Install virtual Nutanix CE hosts on top of the physical host (twice)
- Configure networking on Clusters
- Install Prism Central on the Physical Cluster
- Install Nutanix Guest Tools (NGT) on Nested Hosts
This is the ultimate goal for this exercise:
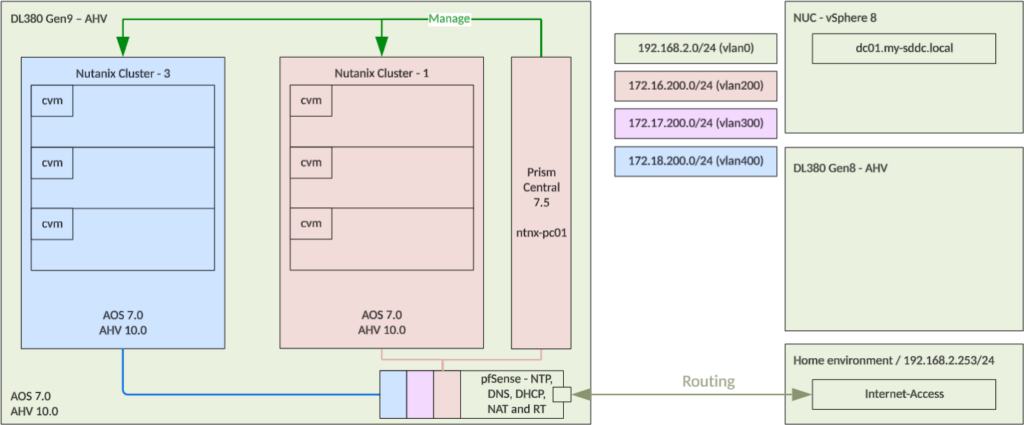
So I want to create two three node cluster, on top of my AHV running DL380 Gen9, with one Prism Central instance (also running on top of the DL380) to manage both clusters (and possibly the physical cluster as well).
Prepare hardware
First thing I need to do, is change my controller mode, to HBA-mode. If I don’t, I am not able to install AHV. Even if I create my “arrays” as one disk per array, the serial number that gets forwarded to AHV installer will be the one from the controller and thus makes installation impossible.
So I created an USB stick with the HPE SPP (version 8.1) and booted it. To do this, I used the tool that is available on the ISO. If you use Rufus (which I use later on), the USB-stick will not boot properly.
After that I was able to clear the configuration of the Array controller and switch it into HBA mode. That allows me to see all the disks as disks, instead of as arrays.
Install Nutanix CE on the physical host
Next step was to install Nutanix CE on the physical host. Here I ran into another issue, I cannot install it on any of the physical disks, because my Proliant doesn’t see them as bootable devices if I do it like that, so I had to use a second USB disk as the AHV boot-disk. Luckily my wife had another USB-disk available, with 32 GB space on it.
So I used Rufus (https://www.techspot.com/downloads/6062-rufus.html) to create a bootable USB-stick, with Nutanix CE 2.1 on it. Get at least version 4.12 of Rufus, that allows you to create the right USB-stick, otherwise you will get an error about a file larger than 4 GB.
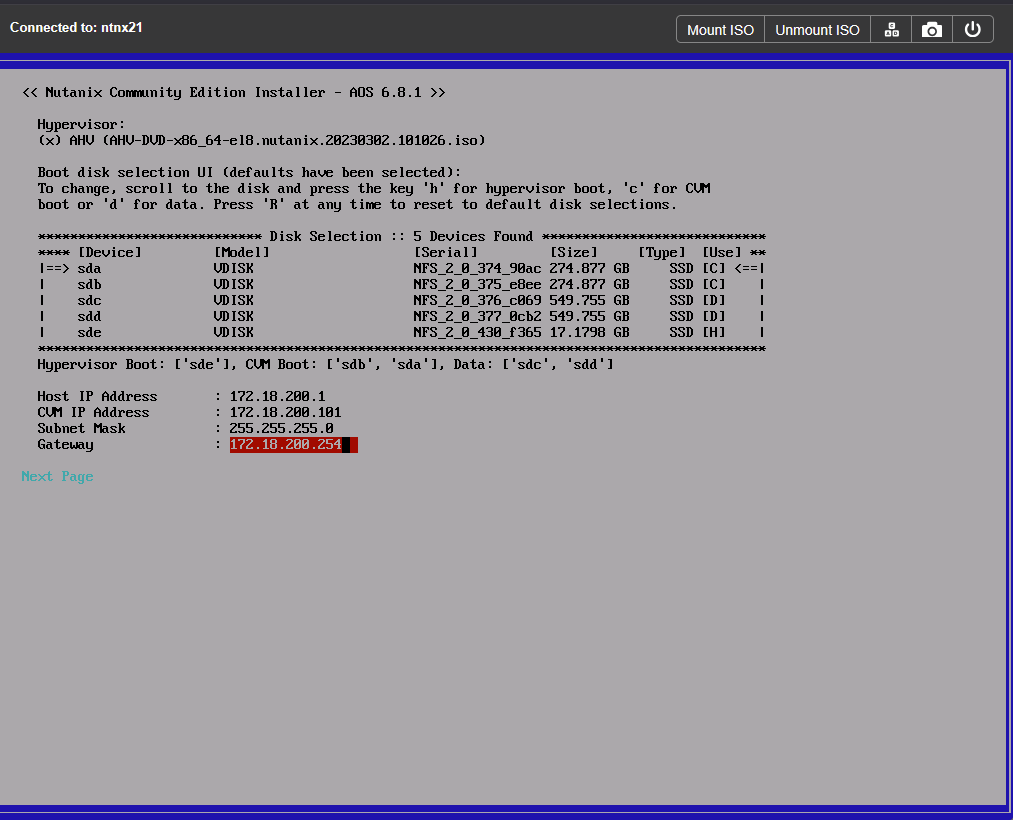
So, I booted my host with both USB-sticks in the system and installed Nutanix CE. This is fairly straightforward, choose the right IP-addresses and disks (USB-stick as “Hypervisor Boot”, SSD as “CVM-boot” and the rest as “Data” and install.
After installation, I could create a (one-node) cluster, by logging into the CVM and run the following commands:
cluster -s 192.168.2.203 --redundancy_factor=1 create
when that was done, and the cluster starts, that is enough to access the Prism Central management layer:

What I did find was that several of my SSD drives were marked as HDD:
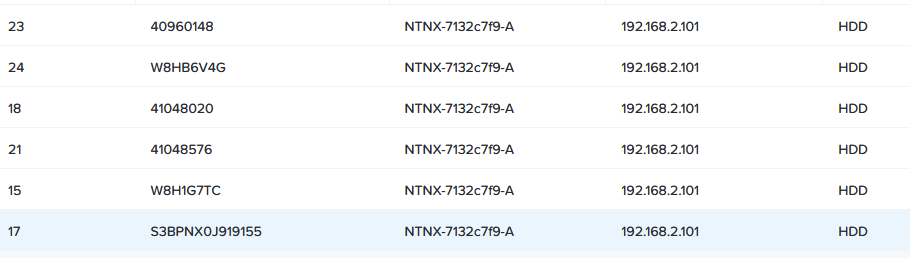
even though they are not. In this case disk 17, 18, 21 and 23 are in fact SSD drives. When I look for the model number of one of the drives:
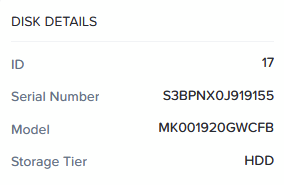
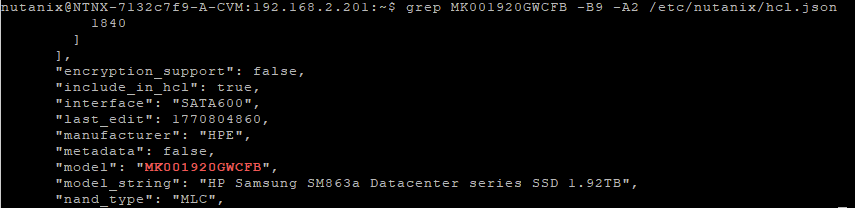
and look that up though the following command:
grep MK001920GWCFB -B9 -A2 /etc/nutanix/hcl.json
I see that it should have been detected as an SSD:
I look up all the “wrong” disks, through the command:
ncli disk ls
and mark them as SSD with the commands:
ncli disk update id=00064a8a-283a-dc42-7f55-e0071b77af30::23 tier-name=SSD-SATA
ncli disk update id=00064a8a-283a-dc42-7f55-e0071b77af30::21 tier-name=SSD-SATA
ncli disk update id=00064a8a-283a-dc42-7f55-e0071b77af30::18 tier-name=SSD-SATA
ncli disk update id=00064a8a-283a-dc42-7f55-e0071b77af30::17 tier-name=SSD-SATA

(just showing the last of the disks).
It also changes the way the disks are shown in Prism Elements (17, 18 and 21 have been changed to SSD):

Please Note! This is a CE based test environment, don’t do this in Production environments, without first talking to Nutanix Support.
After this installation is completed, I performed an upgrade to the latest versions that are working, that currently is:
- AOS 7.0.1.11
- AHV 10.0.1.6
Configure the Cluster
At this stage, I configure the following items on the physical cluster:
- DNS (through “Settings | Name Servers)
- NTP (through “Settings | NTP Servers) (keeping this default)
- Cluster Name (through “Settings | Cluster Details)
- FQDN (through “Settings | Cluster Details)
- Virtual IP (through “Settings | Cluster Details)
- Data Services IP (through “Settings | Cluster Details)
- Networking
This last bit is a little bit more work than just filling in some fields. For now I am going to create some VLAN’s connected to the current virtual switch, I might switch to a “local only” switch later, but using the existing physical interfaces leaves me the option to move the pfSense appliance to another location later on, if I choose to.
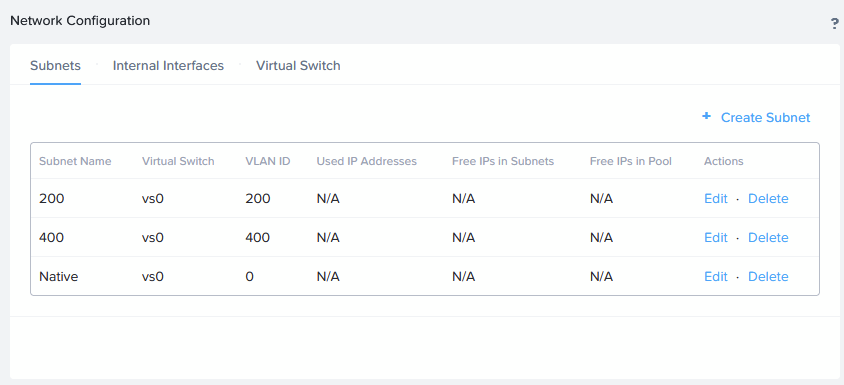
So, I create the following VLAN’s (through “Settings | Network Configuration):
- Native
- 400
And I configure some static rouroutetes on the CVM. This is needed later on. I am currently using my internet gateway as the default gateway for the physical cluster, so I have to add routes to the internal networks, like this:
Create a file called “route-eth0” in /etc/sysconfig/network-scripts like this:
nutanix@NTNX-7132c7f9-A-CVM:192.168.2.201:/etc/sysconfig/network-scripts$ sudo vi route-eth0
In it, I placed the following lines:
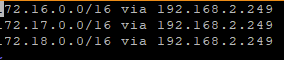
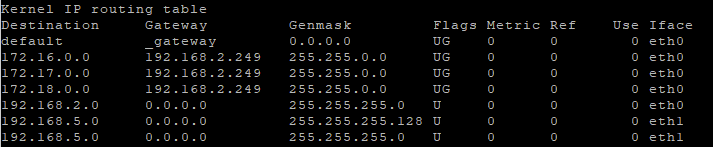
Then I need to restart the networking (this will give some loss of connection to the cluster), and when that is done, I can see the routes on the CVM (and this will survive a reboot):sudo systemctl restart networkroute
Migrate my pfSense (including, adding a VLAN-trunk NIC)
Since I already had invested time in getting my pfSense working as I wanted it to, I didn’t want to redo all that, so I chose to migrate my pfSense from my vSphere host to AHV. This was extremely easy, I exported the OVA from vSphere:
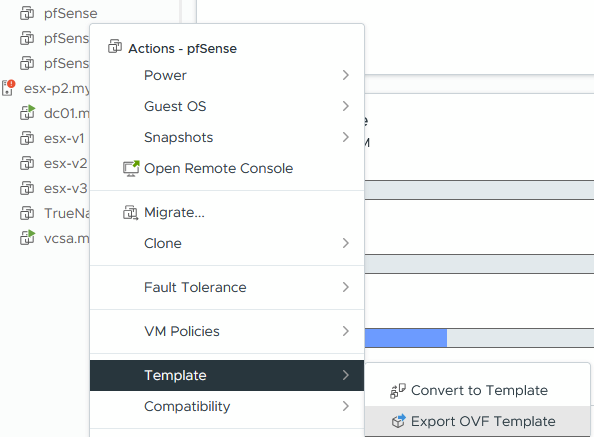
(chose a location to save the files) and imported it in AHV, as an image:
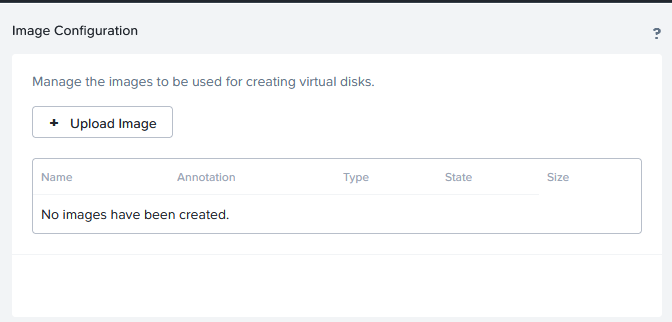
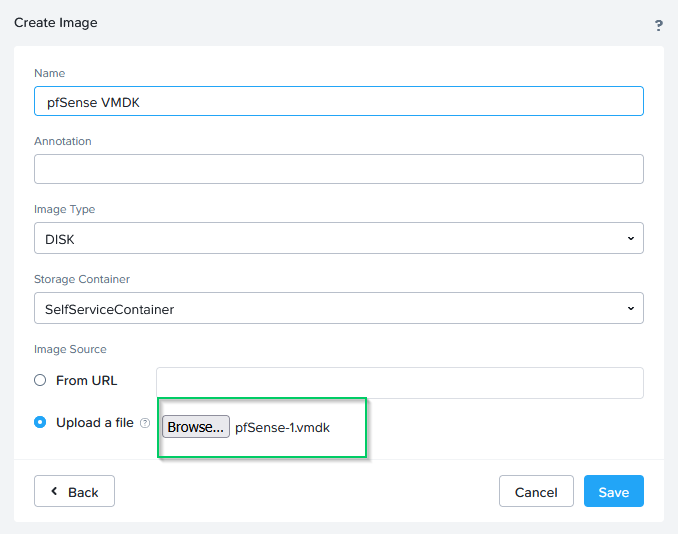
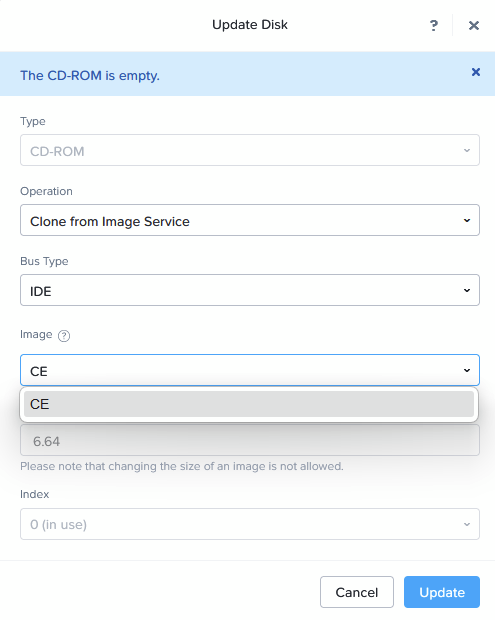
After that, I can create a new VM and base it on this image (this is only the section where you select the disk):
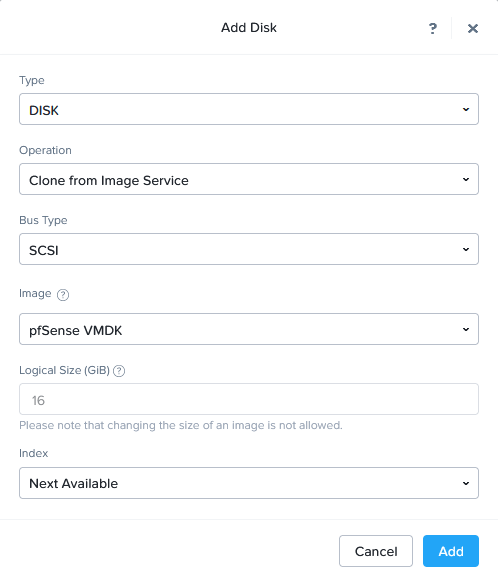
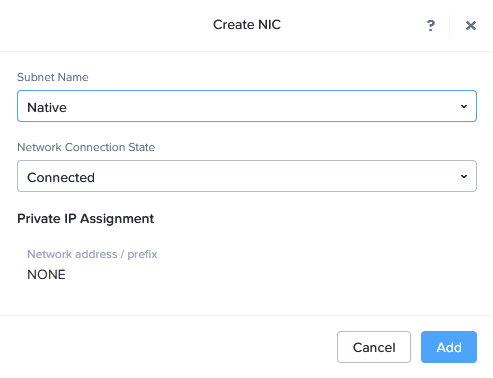
At creation, I am connecting the VM to only one NIC, the “Native” VLAN, for uplinking to the physical “192.168.2.0/24” network.
After creating the VM, we need to adjust some of the networking. First of all, we need to add a new interface, that is connected as a Trunk. This is something that needs to be performed on the command line. We go to the CVM and perform the following:
acli vm.nic_create <vm_name> network=<network_name> vlan_mode=kTrunked

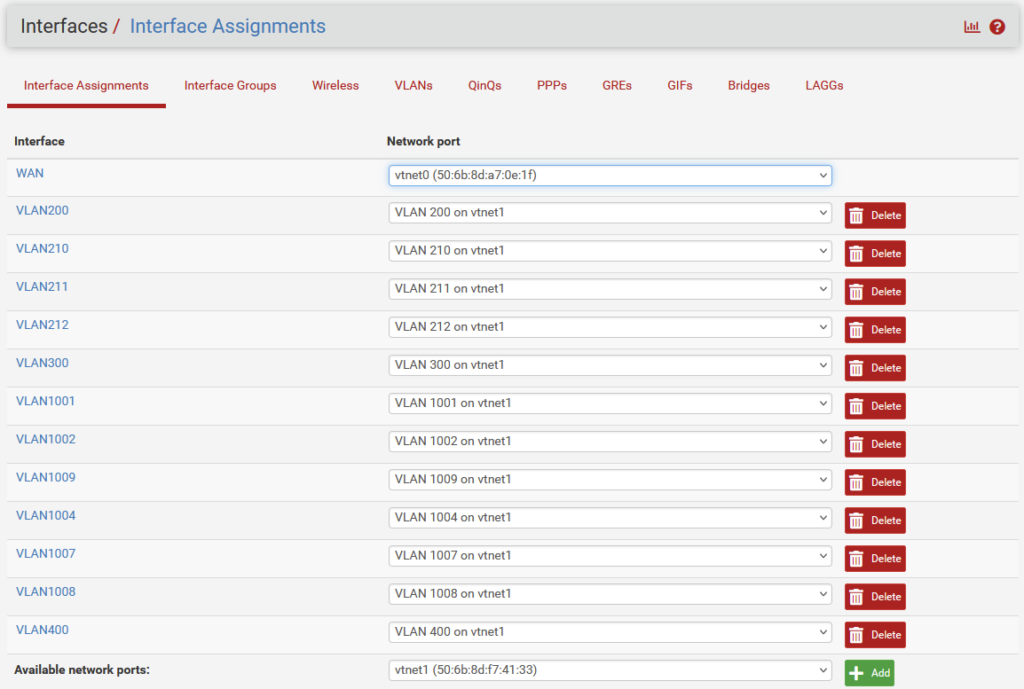
When this is created, we can start up the VM. We select the right interface for the WAN (vtnet0) and continue booting. After booting is completed, we can access the pfSense, through it’s existing IP-address (192.168.2.249) and assign the VLAN-interfaces. We get an additional interface in pfSense so we can move all the VLAN interfaces to this new interface, like so (for every VLAN interface already there):
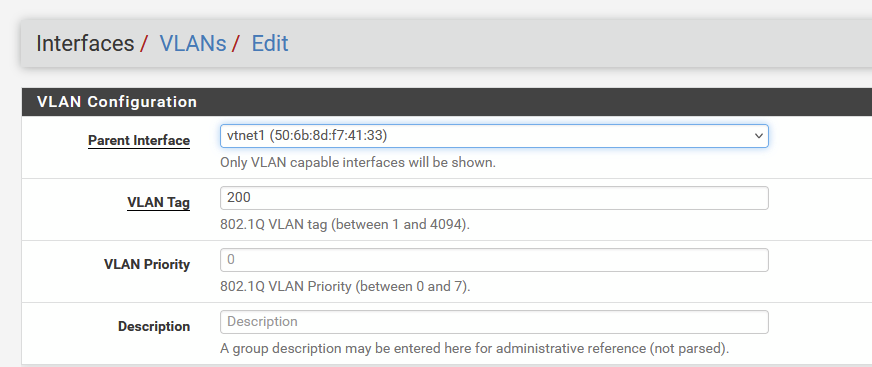
We move the interface from “Parent Interface” em0 to vtnet1. After this has all been done, we see this:
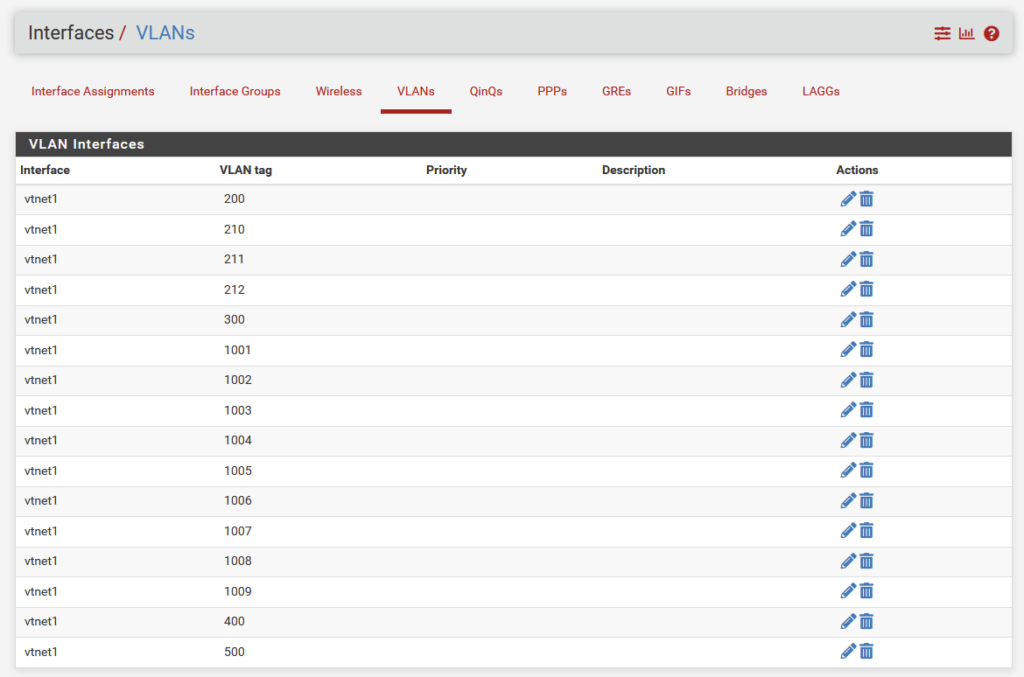
and:
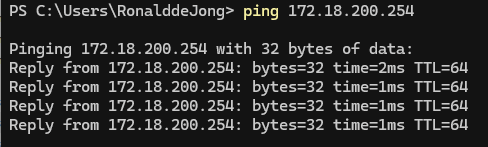
And from my laptop, I can now ping the VLAN interfaces on the pfSense:
What I did have to do, to get connectivity back, was reconfigure the NAT function, that seems to have been changed or deleted, during the migration, but after I set it as such:
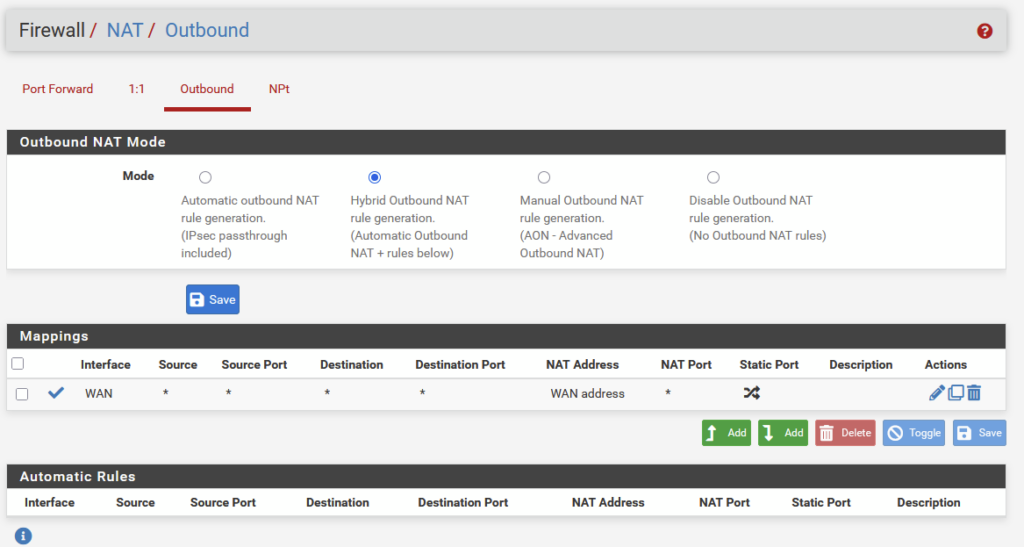
All traffic worked as expected and I can ping the “inside” of the pfSense from my Home-network (and vice versa).
Install virtual Nutanix CE hosts on top of the physical host (twice)
I did all this twice, once for Cluster 01 (172.16.200.0/24) and once for Cluster 03 (172.18.200.0/24). I intend to also build Cluster 02 (172.17.200.0/24) but that might probably be build on the second host. Or not, have not decided yet.
When pfSense is running as it should, we can create the nested VM’s. I have already uploaded the ISO to the Image repository (similar to the upload of pfSense, be it that I chose ISO as the format) and create a VM with two nics, connected to VLAN 400. The other nics will be added later on, because they also need to be Trunked.
Specs of the VM:
- vCPU: 1
- Cores per vCPU: 16
- Memory: 64 GB
- Legacy Bios
- Disks:
- CD-ROM: Attached to CE ISO (see below)
- 32 GB Disk (for AHV boot disk)
- 256 GB Disk (for first CVM boot disk)
- 256 GB Disk (for second CVM boot disk)
- 512 GB Disk (for first Data disk)
- 512 GB Disk (for second Data disk)
- NIC: 2: Both attached to VLAN 400 (no address assignments)
I create 3 VM’s this way (cloning second and third from the first), ntnx21, ntnx22 and ntnx23. They have already been configured in DNS, including the cluster name. Both forward and reverse records.
When that is completed, I have to change the VM, to allow nested virtualization. I do this as follows (on the CVM of the physical host):

vm.update ntnx21 cpu_passthrough=truevm.update ntnx22 cpu_passthrough=truevm.update ntnx23 cpu_passthrough=true
After that, I can boot up the VMs and install CE as per usual:
When the installation has finished (and if the pfSense is doing what it should), and I wait for a little while, until also the post-installation activities are completed. You can check the status of “genesis” on the CVM’s to see if it has completed (there will be a reboot of the CVM before it is finished):
watch -d genesis status
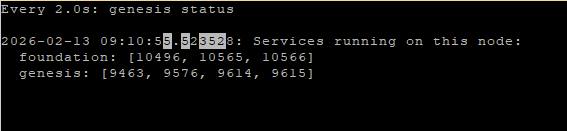
When the installation is completed and genesis ánd foundation are running, I can configure the cluster, like so:
cluster -s 172.18.200.101,172.18.200.102,172.18.200.103 create
After the cluster has been created and started (which takes approx. 10-15 minutes) , I can access the nested cluster, through the IP Address of one the CVM’s:
Next step, like on the physical cluster, I configure the virtual cluster with the following:
- DNS (through “Settings | Name Servers)
- NTP (through “Settings | NTP Servers) (keeping this default)
- Cluster Name (through “Settings | Cluster Details)
- FQDN (through “Settings | Cluster Details)
- Virtual IP (through “Settings | Cluster Details)
- Data Services IP (through “Settings | Cluster Details)
And then I am going to upgrade to AOS version 7.0.1.11 and AHV 10.0.1.6. That is the latest version that I can get to, to stay within supported versions. This has to do with the upgrade process of the AHV Hypervisor for versions 10.3 and 11.0 (and higher), that require a reinstall, instead of an upgrade. There are options to upgrade AOS to version 7.5, but AHV will stay on 10.0 and thus give an “incompatible” warning. If you are looking for that upgrade, you can read here:
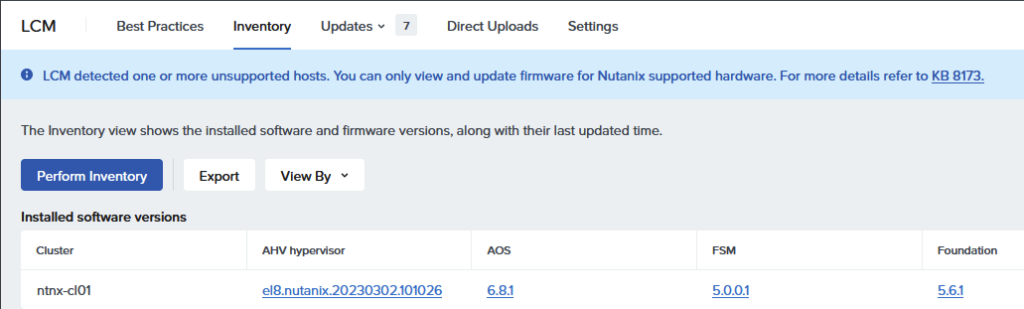
The upgrade itself is easily done with LCM (but it does take some time, in my environment this took 5 hours).
First, run an inventory, by clicking on “Perform Inventory”:
When the inventory is done, we get the choice what to upgrade and to which versions, I choose to do the whole upgrade in one go, and upgrade to the versions mentioned:
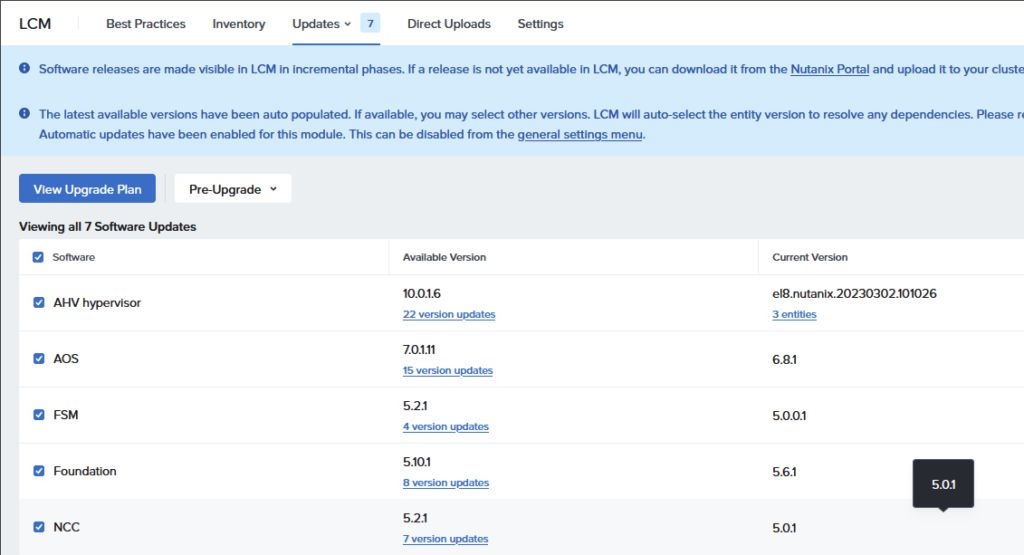
Choose to “View Upgrade Plan” and when that comes back with a valid plan, we can move forward, by clicking Next:
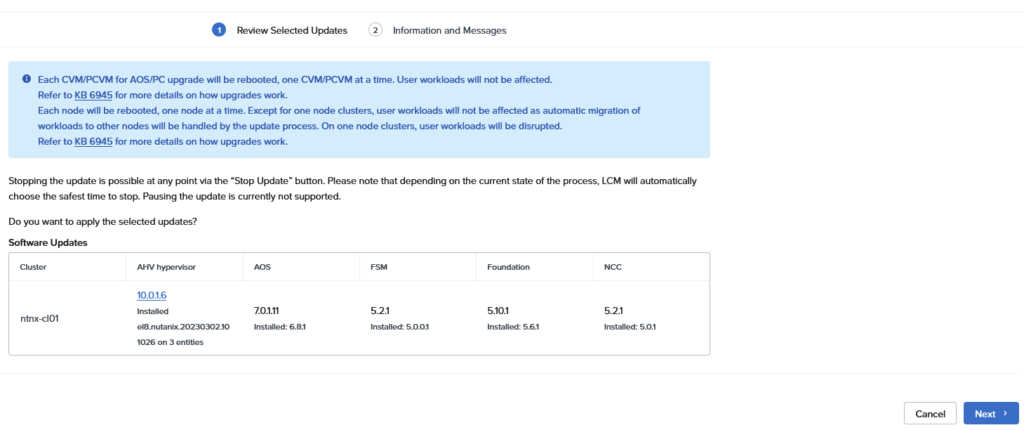
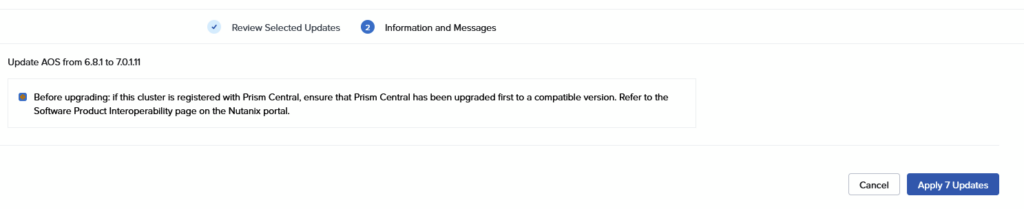
And in the next screen. Apply 7 Updates:
Configure networking on Clusters
Next up, configure networking on the nested clusters. I want to be able to deploy VM’s on here, with VLAN-based networking (and later on, I will create VPC’s). I am adding a second Virtual Switch to the cluster, but before doing that, I am going to add two NICs to each host, that will be able to do Trunked networking.
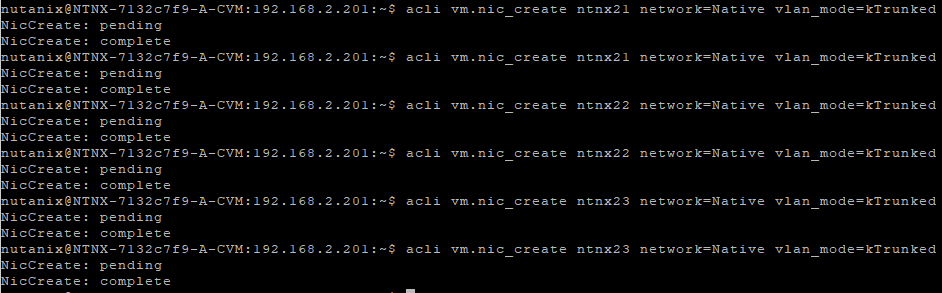
To do this, I go through the same process as I did with the pfSense. I go to the cli of the CVM on the physical host and perform the following command (twice per host):
acli vm.nic_create ntnxXX network=Native vlan_mode=kTrunked
In order to make the host and Host aware of this, I have to do run a script, called:
/usr/local/bin/nic_add_or_replaceRun it on the host, not on the CVM (It will ask for confirmation twice, for both NIC’s). This is described in: https://portal.nutanix.com/page/documents/details?targetId=NX8170NG8-NIC-Replacement-AHV:ahv-nic-add-ahv-t.html
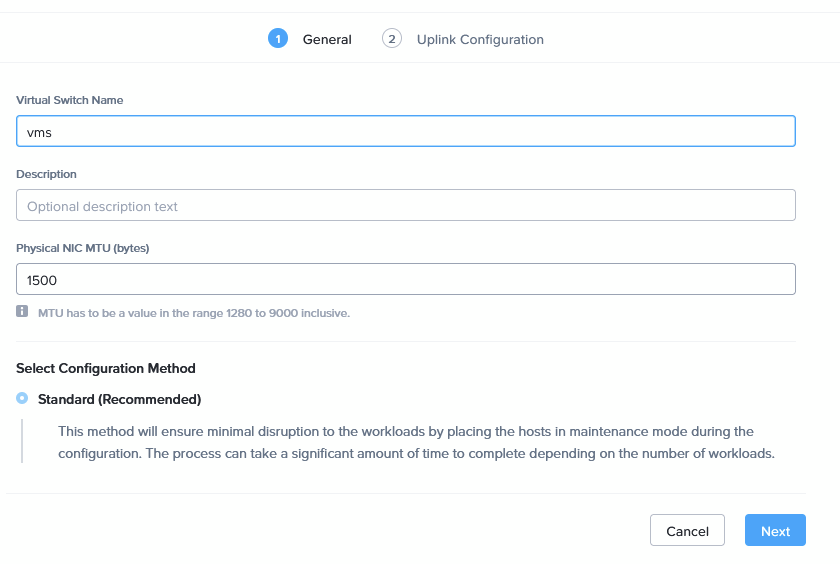
and answer the questions, asked to add the NICs to the host. When those are visible in the GUI, I can create a new Virtual Switch, with the new (trunked) nics. I would have liked to create a single switch for both clusters, but that functionality requires AOS 7.3 on the clusters. So, I create a single-cluster switch, on both clusters, like this:
Now I can create a new VLAN (for instance 212):
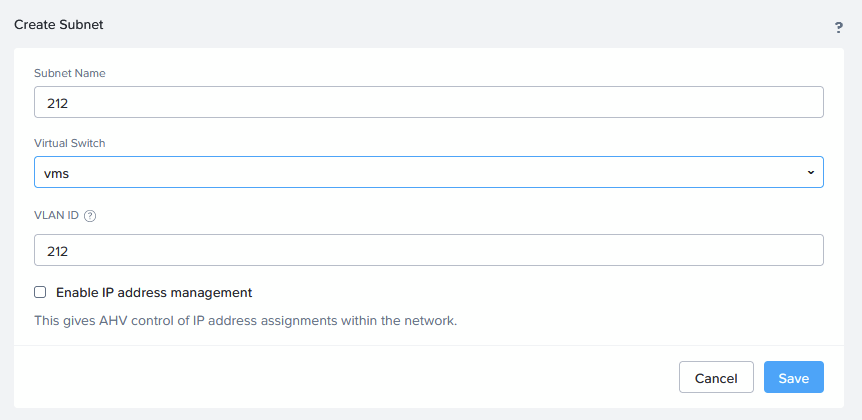
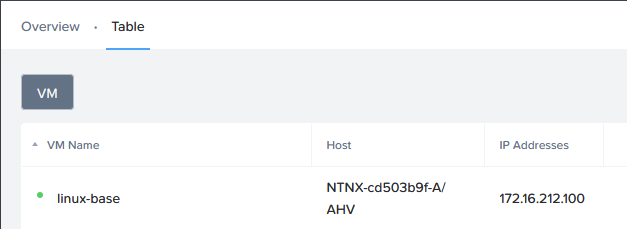
and create a new VM that exists on this subnet (which also already exists on the pfSense). I am using “TinyCore” for this: http://tinycorelinux.net/downloads.html
After uploading the ISO, I create a new VM, and connect the CD to that ISO, and install it, with the following specs:
- vCPU: 1
- Cores per vCPU: 1
- Memory: 1 GB
- Legacy Bios
- Disks:
- CD-ROM: Attached to TinyCore ISO
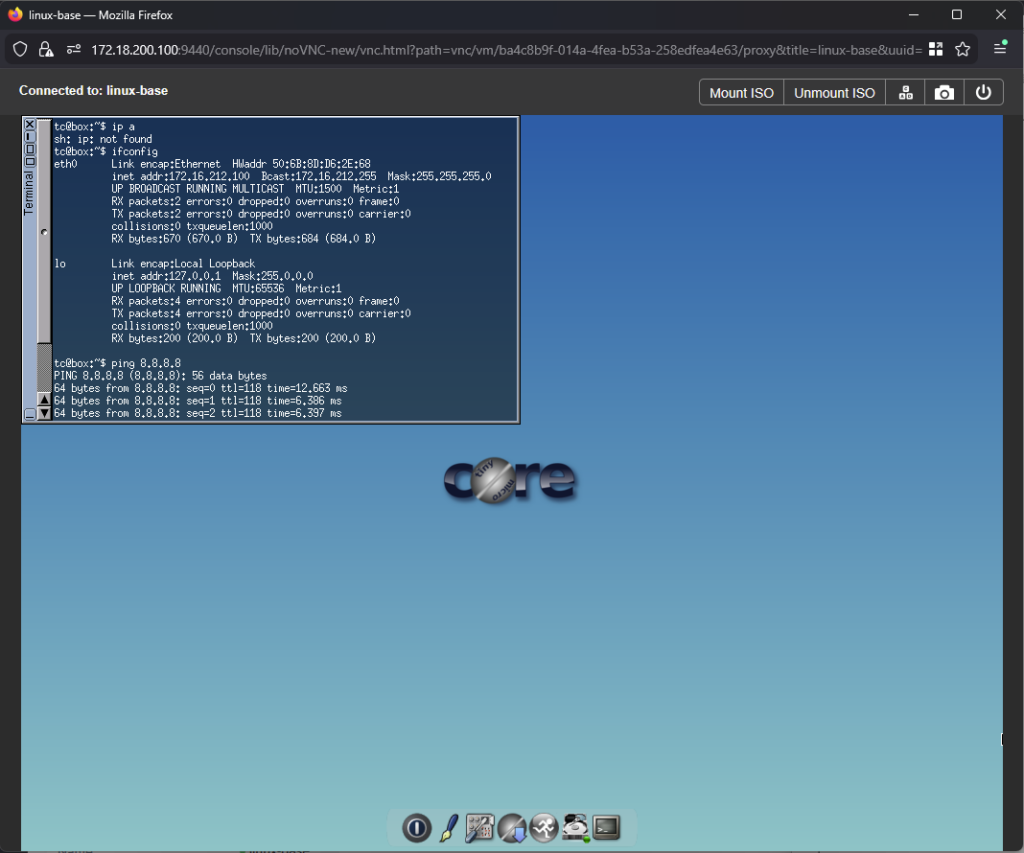
- NIC: Attached to VLAN 212 (no address assignments, I have DHCP running on the pfSense)
It runs off of a CD, so no installation needed, just to test out the networking for this cluster:
Install Prism Central on the Physical Cluster
I can now also deploy Prism Central on the Physical Cluster. I choose to place this in VLAN200. For this I have created a new VLAN on the physical host:
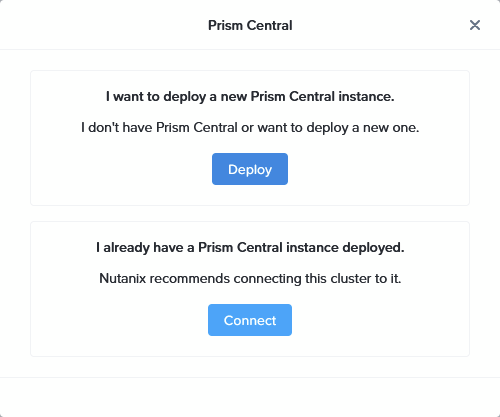
I deploy Prism Central from “Settings | Prism Central Registration | Register or create new”:

Choosing to Deploy a new Prism Central instance:
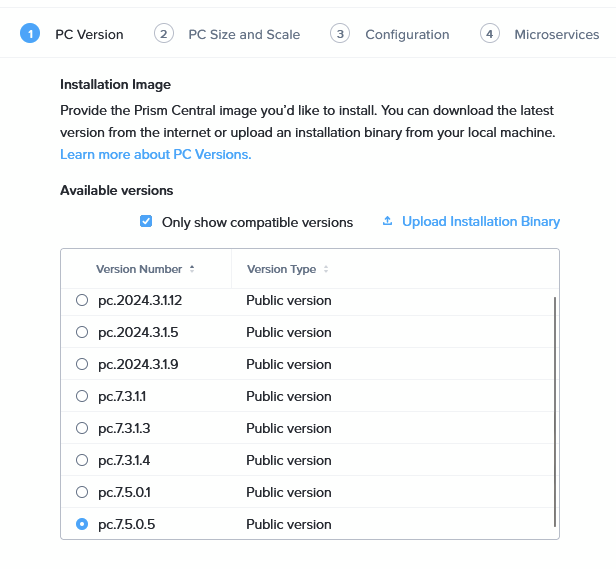
Choosing the latest version (7.5.0.5, I have checked the compatibility with my AOS versions, here: https://portal.nutanix.com/page/compatibility-interoperability-matrix/pc/interoperability
I am choosing a Large model, to make sure I can do all the things I want to do later:
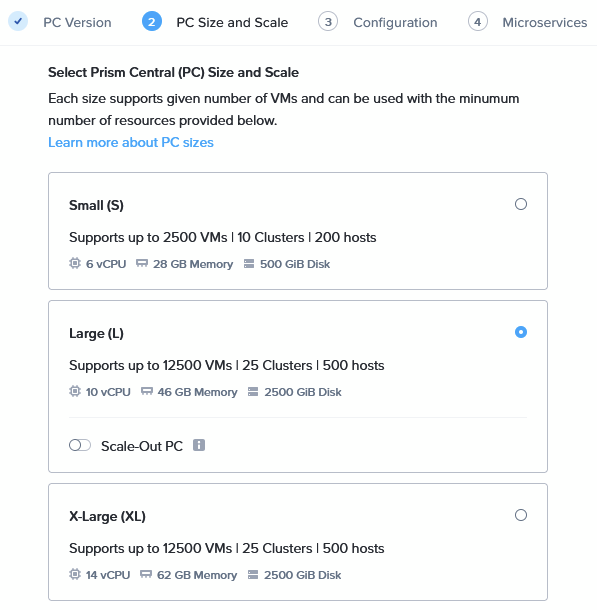
Not choosing “Scale-Out”, I am not made of resources ;).
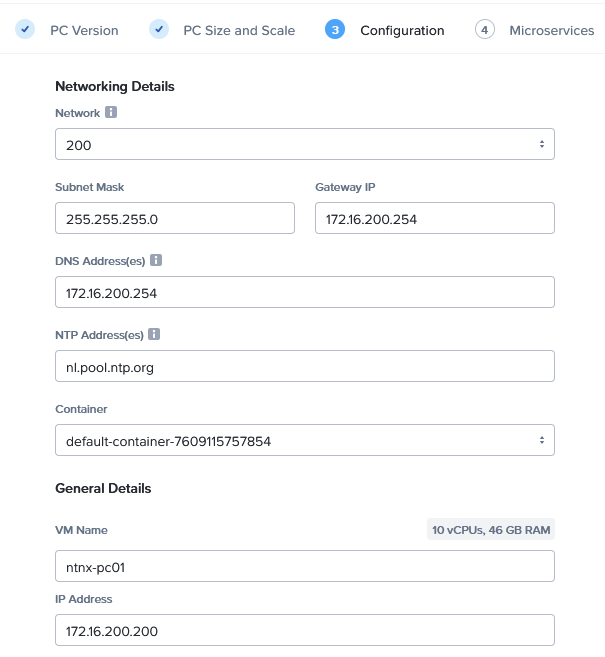
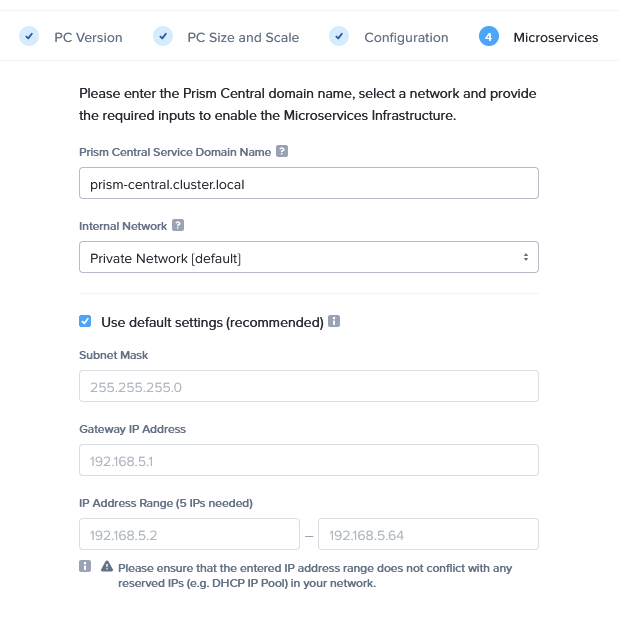
Fill out the correct networking information and name, and keeping the following screen default:
And then clicking Deploy.
It takes about an hour and a half in total, but after that time, I can login to the pristine Prism Central appliance:
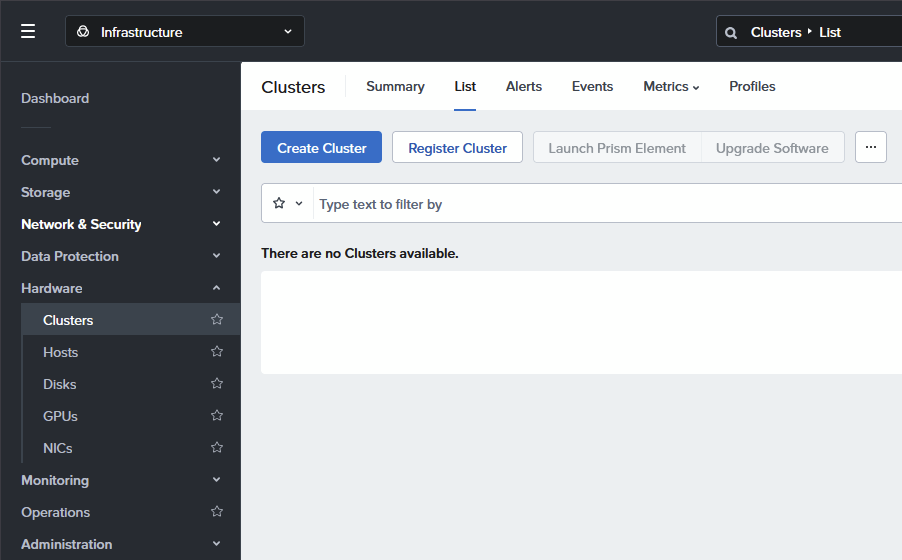
Where I can register both nested clusters (this example only does one of them, but you can do two simultaneously):

Click “Validate” and “Register”
I choose not to add the “host cluster” to Prism Central (yet).
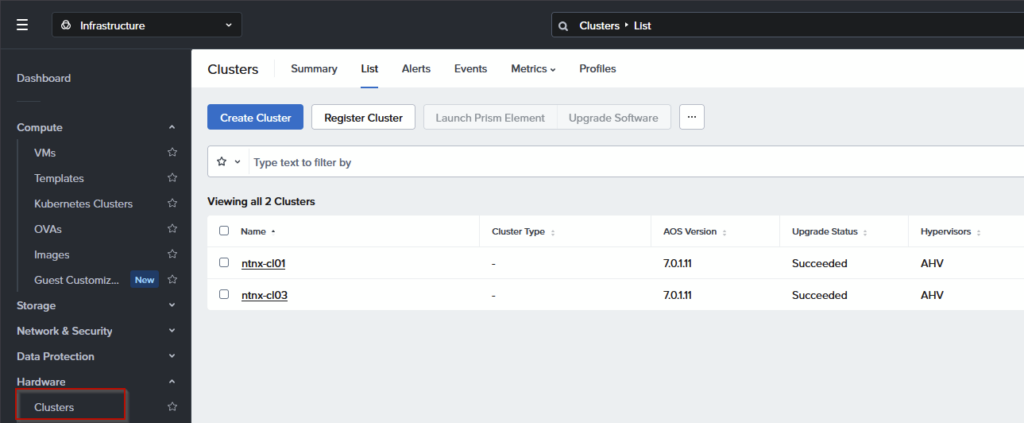
When both clusters have been registered, I see the following:
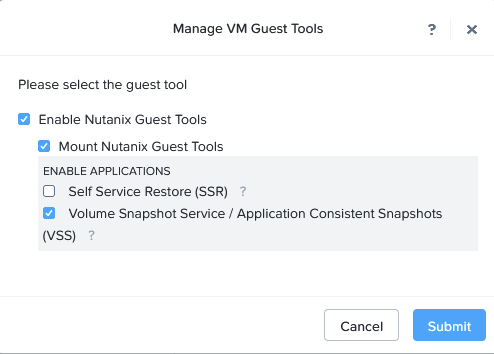
Install Nutanix Guest Tools (NGT) on Nested Hosts
Because I want some more control over my VM’s, I also want to have NGT running on the nested hosts.
We first mount the NGT Tools CD to the VM:
Right click on the VM, and select:

Then, login to the Hypervisor (not the CVM) and run the following commands:
mkdir -p /mnt/ngt
mount /dev/sr0 /mnt/ngt
rpm -ivh --nodigest --nofiledigest /mnt/ngt/installer/linux/ngt_rpm_installer/ngt_repo/nutanix-guest-agent-4.2-1.x86_64.rpm

When that is all done, the VM’s will report like:
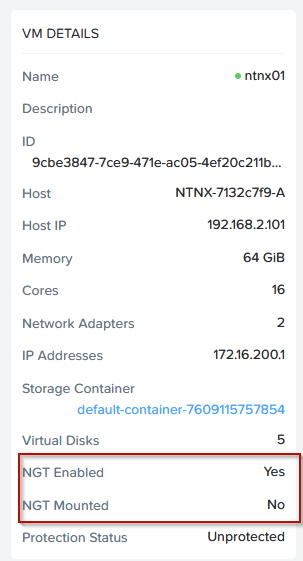
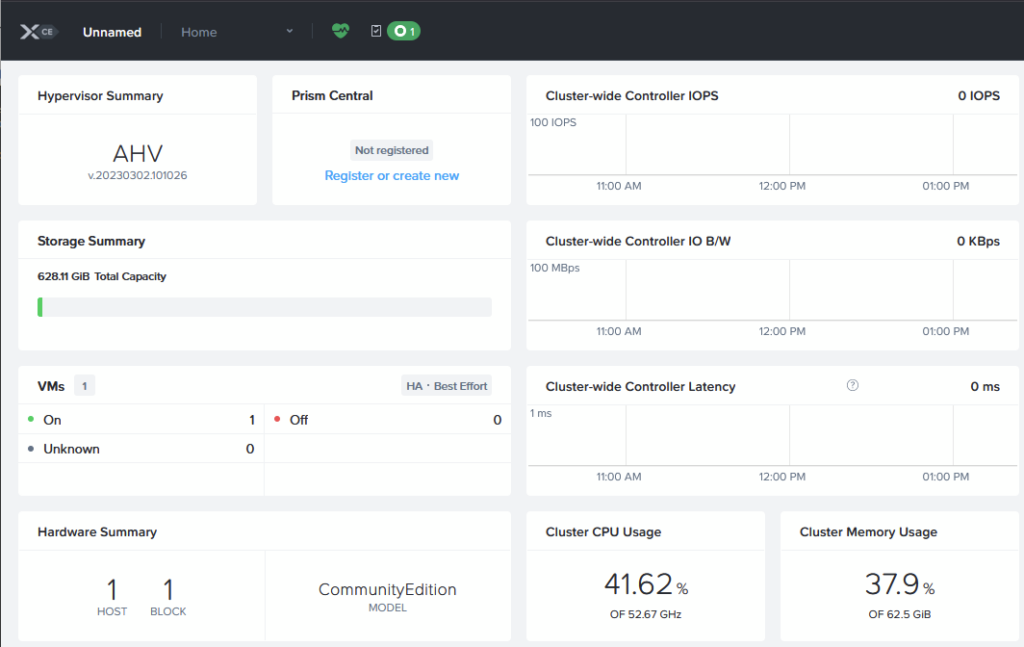
And that concludes building the Nutanix on Nutanix lab environment, with one physical host, one Prism Central VM, two nested clusters and one pfSense appliance. It does take up most of my resources on the physical host, especially the compute part is heavily utilized:
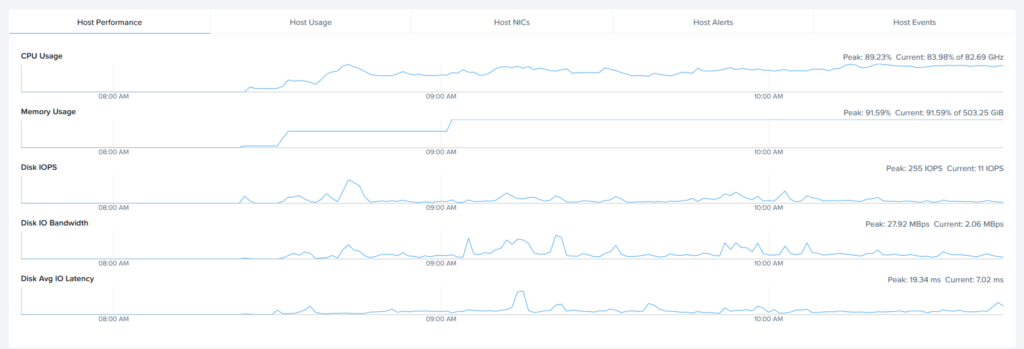
But I must say it feels responsive and snappy enough to be a good test-lab. I am also not unhappy with the Disk Avg. IO latency, which is fairly low. But of course, there is nothing “storage intensive” running on top of this (yet).
Added on:
One thing I would like to add, just for reference. When I was building the lab, at the stage that I had installed the following:
- pfSense
- Prism Central
- Cluster03 – completely, including added to Prism Central
- Created the Test VM on Cluster03
- Cluster01 – At the stage of having ran the inventory, ready to start the LCM upgrade
The power failed on the physical host. I noticed this when I got an error at the start of the LCM Upgrade. It went without any warning or any cause that I can find, just failed power, according to the iLO:

The reason I am mentioning this here (for my own future reference as well for anyone interested), is that I was interested to see to what state this would lead, when I would refire the host. It is not something I would have wanted to test myself, because of the possible disruptive nature of the test, but it is interesting to see what would happen, if the test sort of “occurred” without me planning it.
Well, the state is as follows:
- AHV Starts
- CVM Starts
- Physical (one-node) cluster is automatically started
- The VM’s on the physical cluster get powered on:
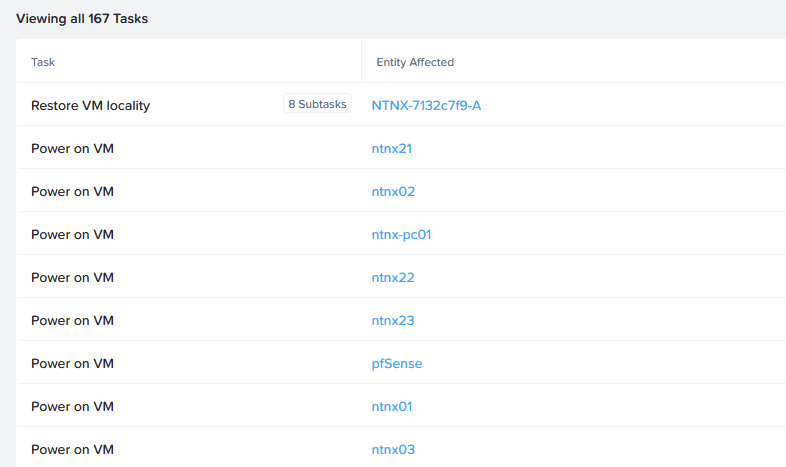
- The virtual clusters are started automatically
- Prism Central starts
- The (one) nested VM on the virtual Cluster03 is automatically started:
So all in all, it takes a while (I would say a total of 20-25 minutes, before everything is back) , but everything automatically came back up. And to be honest, 20-25 minutes is not too bad. The longest wait was for Prism Central to become available again, which is in line with my expectations.